Adventures In Pizza
How I built a wood burning pizza oven in my back garden for £35.

Foaccia, country loaves, panettone are all things that anyone can bake in a conventional home oven and be pleased with the results. At first glance, it seems like that should also be the case for pizza. It's a super basic water/flour/yeast dough with some cheese on top but achieving that classic crispy base and fluffy interior with lightly browned cheese can prove very, very tricky.
Pan pizza is by far the easiest to do at home (and I might post my goto recipe for Sicilian style soon) but something like a New York or Neapolitan style is a lot tougher. These pizzas are traditionally cooked in ovens that reach temperatures upwards of 400°c/750°f for a very short period of time – around 90-180 seconds – which is hard to emulate in a home oven that often maxes out around 250°c.
It's not impossible though and with some perseverance you'll likely pull a great pizza out of the oven. If you are wanting to bake fresh pizza in your kitchen oven then Adam Ragusea has a great video on his technique for a New York style pizza at home. It requires pre-heating a pizza stone or steel for an hour on your oven's highest temperature and uses the grill (broiler) to brown the cheese.
I've tried Adam's technique and to be honest, was disappointed with the results. I used a pizza stone that I got as a Christmas gift but I think my oven just doesn't reach the temperatures required to give the dough that quick hit of heat required to crisp and puff up. I'm certain that your results may vary, especially if you have an oven that maxes out higher than mine.
The Hunt For a Pizza Oven
After a few failed attempts with my pizza stone I started lusting after my very own pizza oven for my back garden. Of course anyone that's ever spent more than 5 minutes Googling for these things will have heard of Ooni but £249+ for a "toy" that I would only be able to use on the 3 sunny days the UK is blessed with per year wasn't something I could justify.
After I'd come to terms with the fact that a private pizza oven was something out of my price range for the time being, I put the idea to the back of my mind. One day however, a ChefSteps video called How to Build Your Own High-Performing Wood-Fired Pizza Oven from Bricks popped up in my recommended on YouTube.
With just a few bricks, a couple of paving slaps, and some wood you could be baking pizza like a pro in your back garden… Or so the video promised, but was it actually realistic? Could someone with no experience in DIY build a wood-fired oven? And could someone who isn't a professionally trained chef even get good results with it?
I wanted to find out…
Building a Pizza Oven
I found the instructions for Grant's oven on ChefSteps' Pinterest which provided a better look at the materials required as well as the exact steps to build it.
Materials
Here's what I used – along with prices and links – to build the oven:
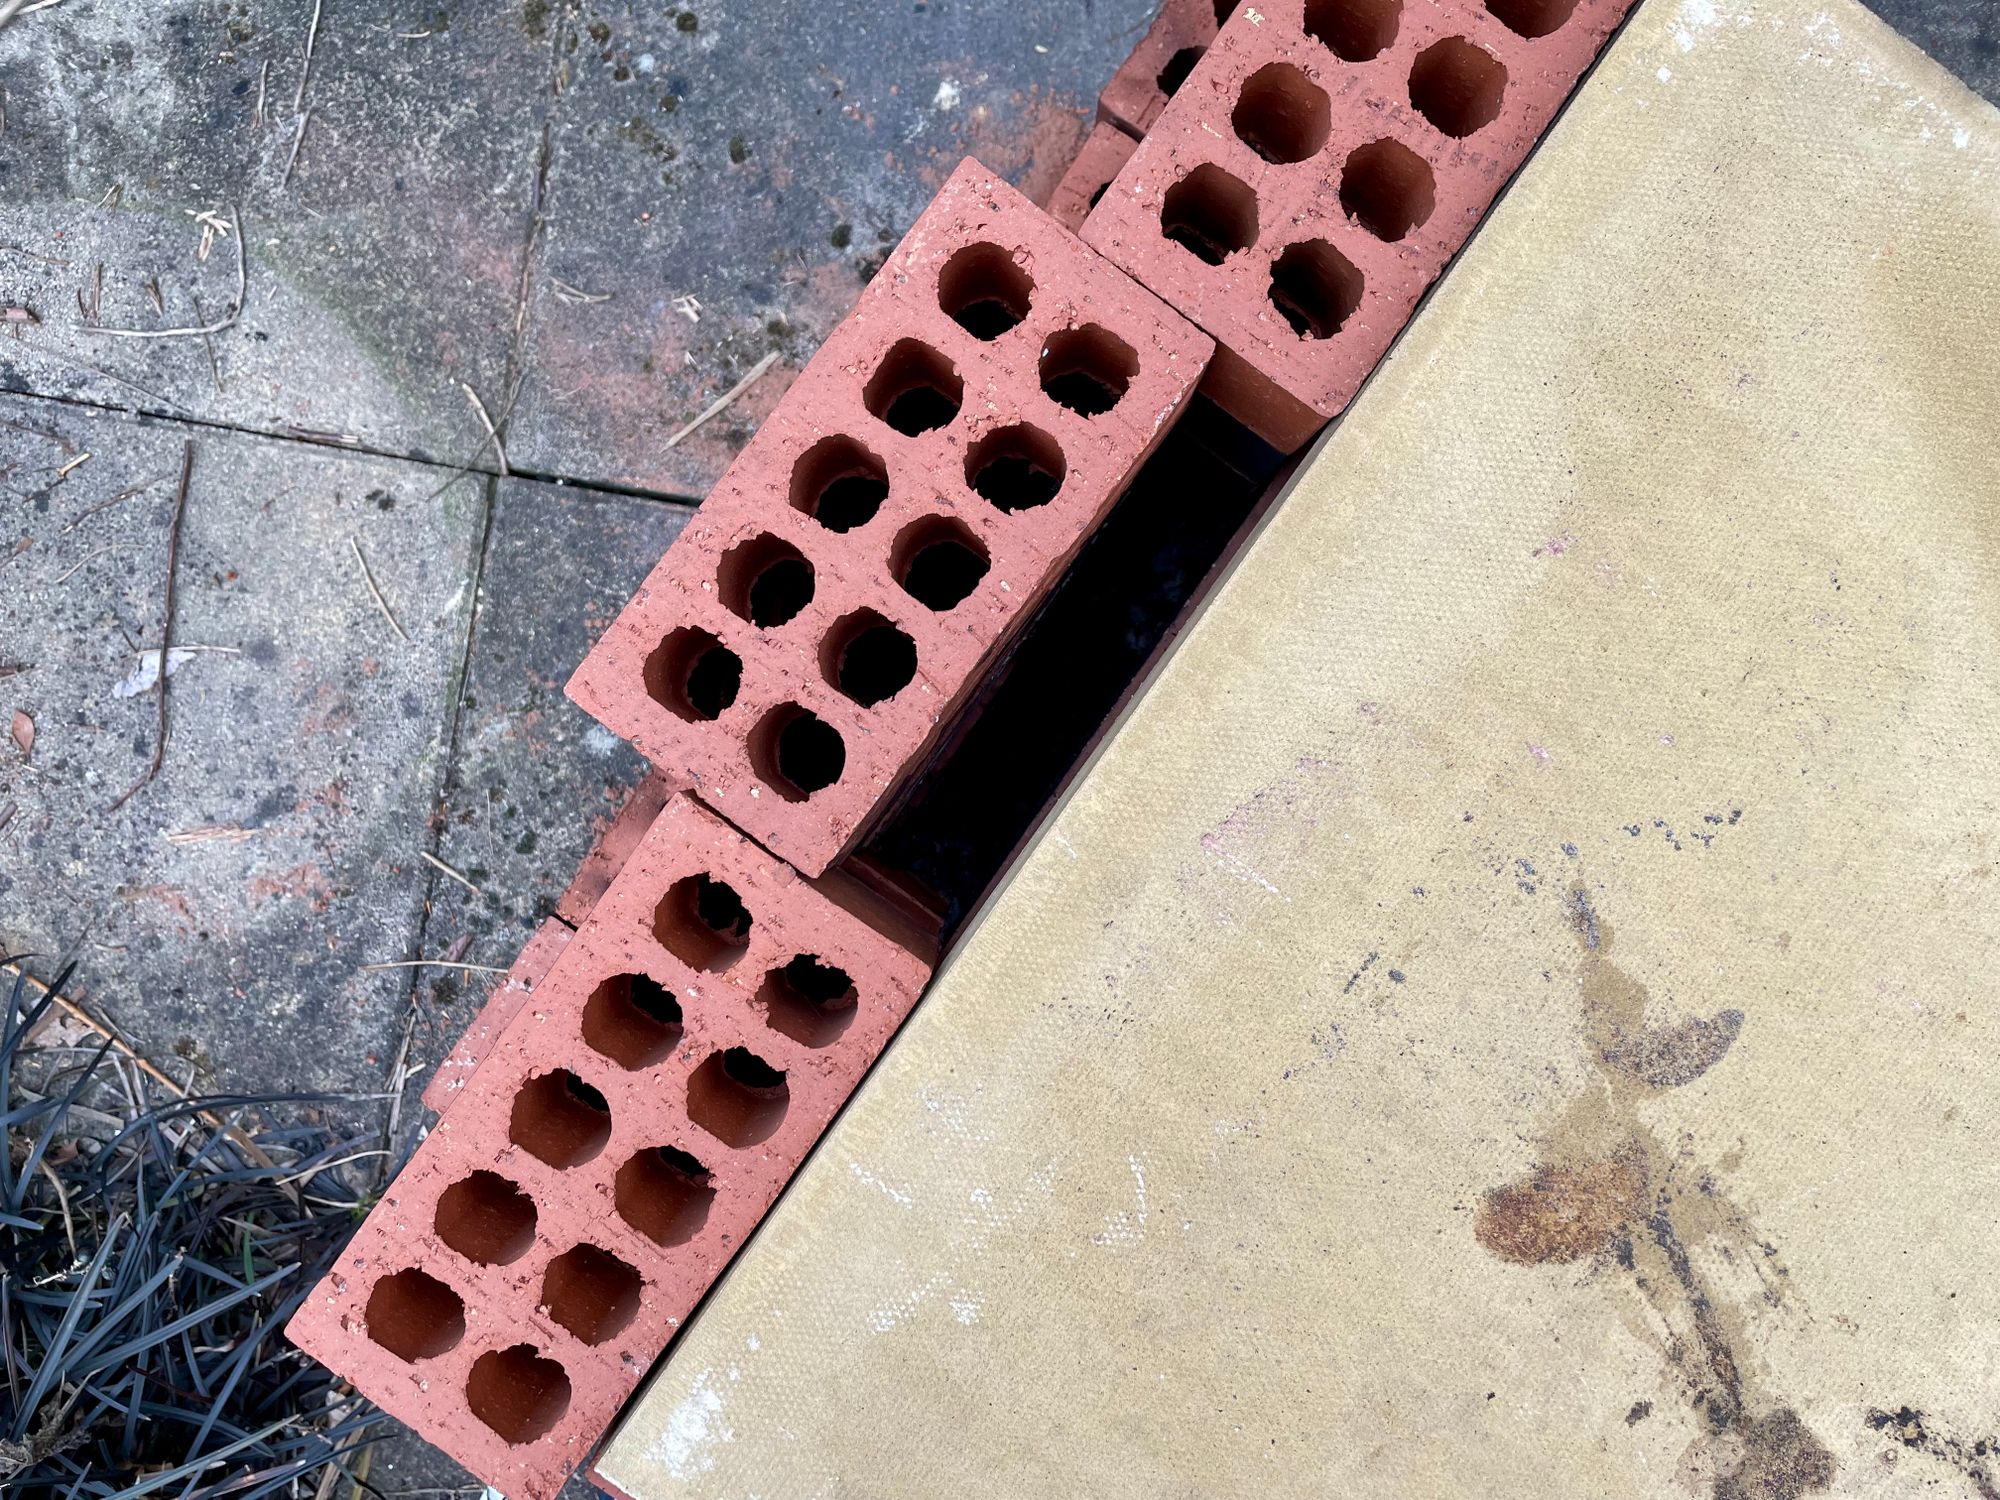
- 44 engineering bricks - 48p each
- 3 solid bricks (I already had these but you could use any)
- 2 paving slabs (600mm x 600mm) - £6.12 each
- A bag of building sand - £1.95
Total: £35.31
Engineering bricks are recommended as they can apparently withstand the temperature of the fire better than basic clay bricks and a lot better than concrete blocks.
If you can get a 600mm x 400mm slab that would fit a little better.
Assembly
If, like me, you've never built anything in your life then don't freak out; you can do this! Just start by laying some sand down to level out the surface and then follow the ChefSteps' instructions to build the oven.
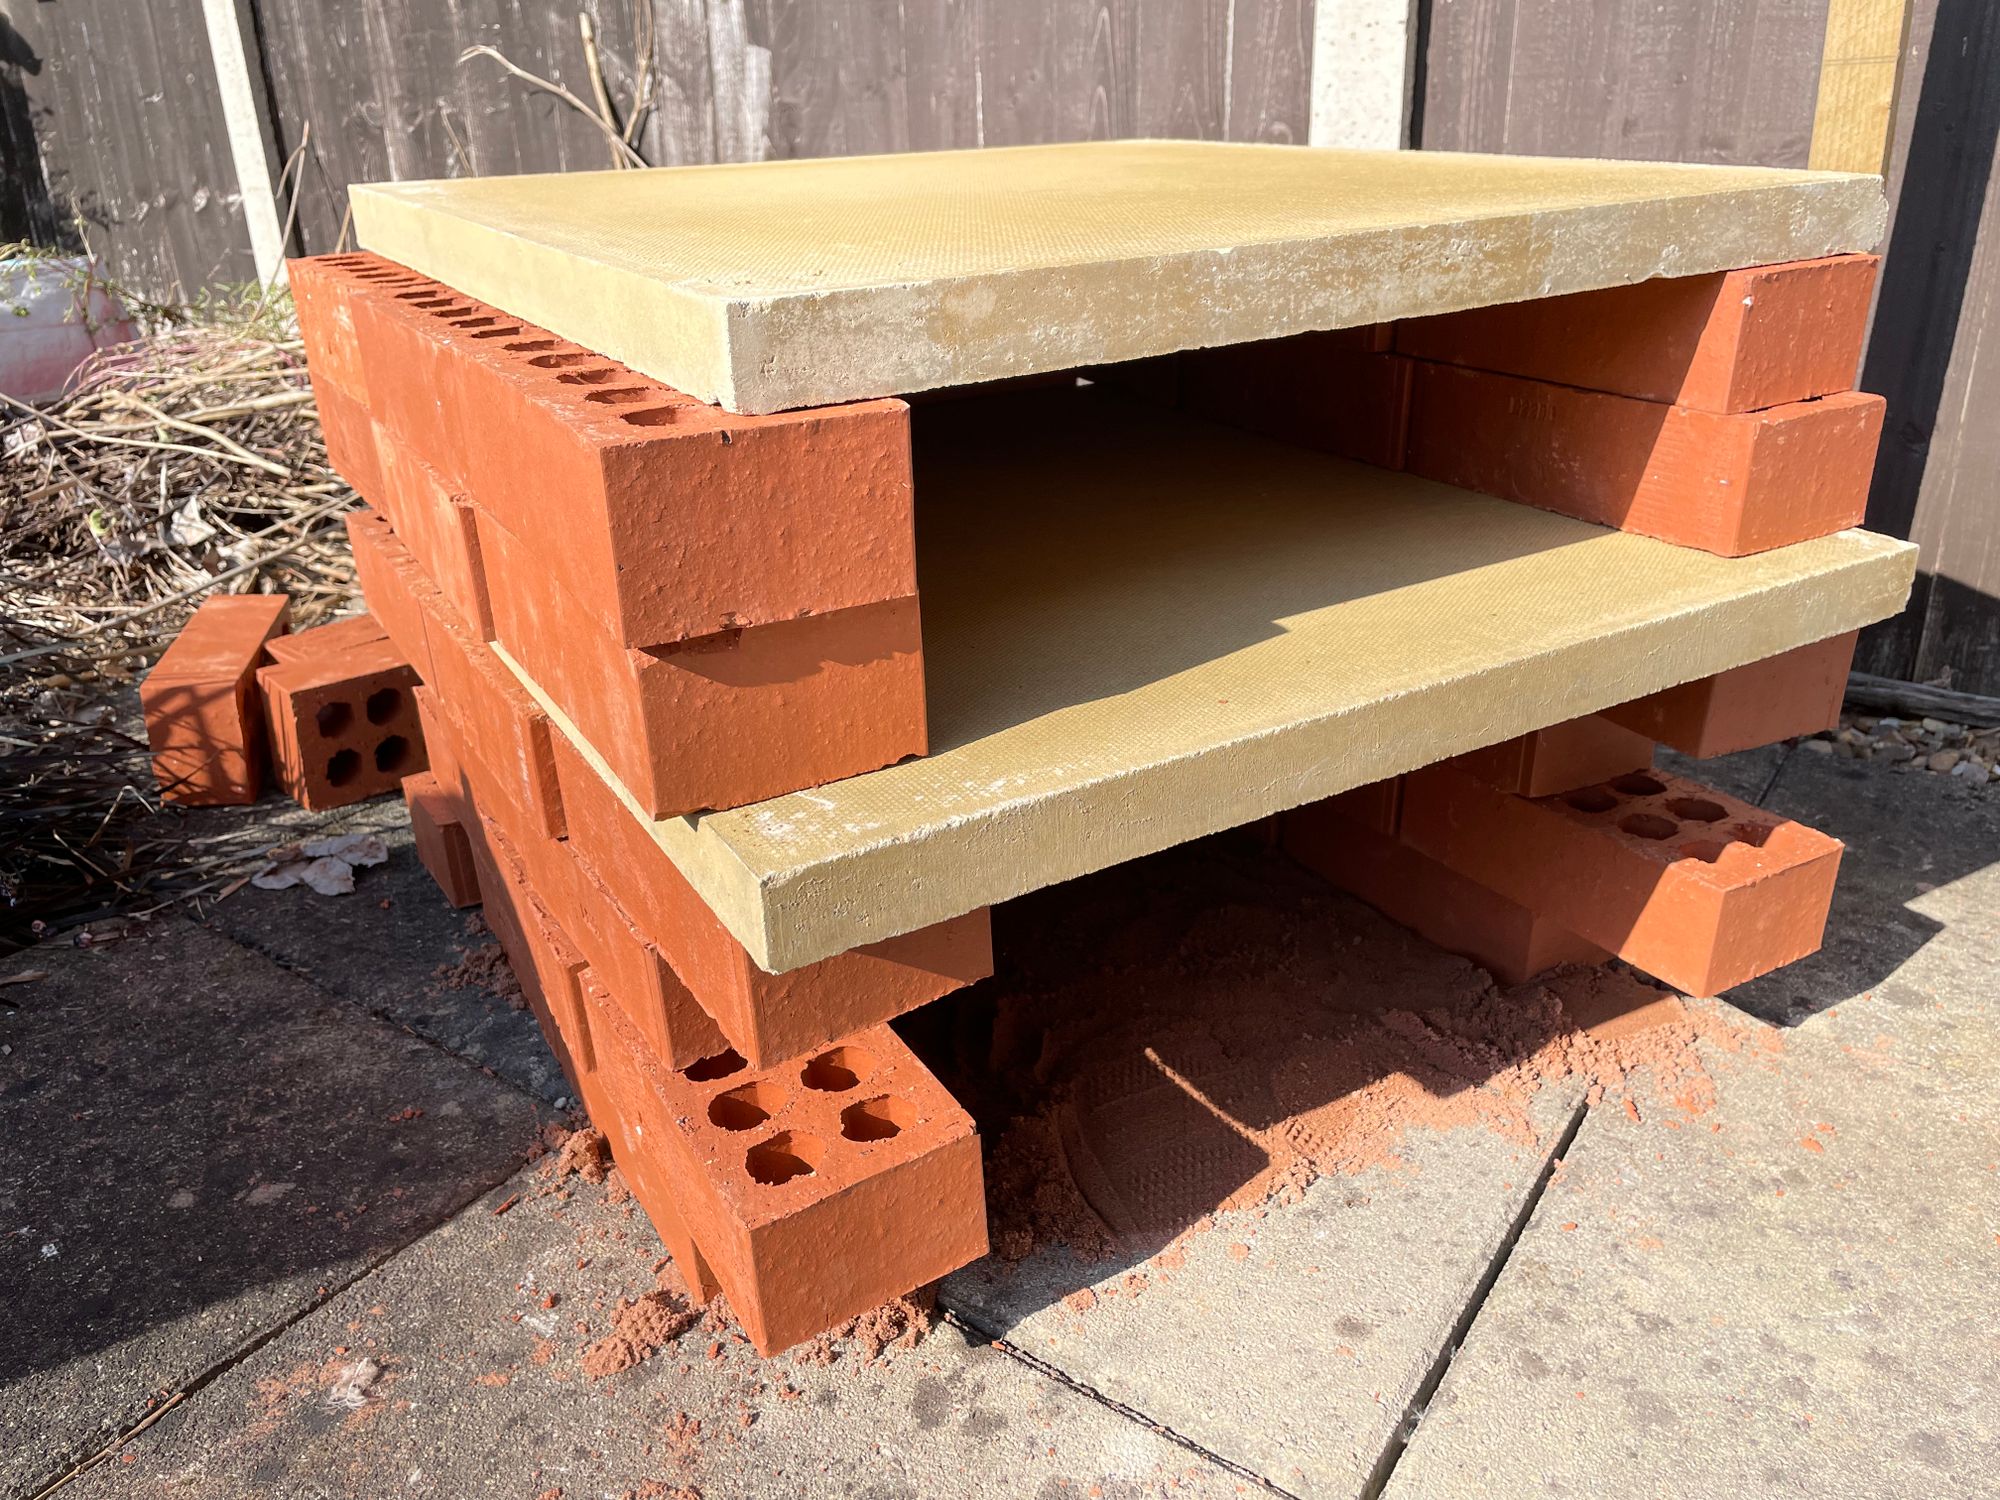
It's all pretty straight forward but I did have a little confusion around the second slab and how it fits in with the chimney. After deconstructing and building it again I figured it out. Originally I had the chimney with a totally open hole all the way to the top.
However, this means that the heat escapes before it can effectively heat the top slab. By closing the chimney with some solid bricks the heat is drawn up the chimney and through the front of the oven, over the top of your baking pizza.

Lighting
The last step before baking a pizza is of course to start a fire. I'd recommend using some kiln dried firewood and start by heating things slowly by adding a log at a time.
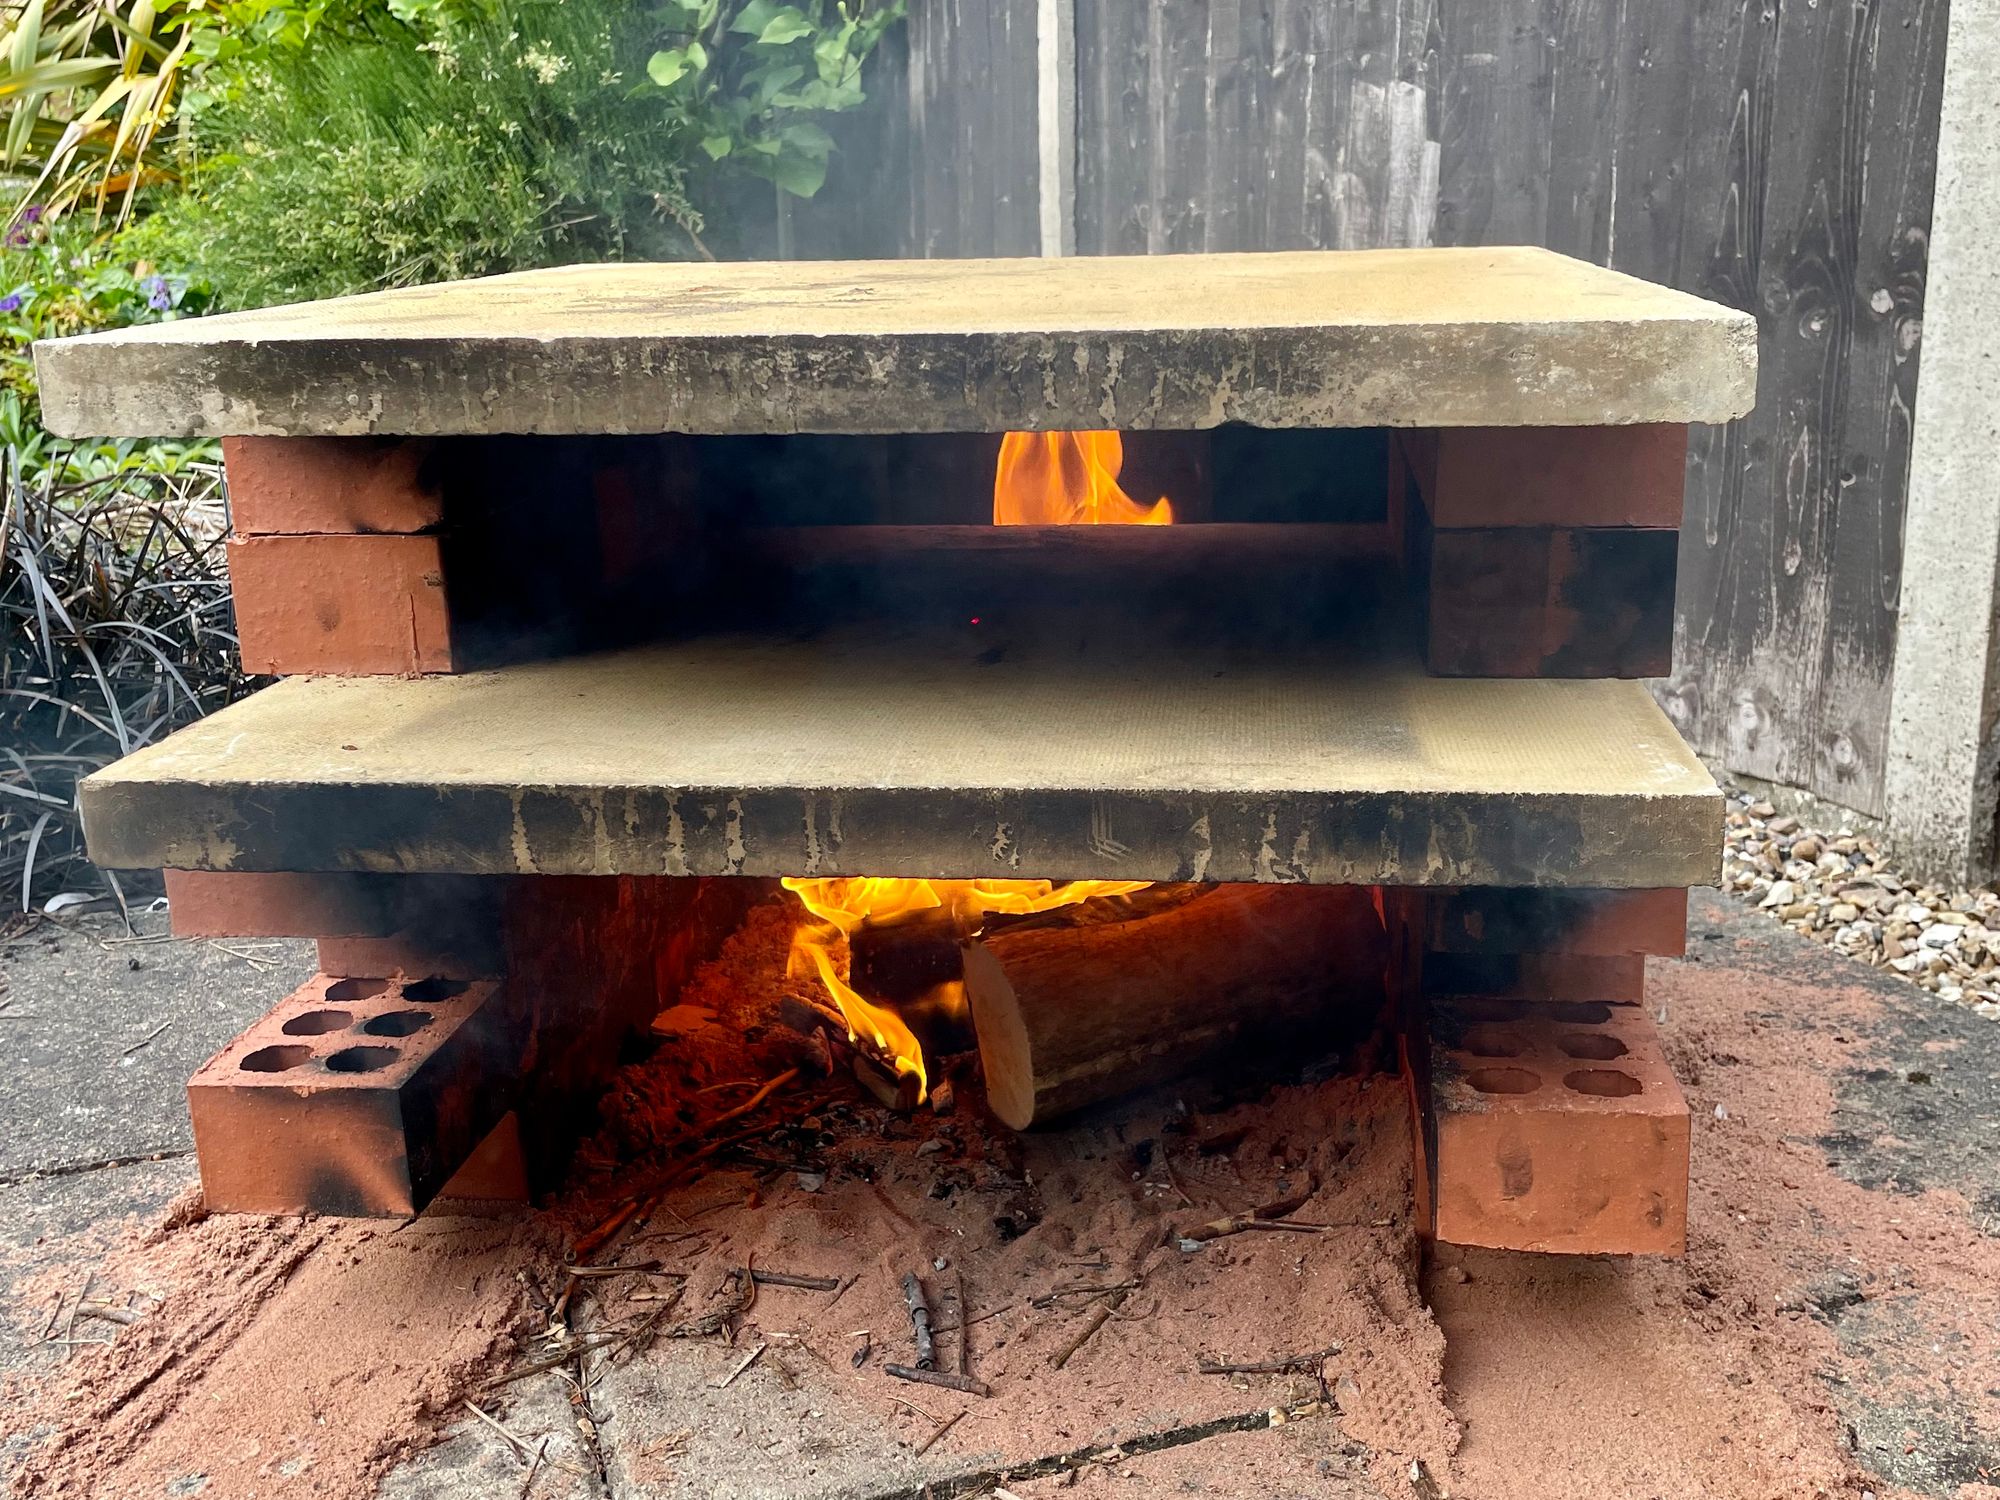
This should reduce the risk of any cracks forming in the slabs, though this did happen to mine on the first use. It's not something that causes any structural concerns on my oven but it's worth keeping an eye on.
Baking Pizza
With the oven up and running I couldn't wait to get some pizzas on to bake. Pizza dough is super basic and easy to make and I'd prepped and had some dough in the fridge overnight.
Essential Equipment
Before I outline the dough I used, I wanted to highlight some of the additional bits of equipment that you'll either need or that will make your life a lot easier.
- Metal Pizza Peel - Make sure you get one with a long handle because these ovens get hot. A metal peel is better than a wooden peel as it will allow you to manoeuvre the pizza around when it's in the oven.
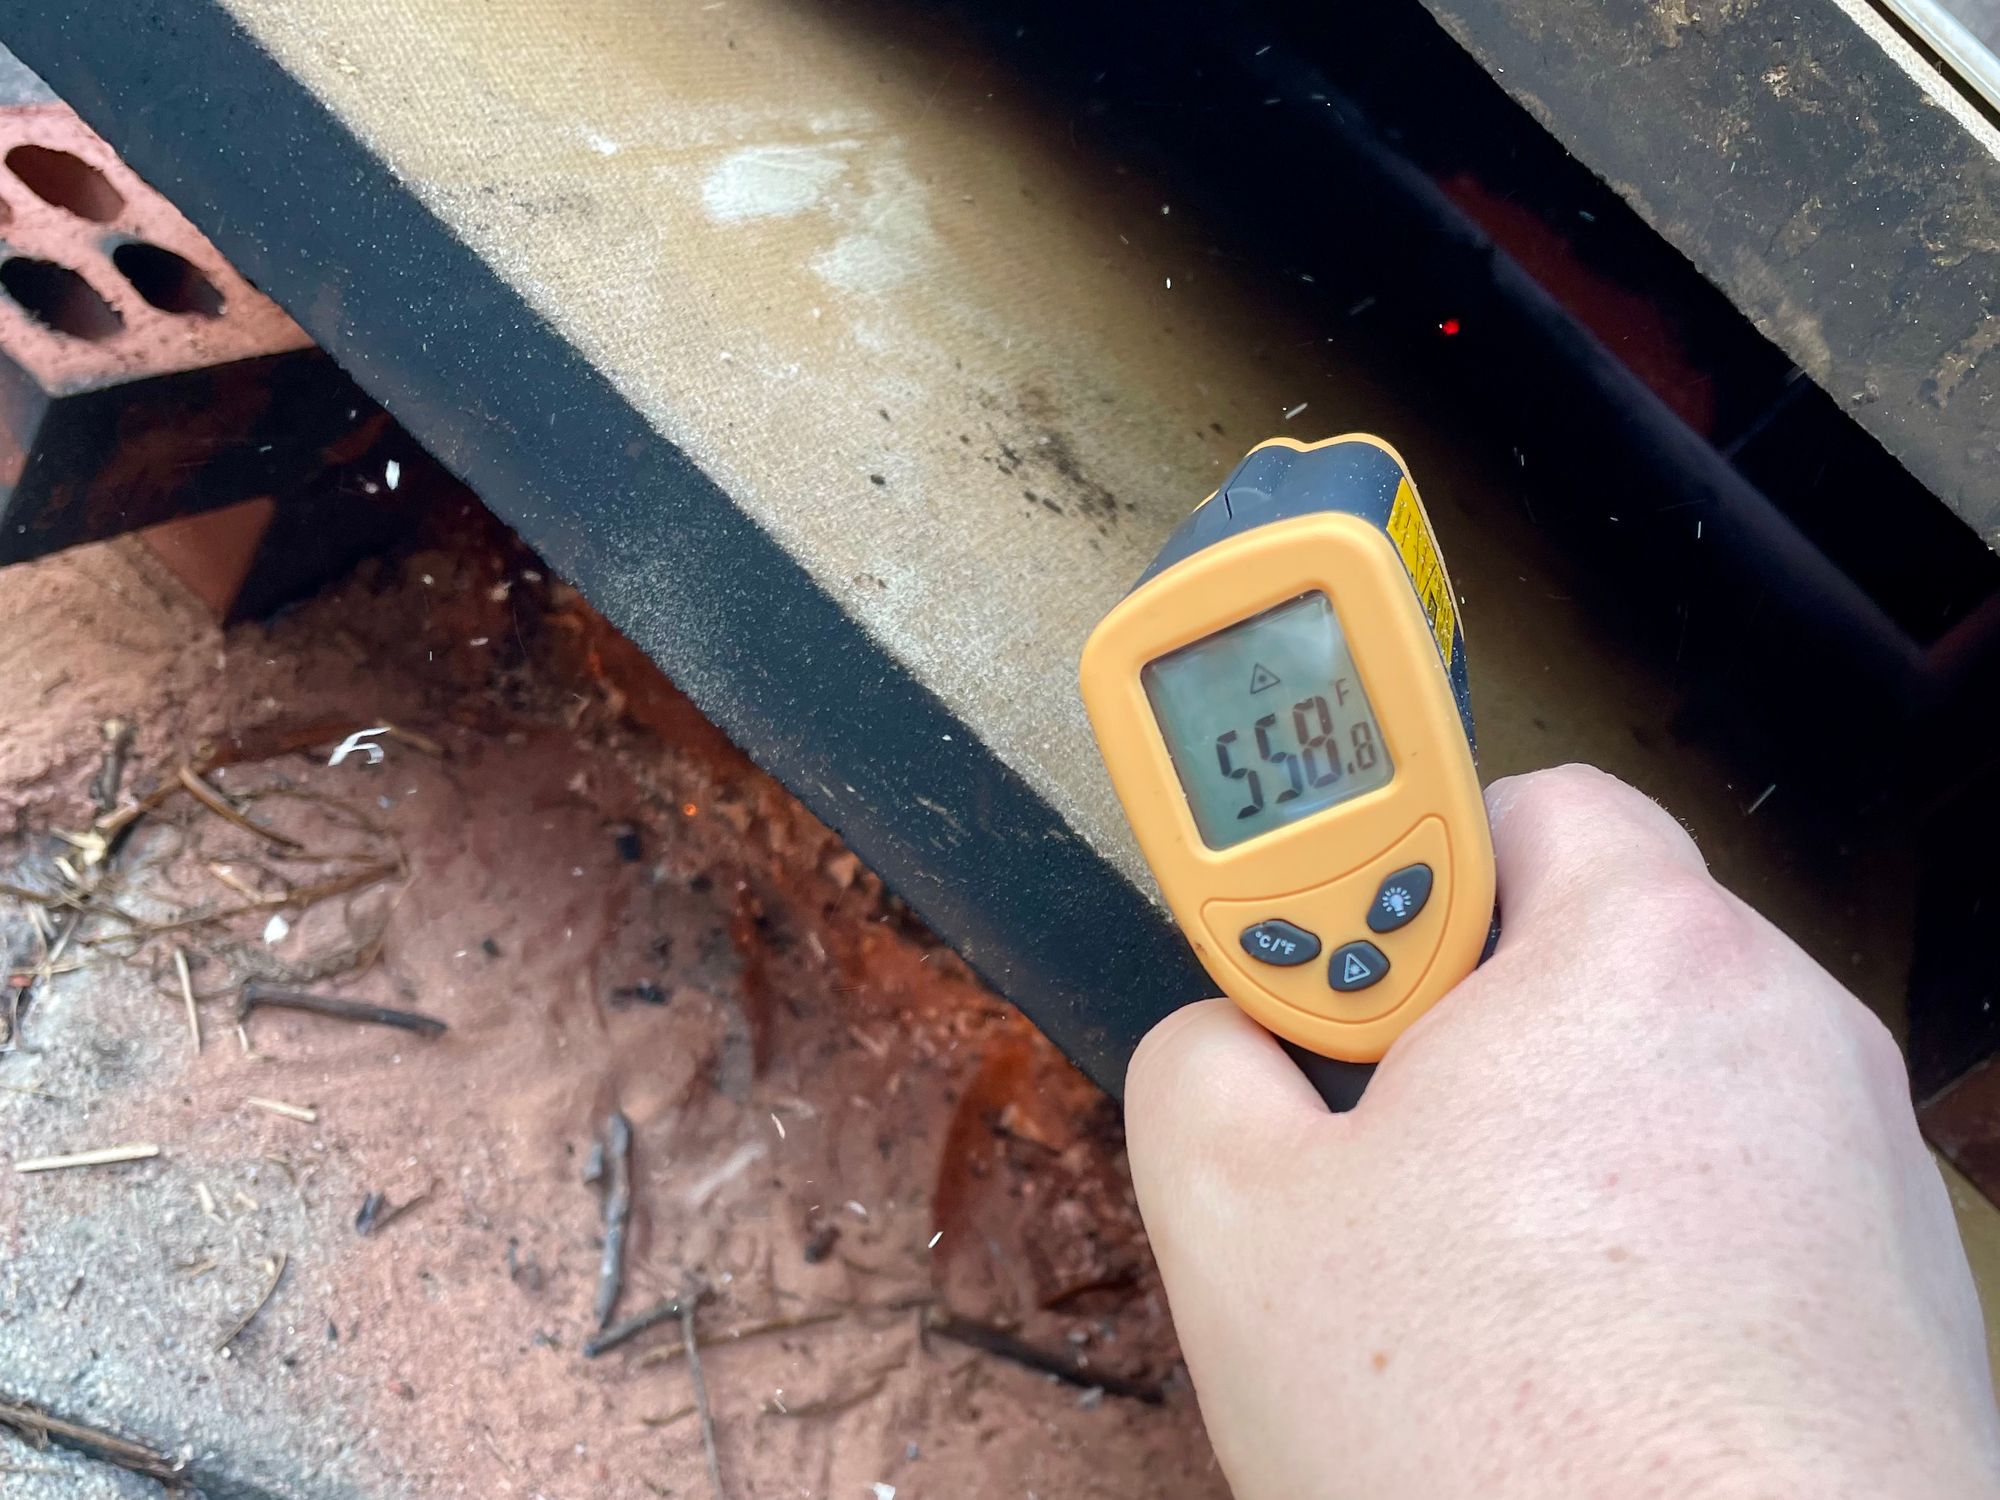
- IR Thermometer - While not required, it does take a lot of the guess work out of determining when the oven is ready for your unbaked pizza. You're looking to get to around 400°c or 750°f on the baking slab.
- Stand Mixer - Again, not required as you can of course make the dough without one but a 70% hydration dough can be very tough to handle. J. Kenji López-Alt uses a food processor for his dough which is also another option.
Overnight Pizza Dough Recipe
Pizza dough is a really basic bread dough. For traditional Neapolitan style it's just flour, yeast, and water. American pizza adds a little sugar in there, and you can optionally add some olive oil too.
This recipe is the best I've come up with so far and will make 4 pizzas, around 12" in diameter. It uses a preferment called a "poolish" which you could prepare early in the day or even 1-2 days before.
The key to getting those "leopard spots" is the long fermentation. 24-48 hours minimum is what the "pros" say. I've had decent results with this poolish and an overnight rise.
Ingredients
- 650g white bread flour (00 pizza flour is possible)
- 400g water
- 3g yeast
- 16g salt
- 7g olive oil
Method
- To create your poolish, add 200g water, 200g flour, and 1.5g yeast to a mixing bowl. Stir until everything is incorporated and leave at room temperature for at least 8 hours.
- Once your poolish is ready, add the remaining ingredients and bring it together.
- Knead the dough for around 10 minutes or until a gluten window test can be performed.
- Form the dough into a large ball and place it into a large bowl lightly oiled. Cover with clingfilm and leave at room temperature to proof overnight.
- The next day, "turn" the dough to allow the yeast to come into contact with some fresh flour.
- Around 2-3 hours before you want to use the dough, knock it back and split into 4 balls around 265g each. If the dough is sticky, use a very small amount of flour to dust the top asyou bring it into a ball.
- When the oven is ready, take a ball and use a little flour on your workbench and on top if the dough is too sticky. Shape into a pizza, either by hand (to get a nice puffy crust) or with a rolling pin.
- At this point I transfer the dough to my peel and assemble on there. I use a little rice flour on the peel to avoid any sticking. Traditionally, semolina is used in pizzerias but my partner doesn't like the texture.
- Top with your sauce, cheese, and whatever else you want to put on your pizza. I use some passata with a pinch of oregano, and a little olive oil for the sauce and use it sparingly. You need less than you think.
- Quickly slide the pizza into your oven. The action is sort of like shuffle, shuffle… YANK. It's hard to explain but you'll get it. Make sure the pizza can freely move on the peel before you try to place it in the oven.
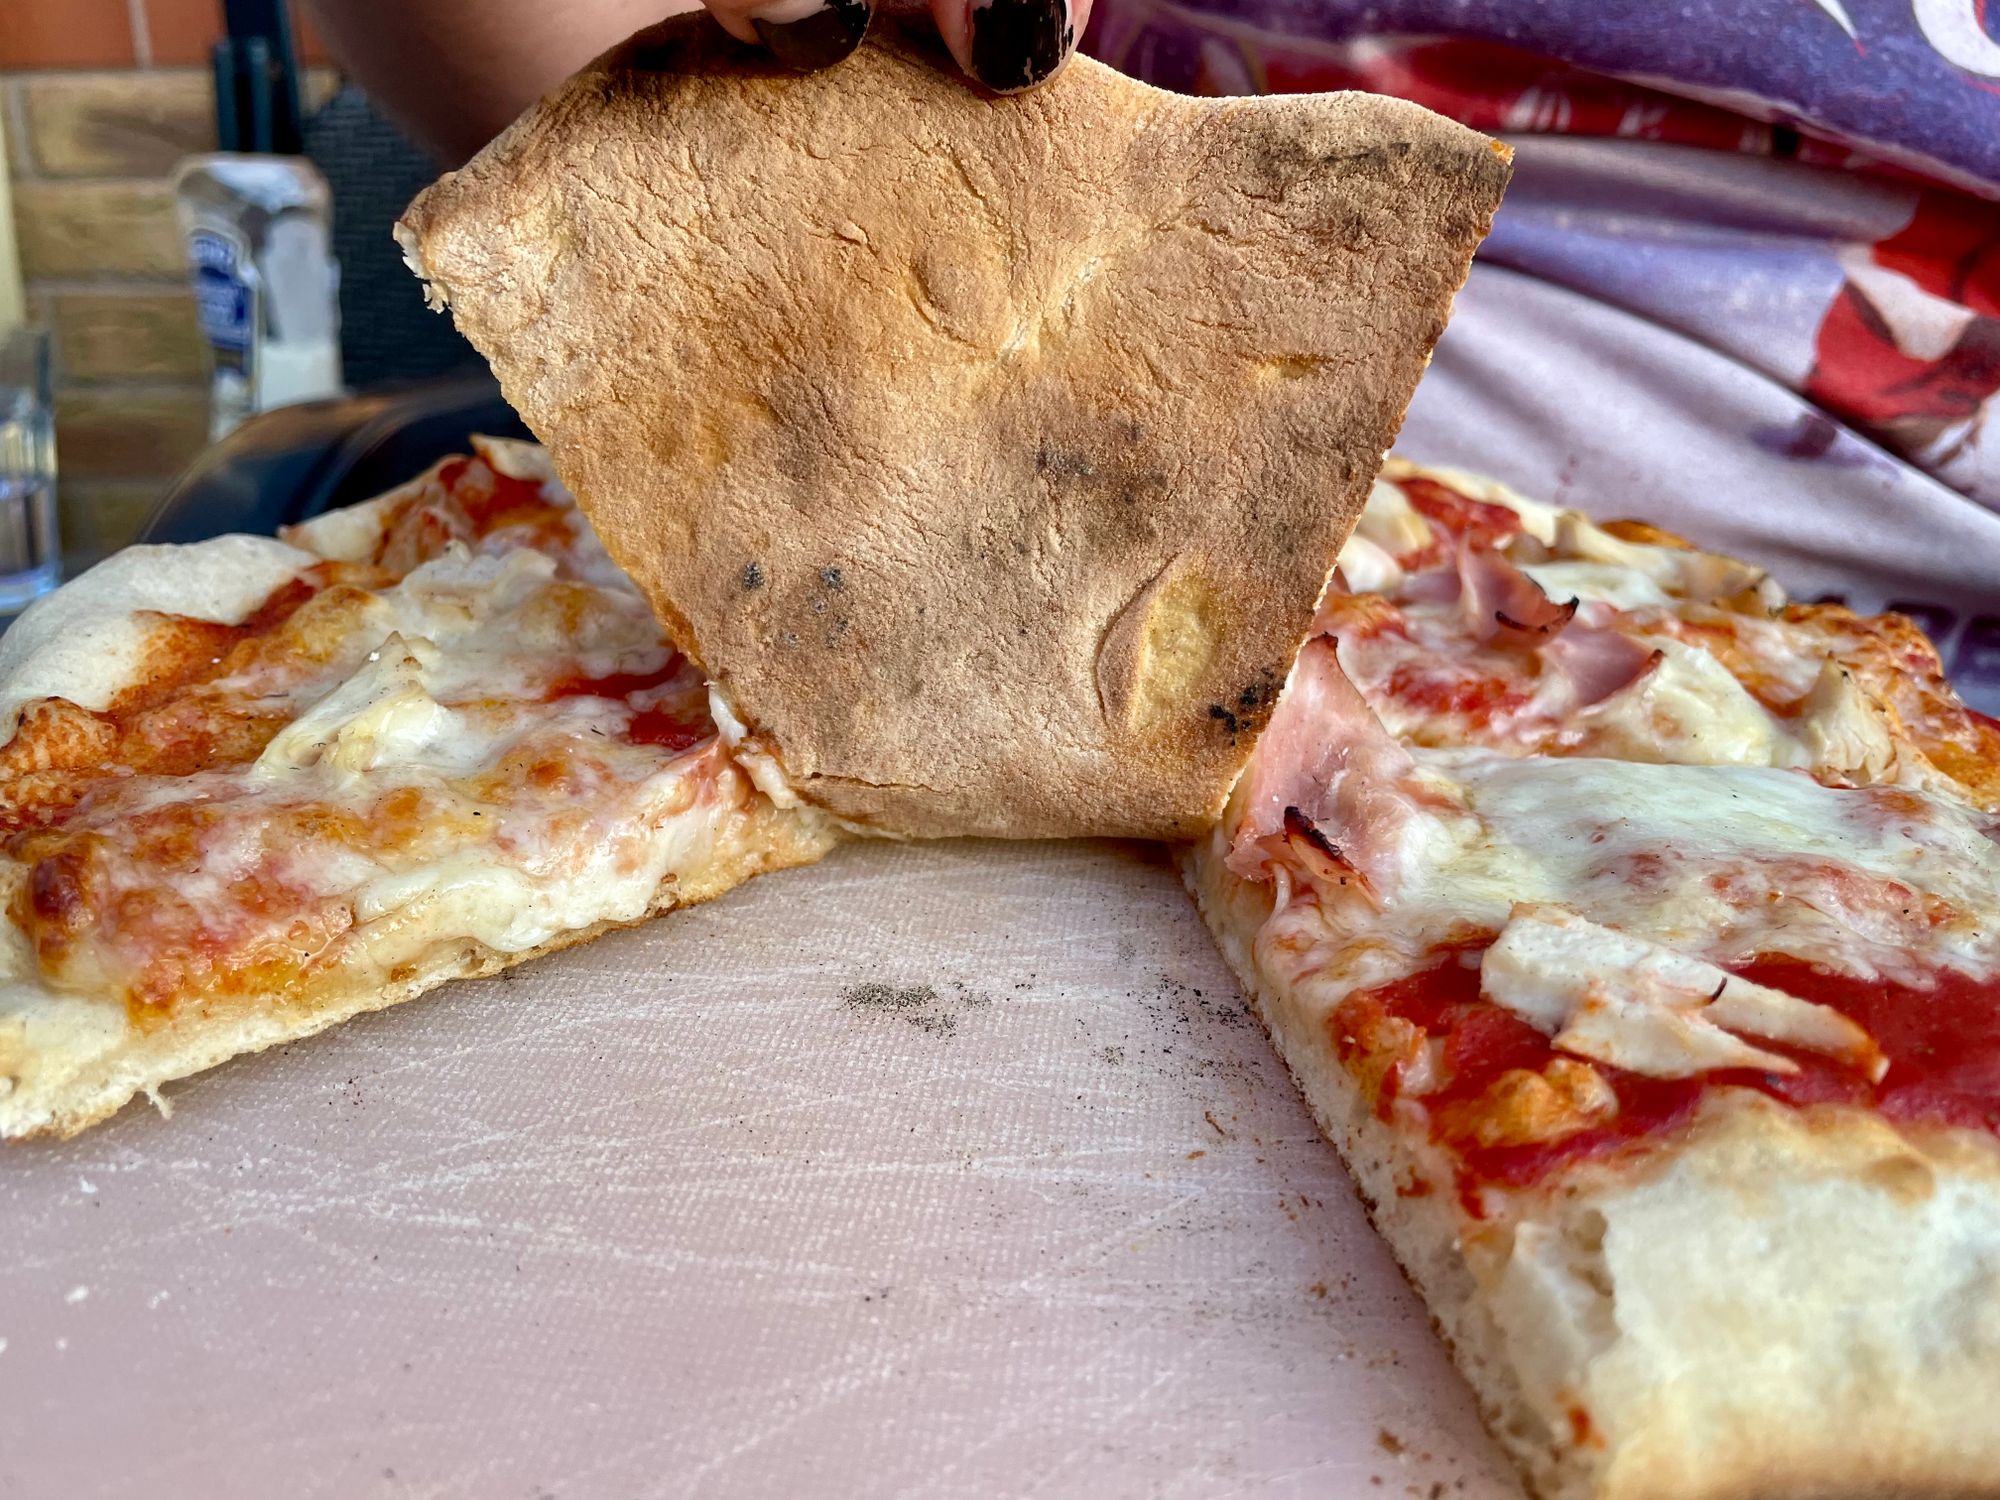
- Keep an eye on the base as that will cook a lot faster than the top of the pizza. You can always move the pizza around in the oven to get an even bake and hold it close to the top slab to aid browning of the dough and cheese.
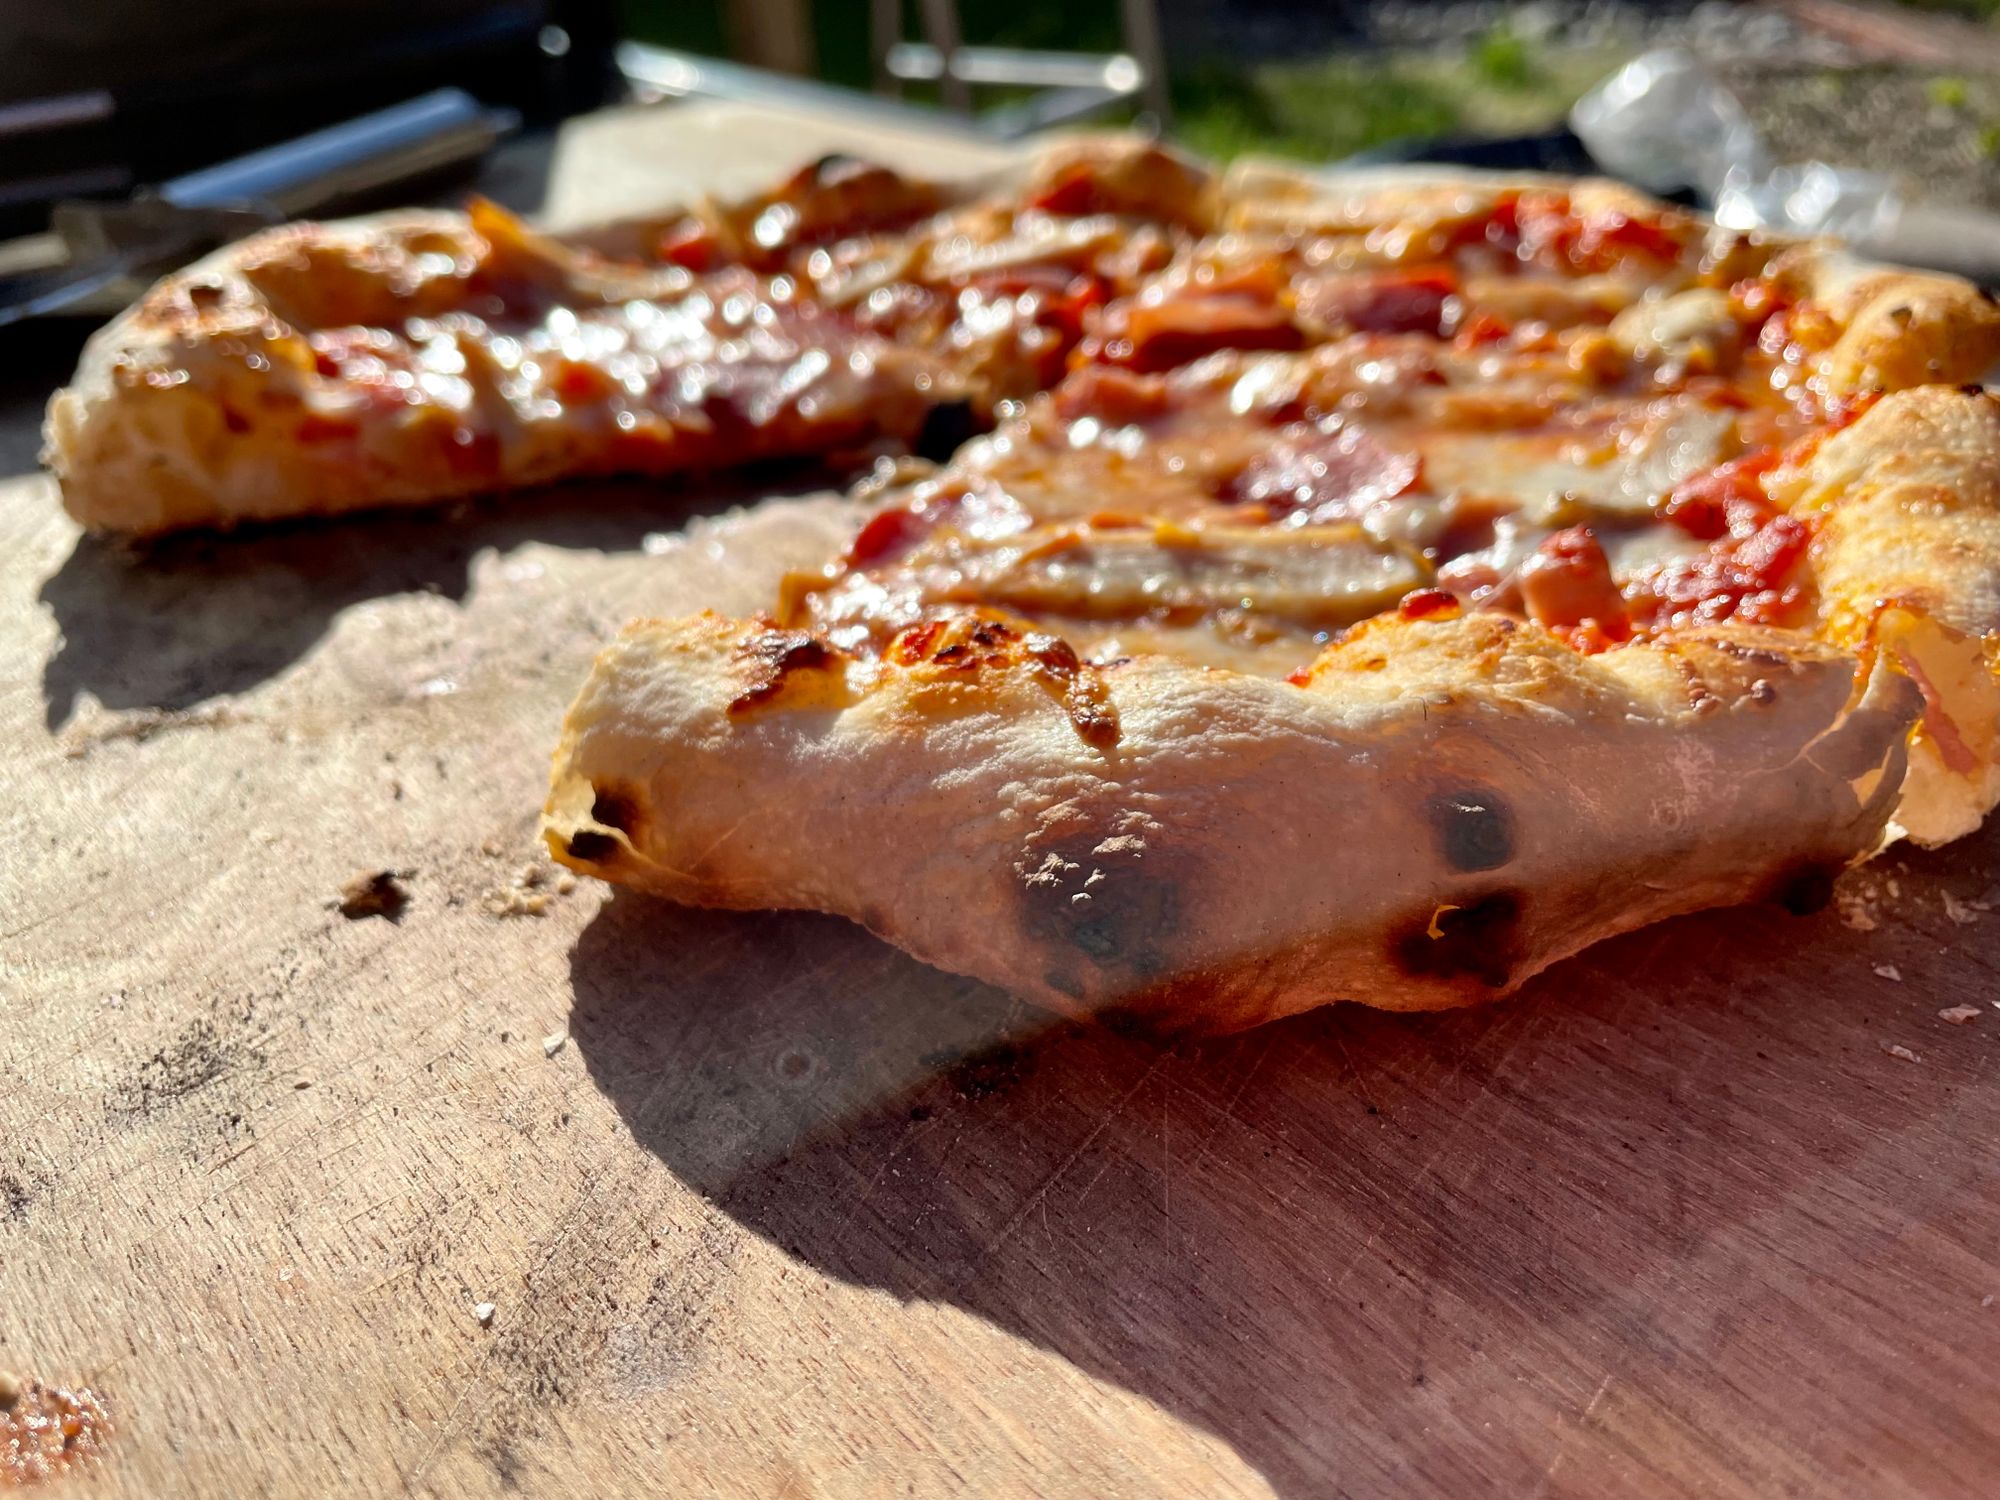
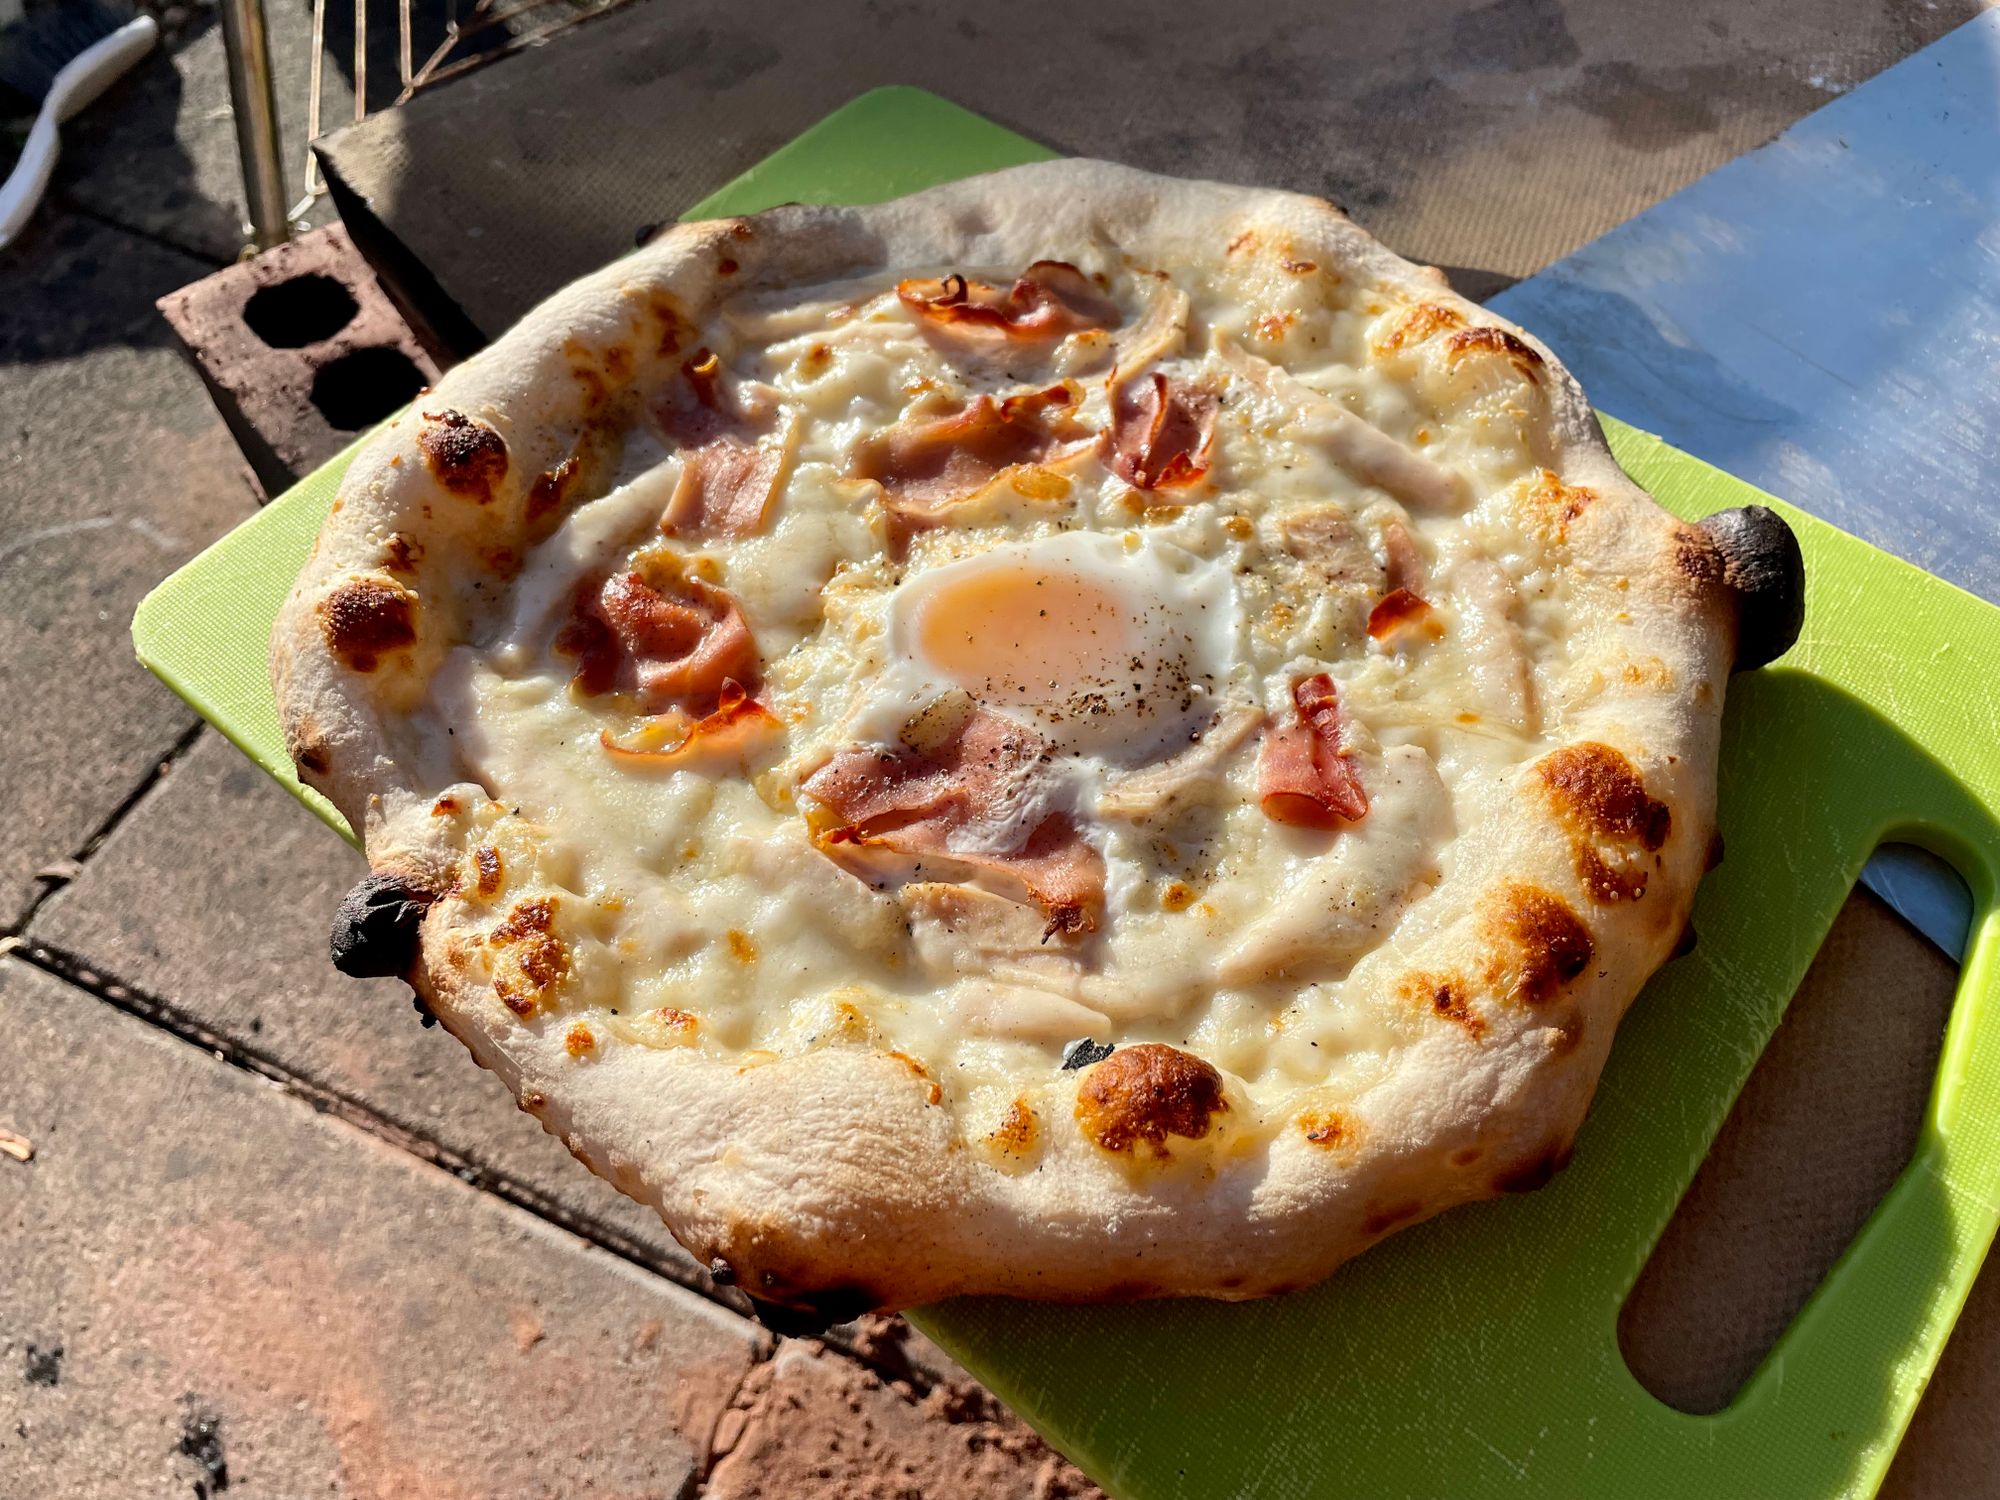
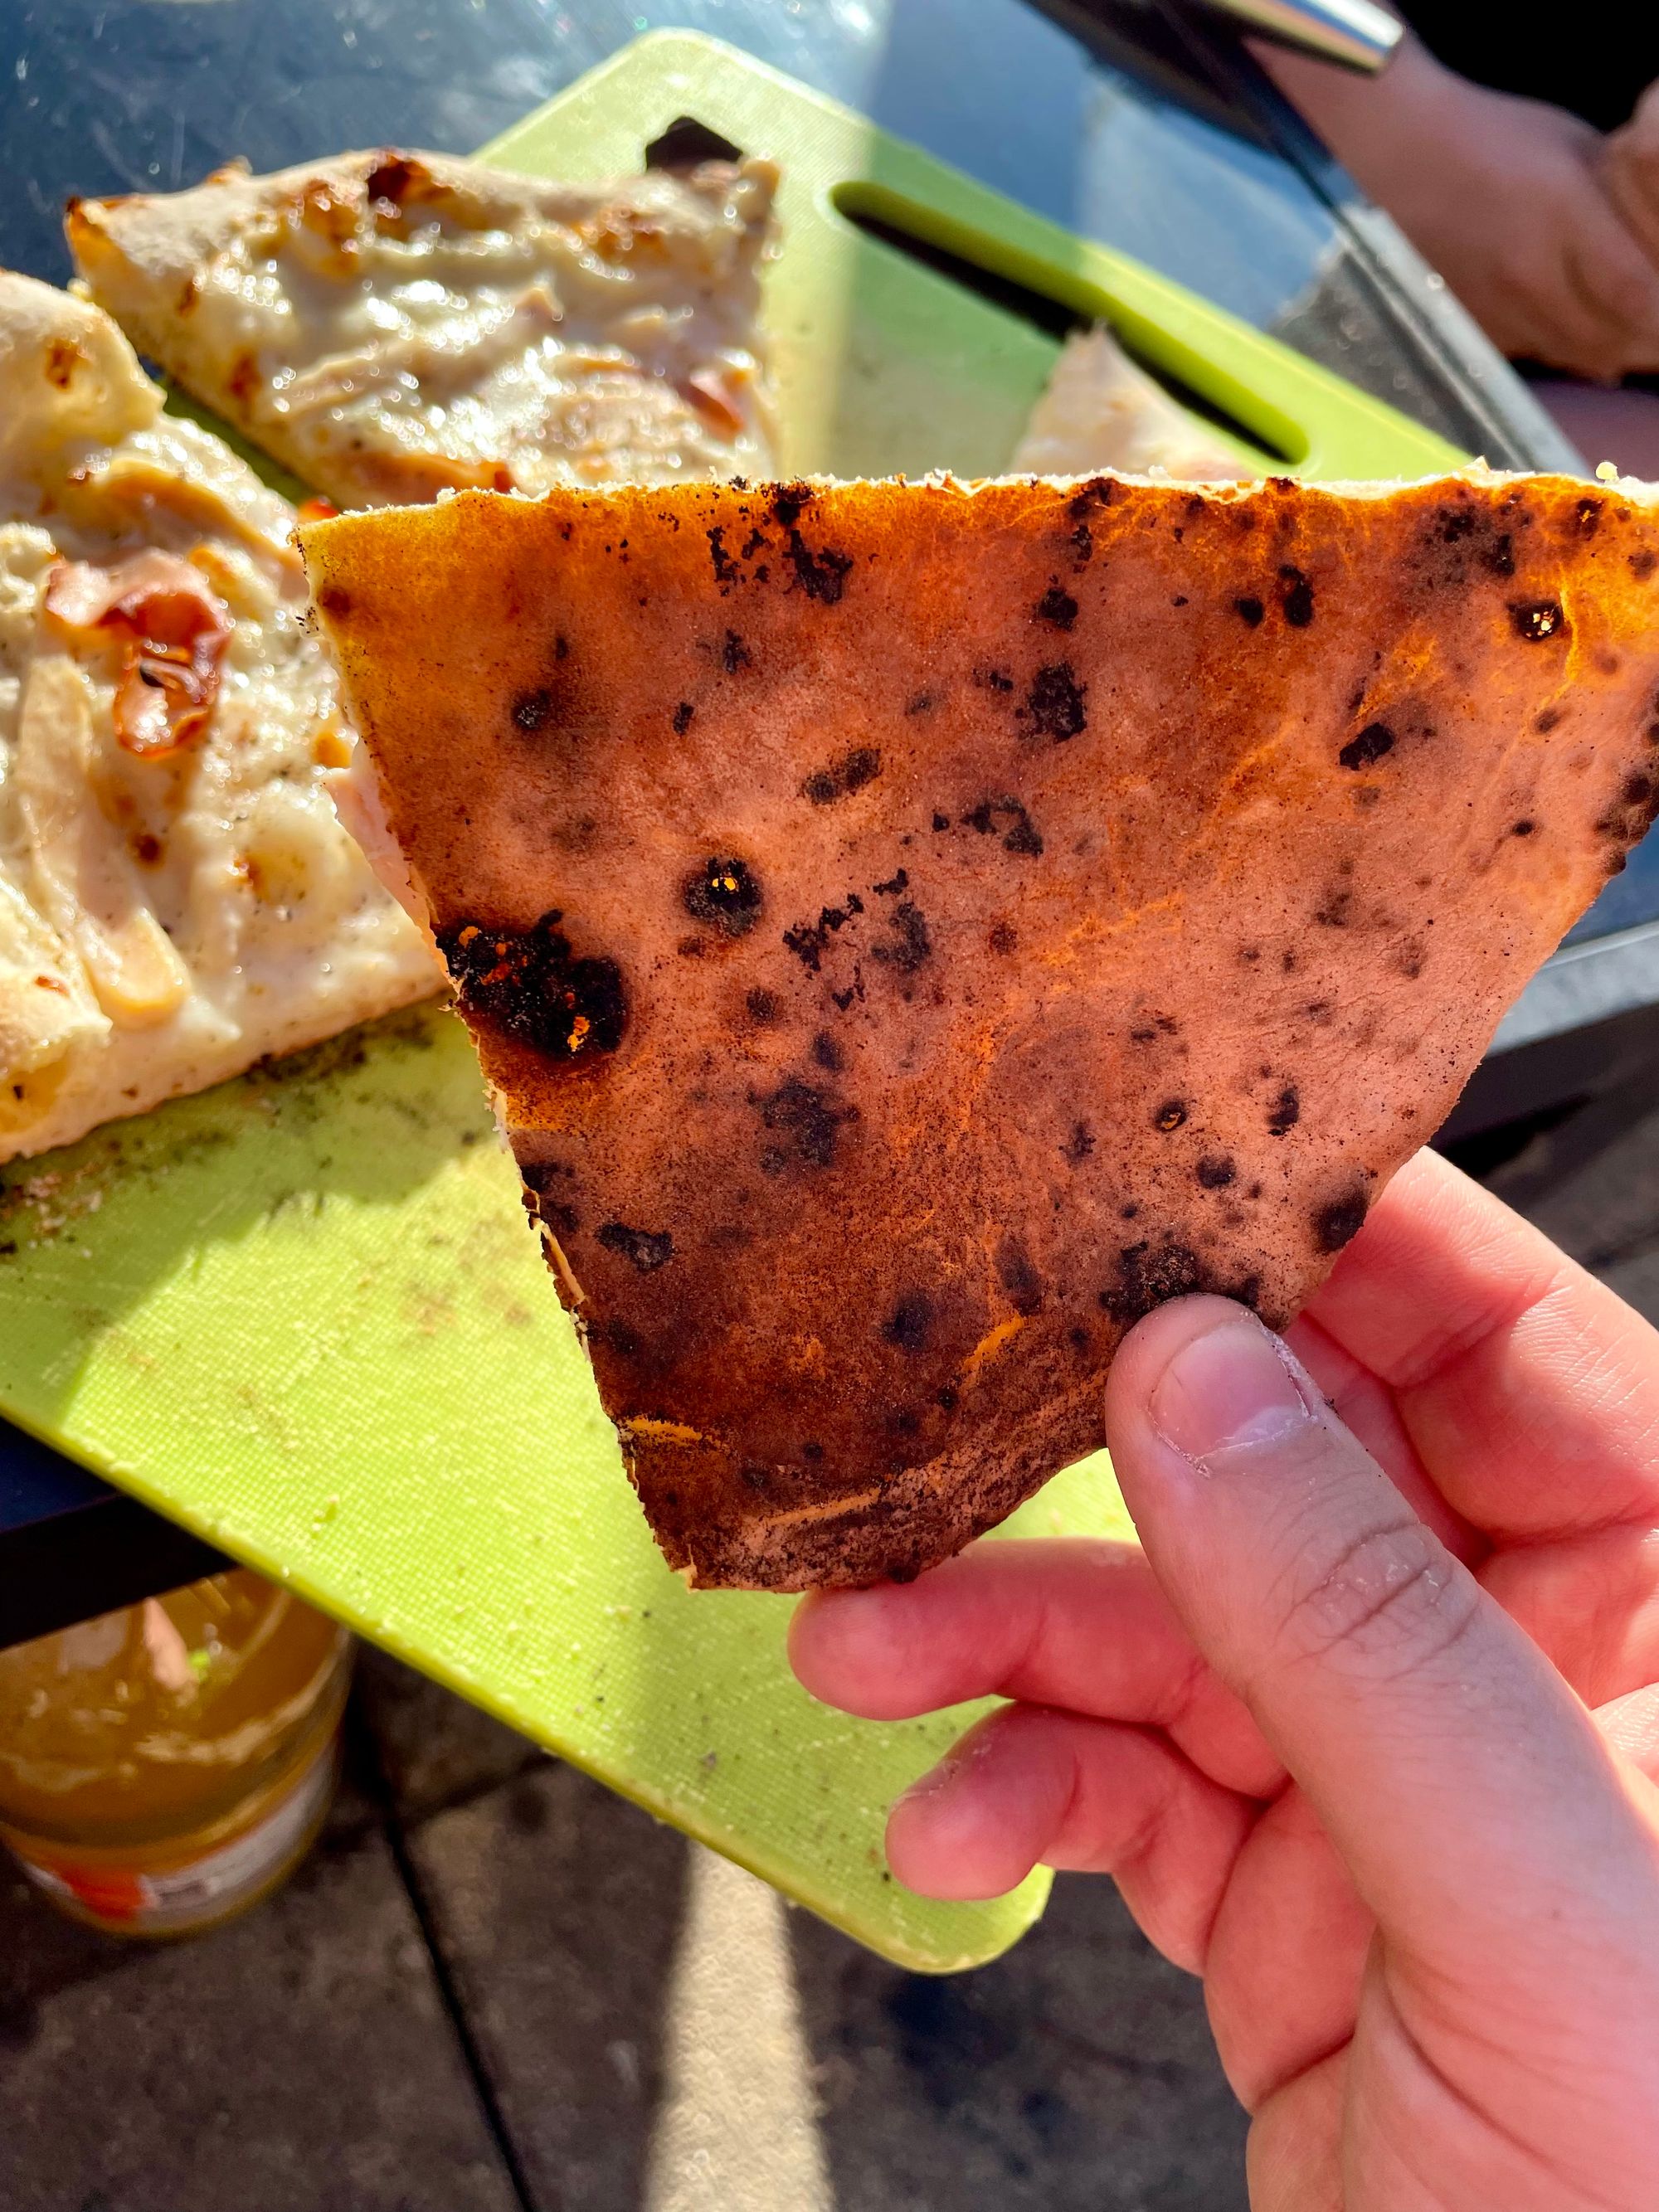
Results and Thoughts
I'm honestly blown away with the pizzas that can come out of this stack of bricks and slabs. While I'm sure an Ooni (or similar) would be easier and deliver better results, they're also around ten times the price I paid.
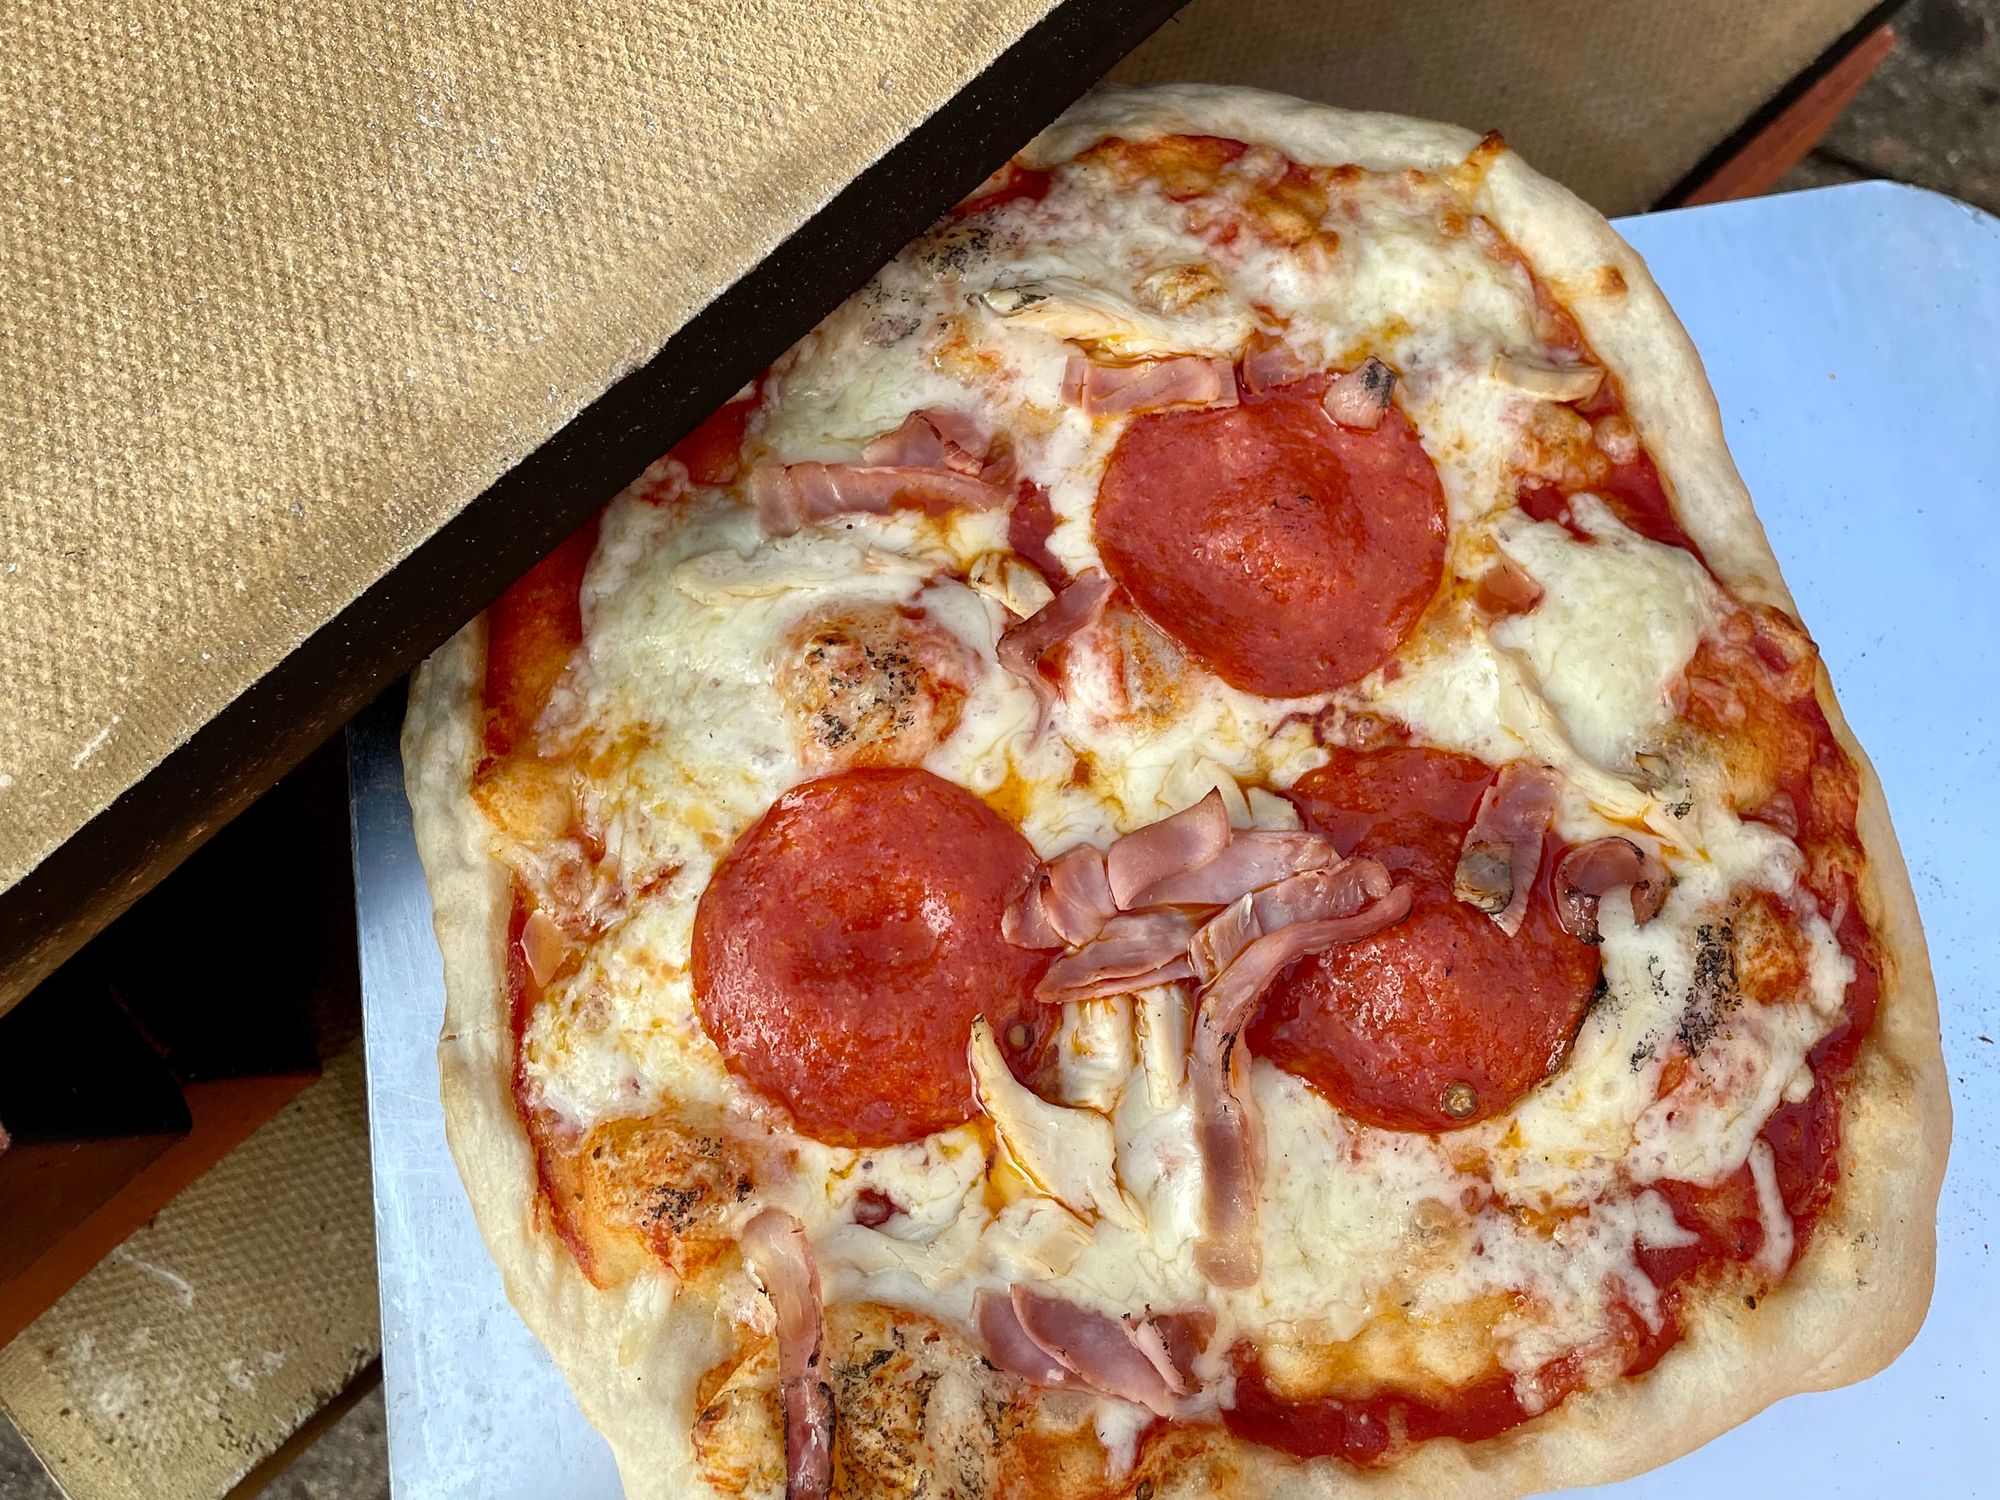
We did a pizza night with some family in the back garden and it was absolutely fantastic. Everyone had a great time picking their own toppings and we all agreed that the pizza was the best we've had at home. A conventional kitchen oven just doesn't come close to achieving the heat required to get a beautiful crispy base like this delivered.
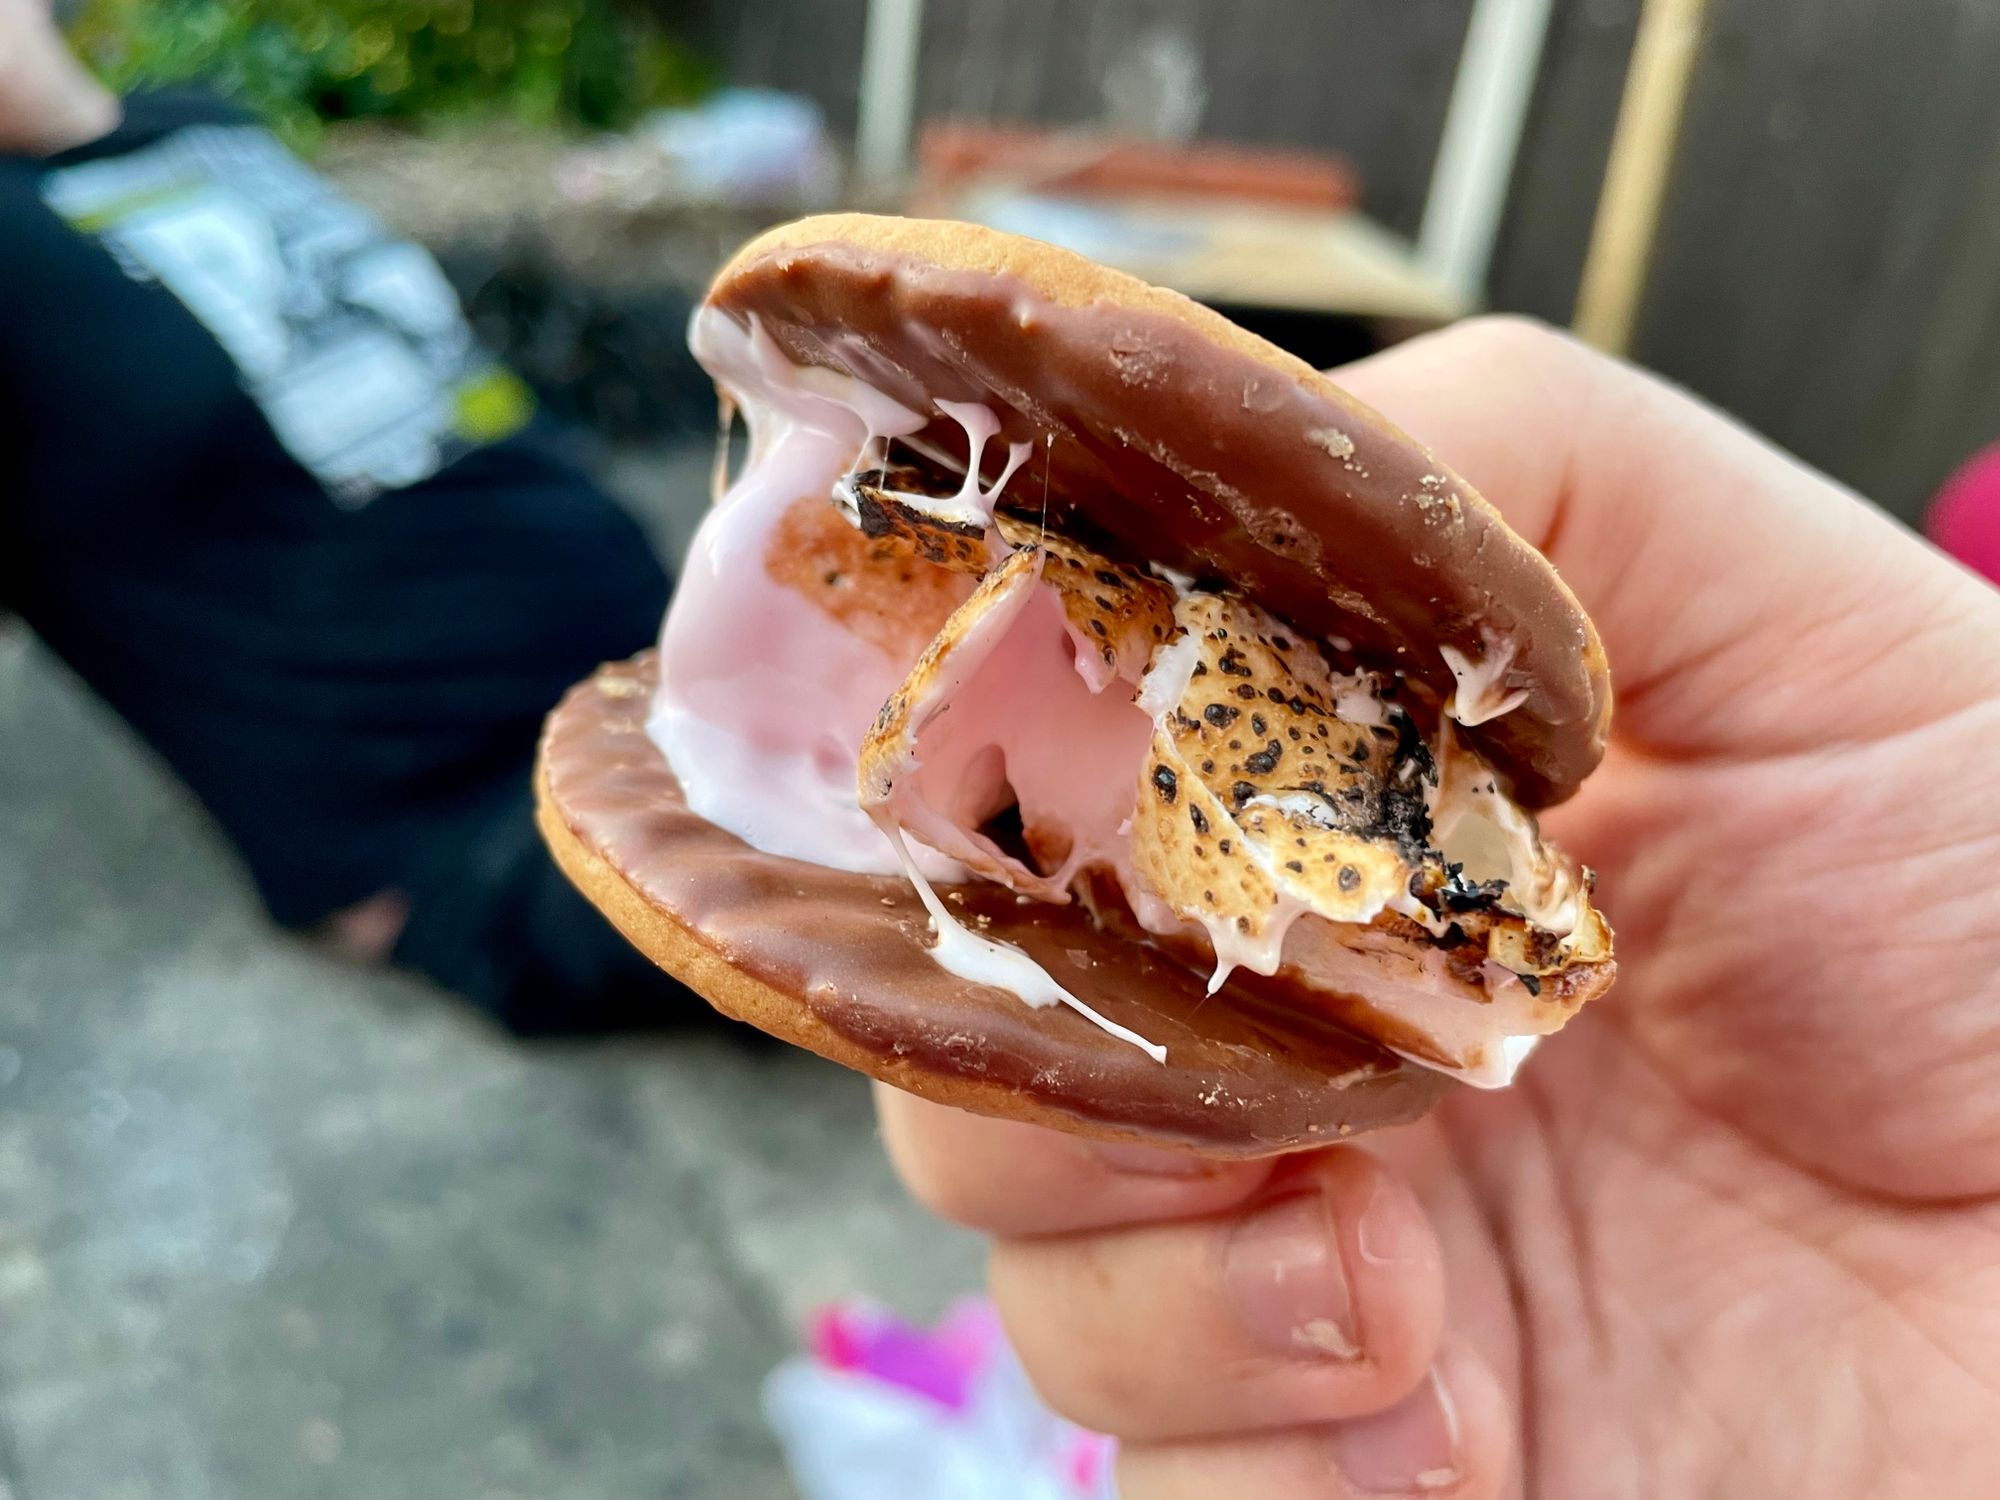
And, as bonus due to the open fire, we were able to make s'mores! If you're in the UK, don't bother with pieces of chocolate or trying to find Graham Crackers, just use two chocolate digestives around your melted marshmallow.
The only thing I think I'd like to try and improve even further is the browning on the top of the pizza. Whether that's down to the chimney on the oven, the lack of sugar or wholewheat flour in my dough, or perhaps the top level only needs one row of bricks rather than two — I'm not sure.
I'll keep experimenting throughout summer, and if you have any ideas on how to improve the oven, have any questions, or end up building one yourself then be sure to let me know over on Twitter.
Happy pizzain' 🍕
Update: 13/07/2021
We had another pizza night last night and had the best results yet. I've updated the dough recipe above with the new recipe I used which involves a preferment called a poolish.
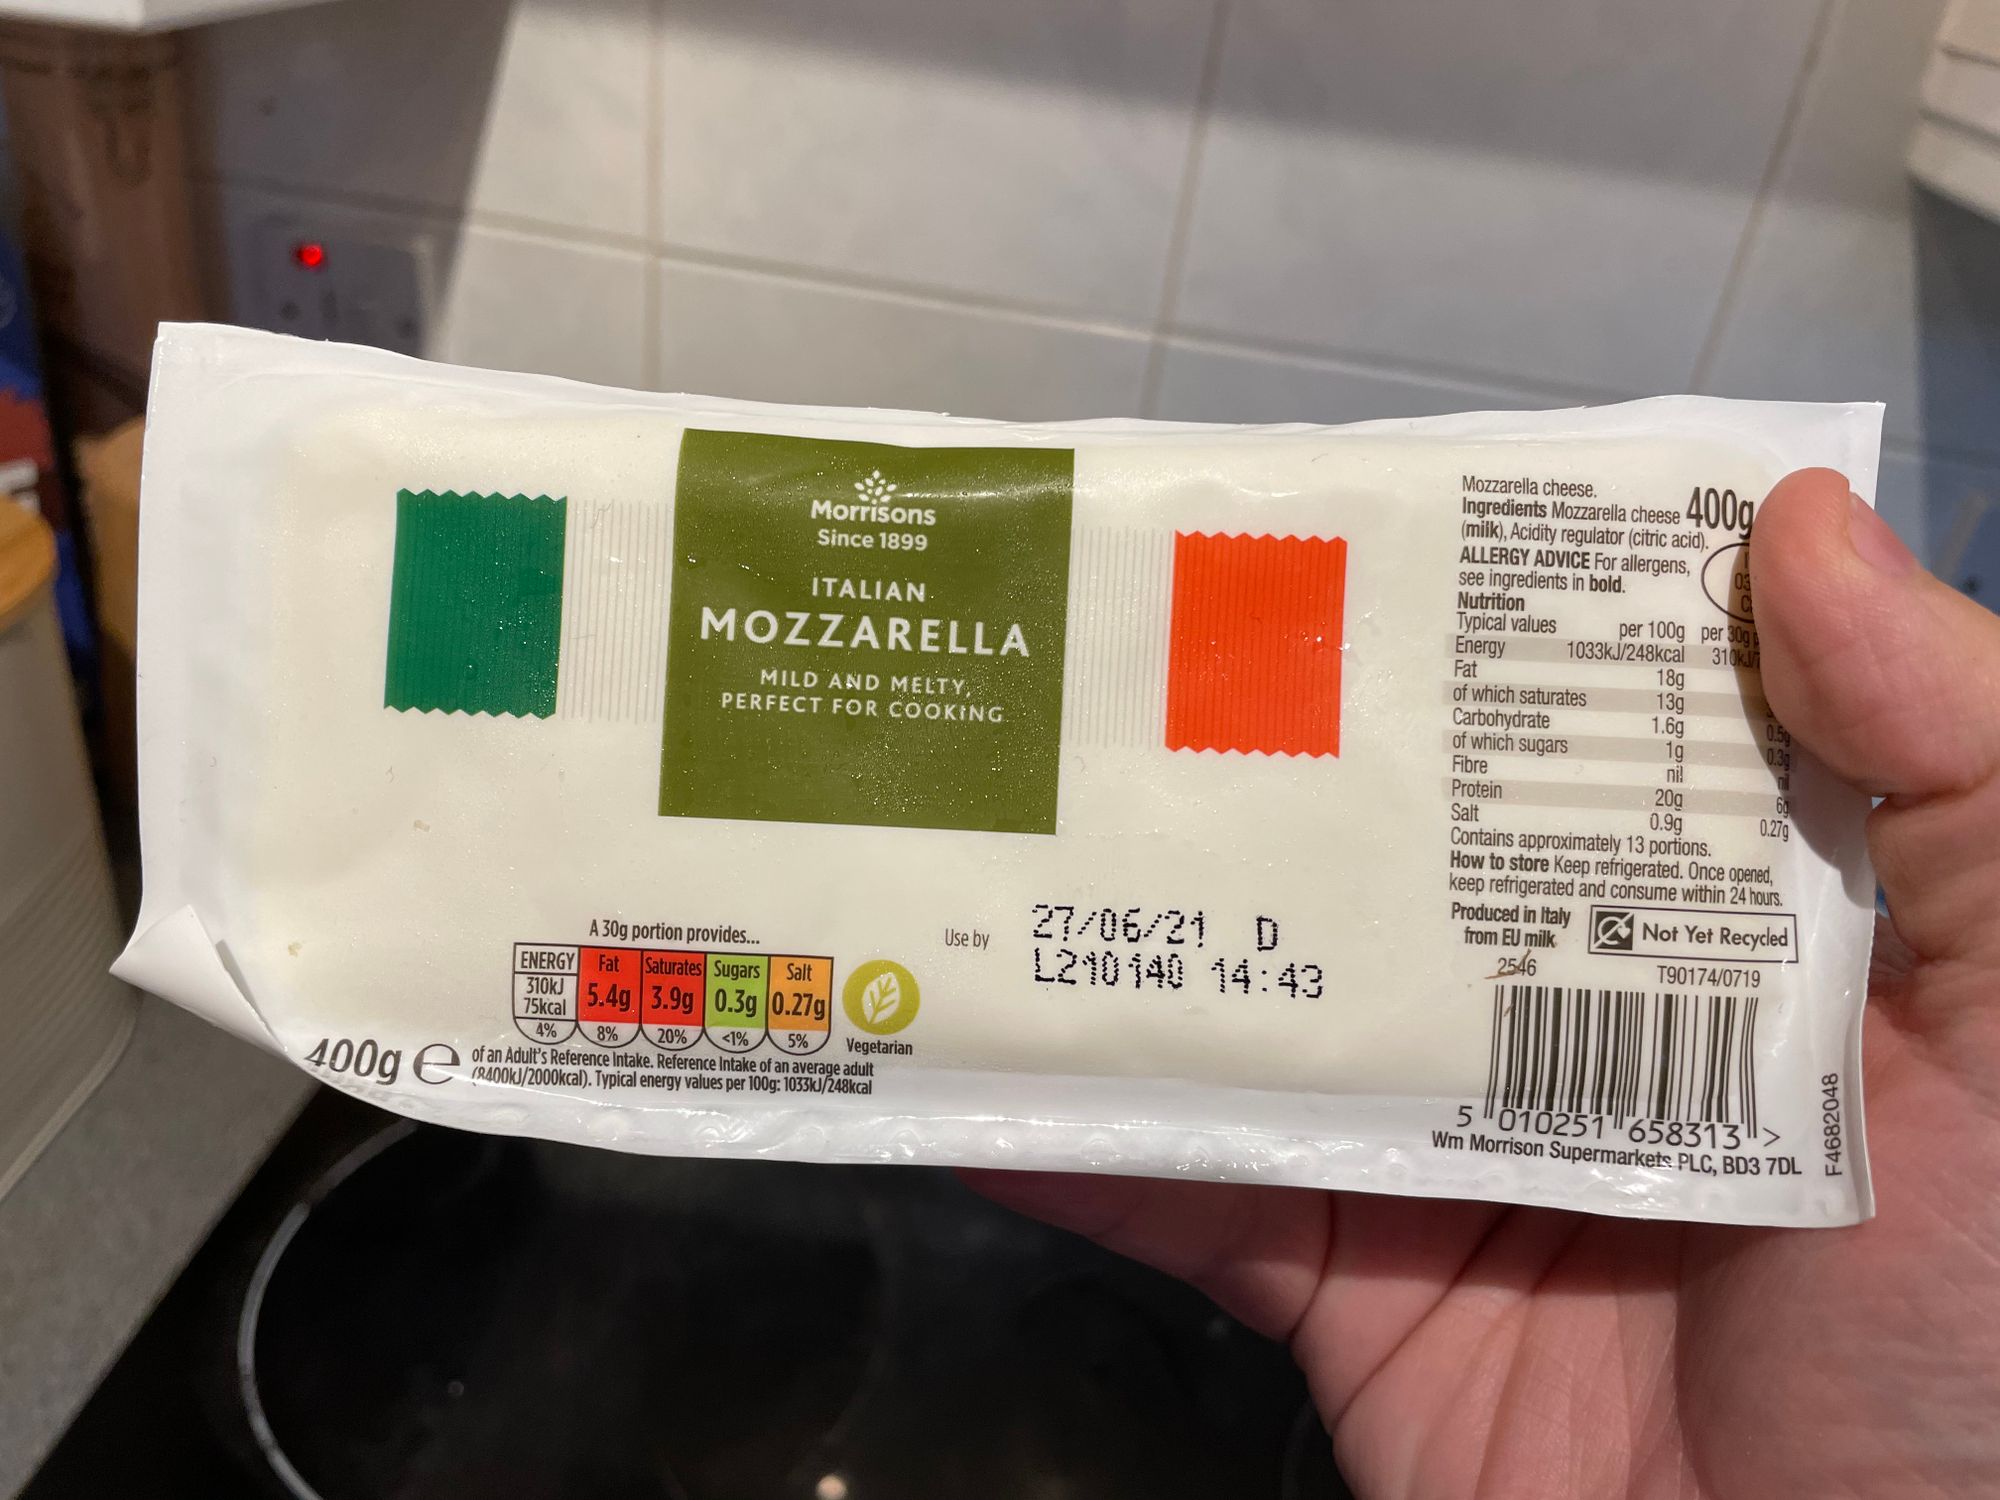
We also found some low moisture, full-fat mozzarella in Morrison's which they call "pizza mozzarella". This melts and browns way better than either the pre-grated or wet fresh mozzarella.
I think a huge factor though was the fact that we used more wood for a bigger fire. We were perhaps a little conservative in previous attempts and the additional heat and flames gave better results.
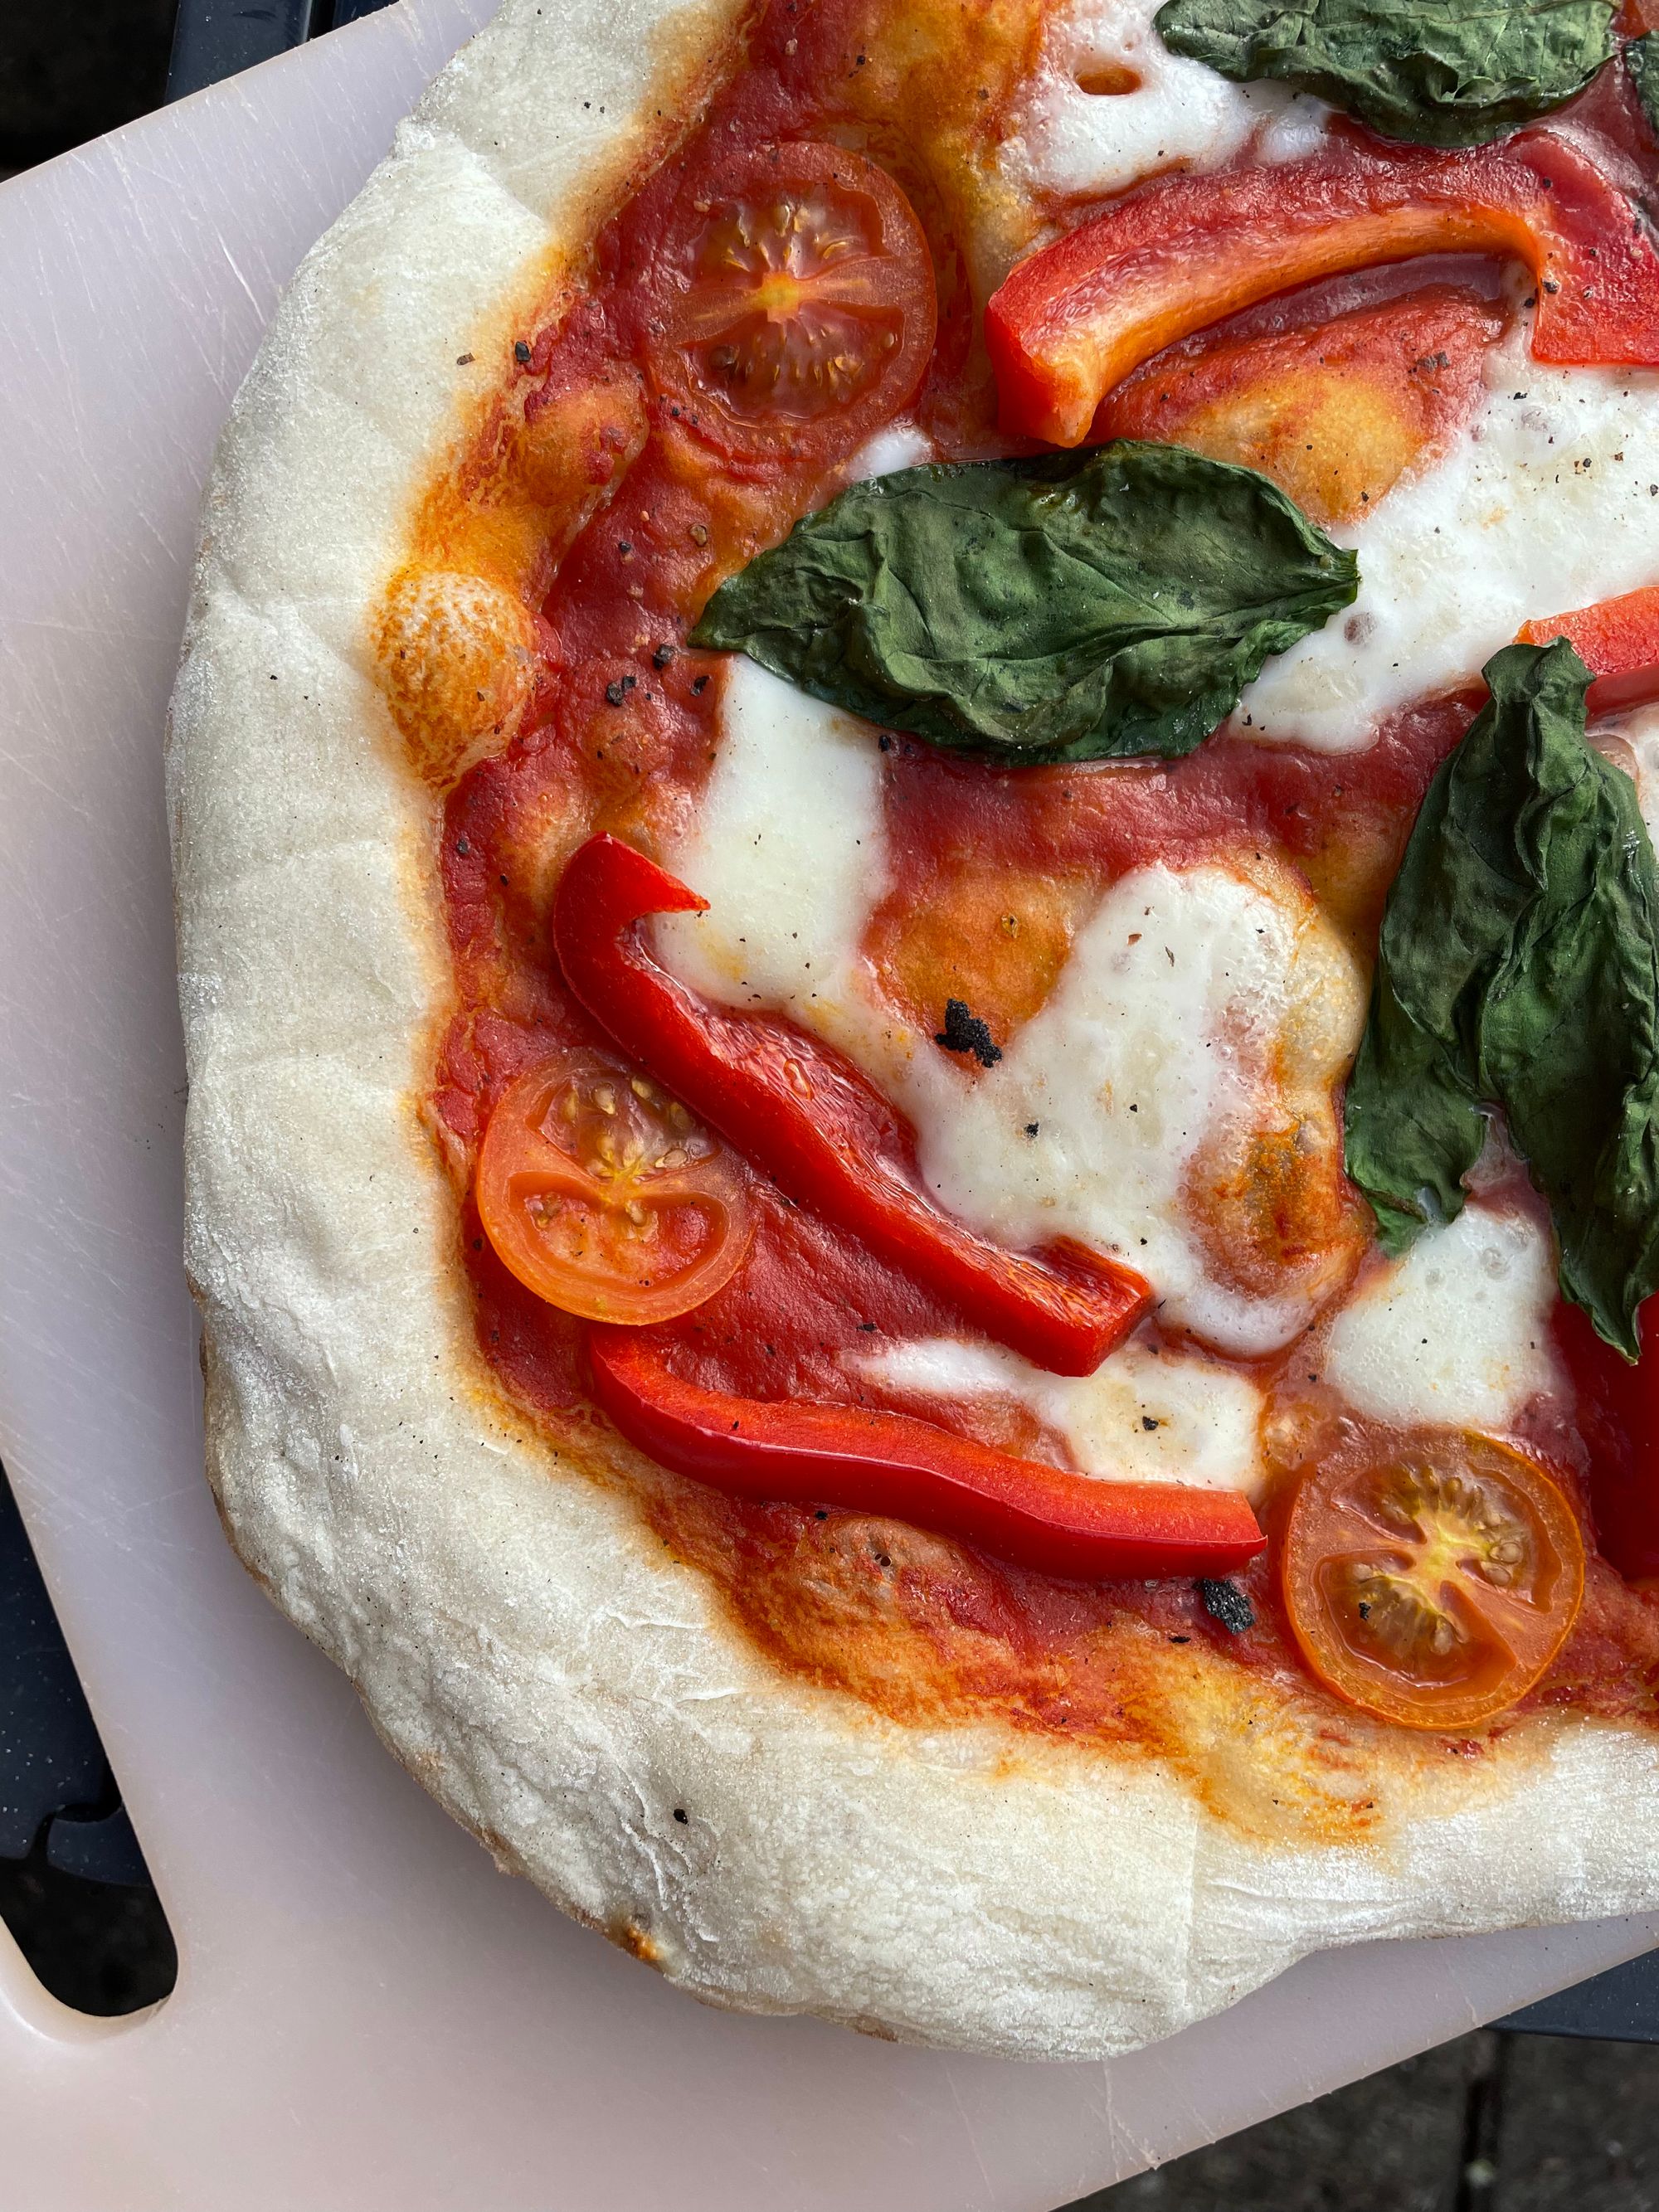
Here's some of the latest pizzas we've had out of the oven: