So you want to start a podcast…
I have loved podcasting almost since its inception, before it was a part of iTunes and you had to download something like iPodder Lemon, find an RSS link and subscribe manually. Back then it was truly something new and I had a lot of fun messing around in my early teens with Blogger and Feedburner to release my own podcasts.
Since then, podcasting has grown significantly. There are more listeners than ever and production qualities have reached broadcast standards with big players like NPR and the BBC releasing their own podcasts.
One thing remains the same though – podcasting is a fantastic way to get your voice heard and the barrier to entry is lower than its ever been thanks to free software and hosting.
Equipment
Whilst starting a podcast is extremely accessible, there are a few pieces of equipment I would consider essential to creating something that sounds good, if not great.
Microphone
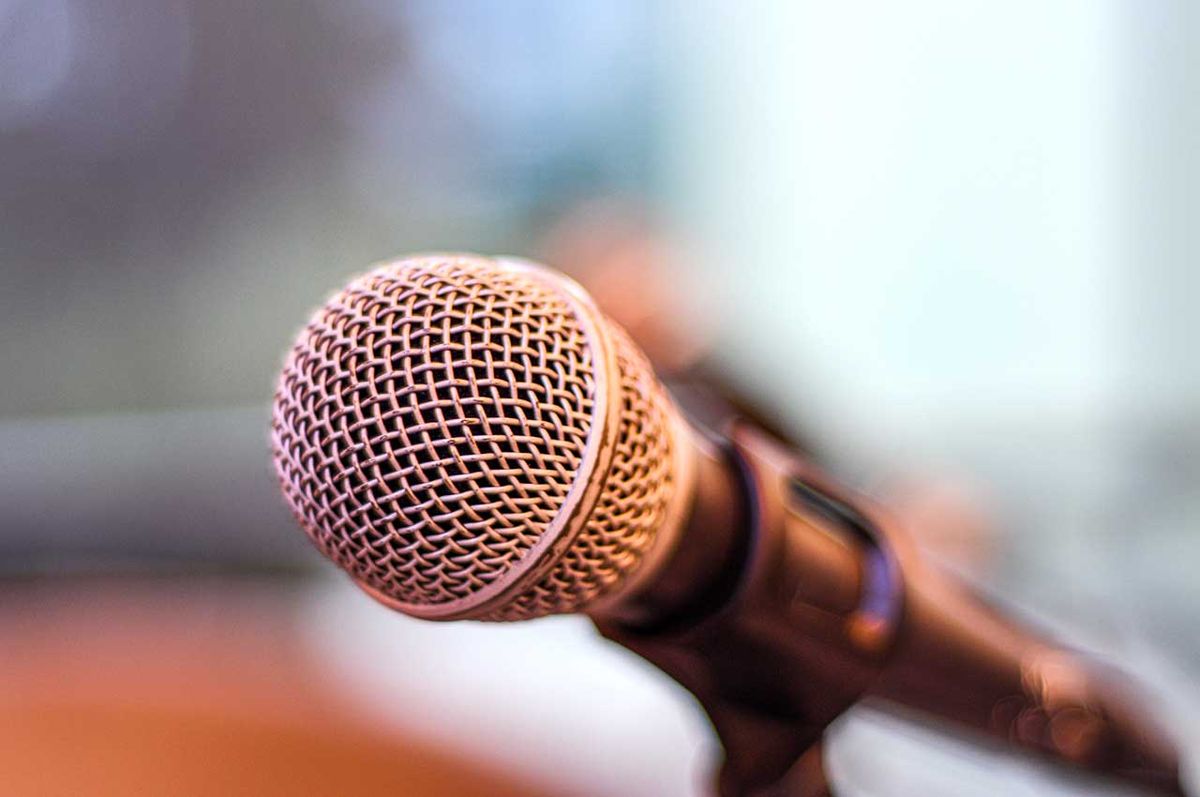
The most important thing on your shopping list (if you don't already have one) is a microphone. There are a few different types of microphone but the most common are dynamic and condenser.
Condenser microphones require power to work are much more sensitive than dynamic mirophones. The most popular microphone that falls in this category is probably the Blue Yeti.
Dynamic microphones do not require power and aren't as sensitive as condenser microphones. The most iconic dynamic microphone is the Shure SM7B.
Another thing you'll need to consider is a microphone's polar pattern which is essentially the direction that a microphone can recieve audio. For example, an omnidirectional pattern is great for interviewing and allows the microphone to pick up sound on all sides of the microphone. For podcasting, you'll want to look for something that supports a cardioid (or supercardioid) pattern. This is a heart shaped pattern (hence the name) that only picks up audio from the front of the microphone and has good side and rear rejection.
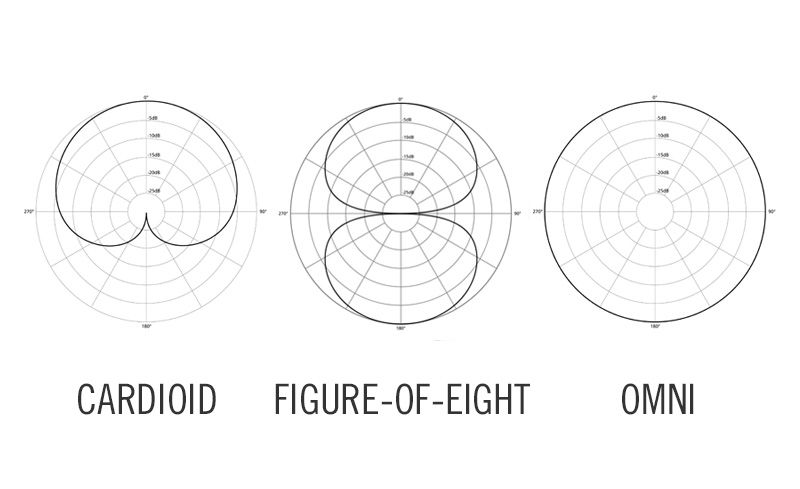
I would recommend a dynamic, cardioid microphone for most people wanting to start podcasting. While dynamic microphones do require you to get closer to them in comparison to a condenser microphone this actually means they don't pick up anywhere near the level of background noise a condenser microphone does. This makes them perfect for use in a home "studio" where what's going on in the background can't be controlled in the same was a professional environment.
Microphone prices range drastically from double digits all the way up to thousands and a while lot of it comes down to personal preference you absolutely do not need to spend a lot. For your first microphone you likely want something plug-and-play through USB (rather than XLR with a separate interface) for less than £100.
I personally use an Audio-Technica ATR2100x-USB which retails for around £80. It supports both USB-C and XLR outputs as well as zero latency monitoring so you can hear yourself and ensure you're sounding okay.
Here are some samples from the Audio-Technica ATR2100x and the Blue Yeti:
- Audio-Technica ATR2100x-USB:
-
Blue Yeti:
Which sound you prefer will obviously differ dependant on personal taste but the ATR2100x has the edge for me. While the built in pre-amp is a little noisier than the Yeti's, I think it sounds a little more natural and less "digital" in comparison. I think it's also clear that in my untreated home office that a lot more echo can be heard on the Blue Yeti due to its sensitivity as a condenser microphone.
For more info on microphones I highly recommend checking out Marco Arment's Mega-Review which also goes into detail on XLR interfaces and more expensive alternatives to the Audio-Technica.
Other Equipment
Once you have a microphone you're ready to start recording but there's a few little extras that will make your life easier and likely improve the quality of your podcast in the long run.
Whichever mic you choose, it will likely come with a stand but they're usually pretty short and will sit right next to the keyboard and mouse you'll need to use while recording.
The first step to improving the output from your mic is to get it closer to your mouth. A boom arm makes this easy. I use one from Neewer that was under £20, clips to my desk and means I can push my mic out of the way when not recording.
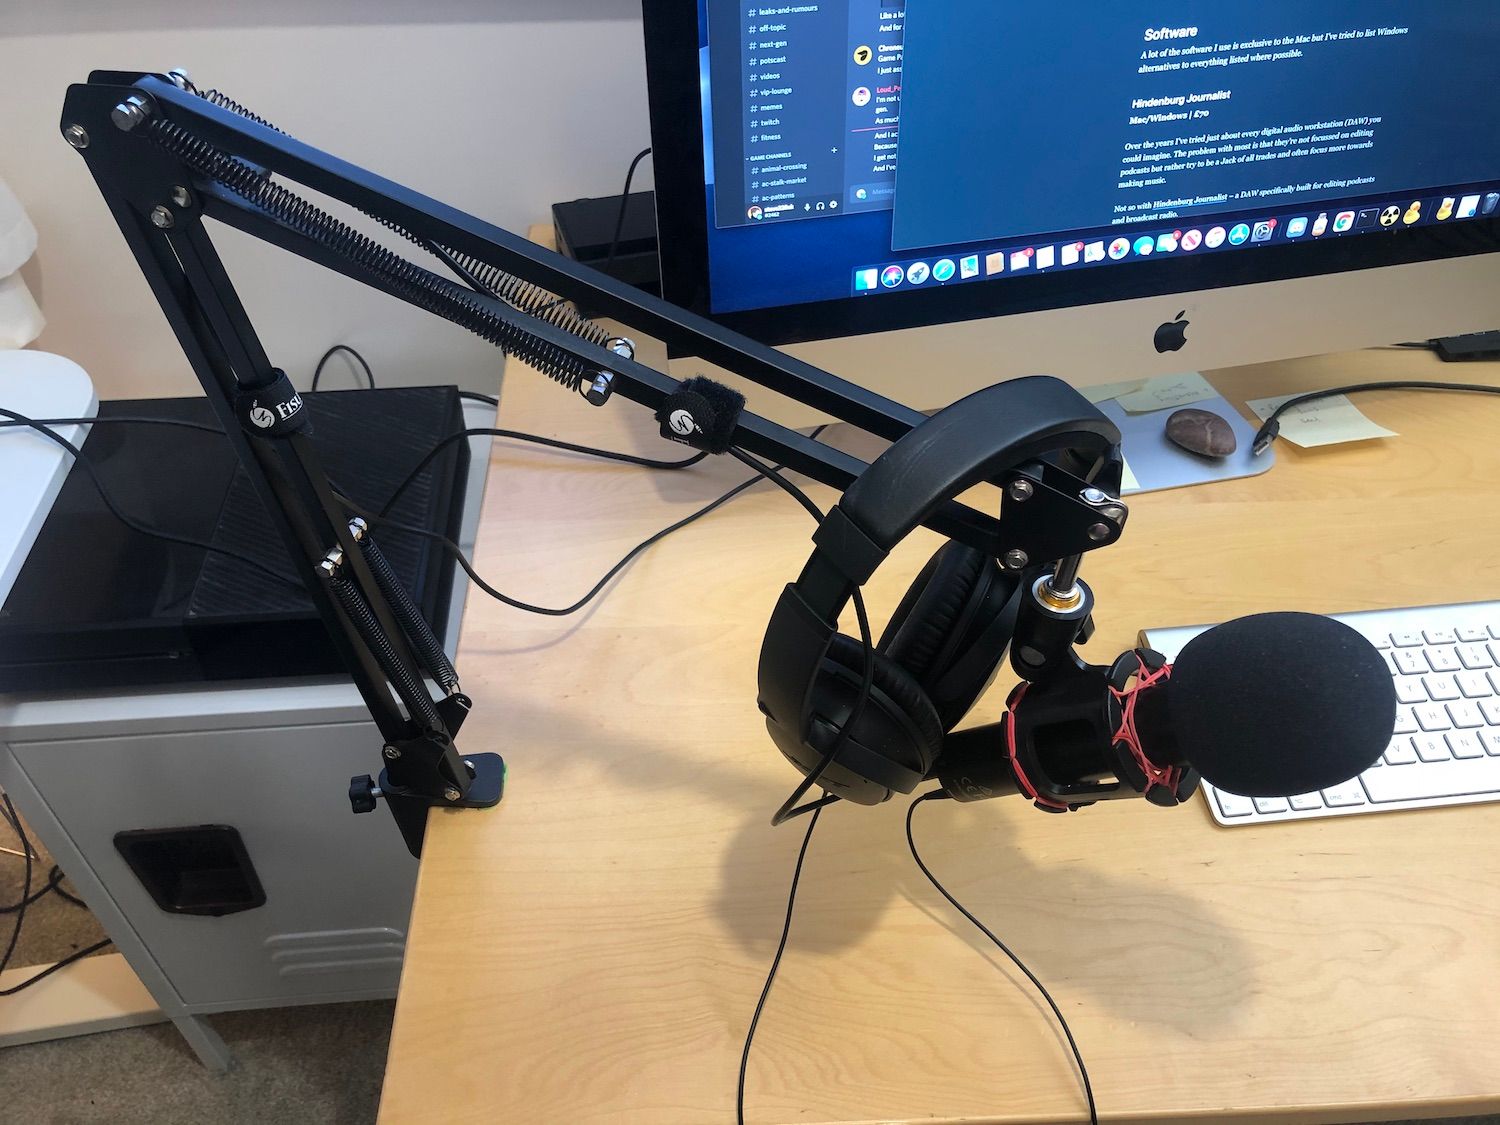
As you can see, I also use a wind filter (or you could use a pop filter) which helps remove the odd plosive that are an absolute pain to get out in post. I also think it's worth picking up an inexpensive shock mount for around £15 which further reduces and noise from knocking on the desk while recording.
The final thing you'll absolutely need is a comfy set of headphones. You'll likely be sat with them on your head for over an hour so get a pair that feel right for you. I use the Bose QC35 which are total overkill and are also pretty bad monitors for voice but they're comfy and I already owned them.
I know a few other podcasters that use the Sony MDR-7506 but again this comes down to personal preference and what's comfy for your head and ears.
Software
A lot of the software I use is exclusive to the Mac but I've tried to list Windows alternatives to everything listed where possible. Please do bear in mind that this is what works for me and there are free alternatives to most apps.
Hindenburg Journalist
Mac/Windows | £70
Over the years I've tried just about every digital audio workstation (DAW) you could imagine. The problem with most is that they're not focussed on editing podcasts but rather try to be a Jack of all trades and often focus more towards making music.
Not so with Hindenburg Journalist – a DAW specifically built for editing podcasts and broadcast radio.
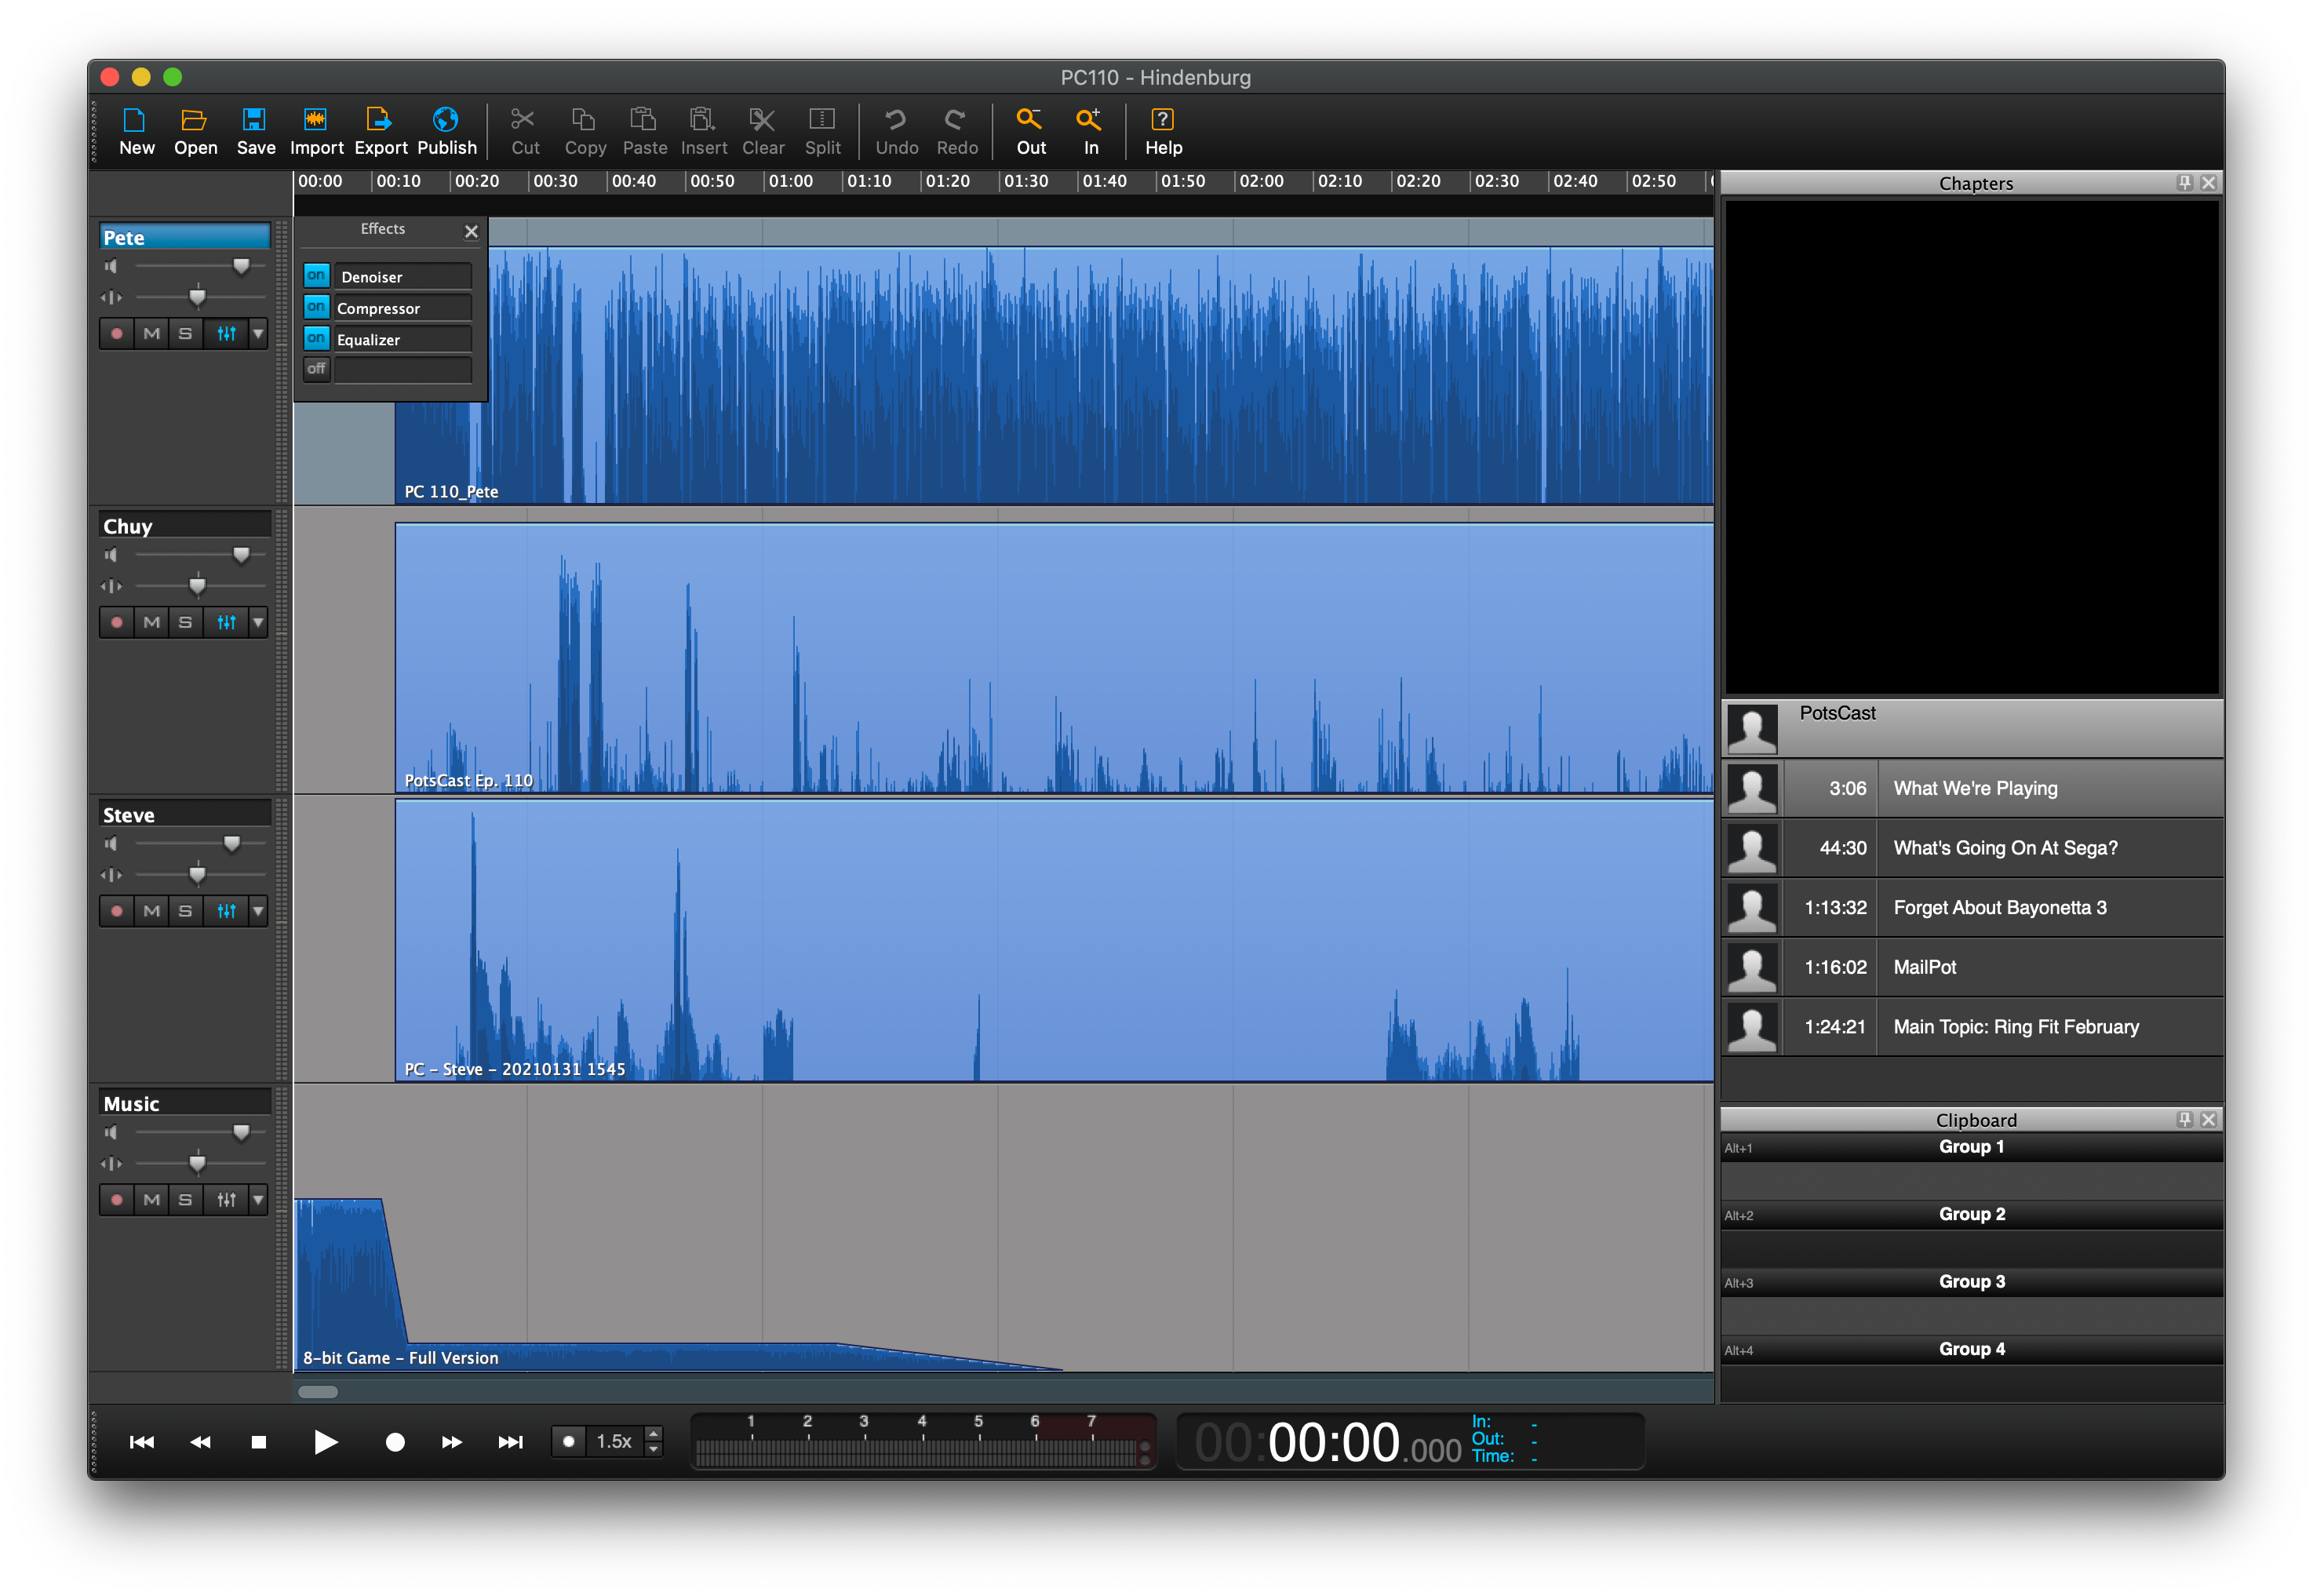
Hindenburg Journalist automated so much of my workflow that I can now edit a 90 minute podcast in around 30 minutes. Small things like audio being automatically levelled on import so there's no manual balancing between tracks, or correctly normalising loudness to the recommended -16 LUFS on export allow you to focus on just editing the content without sweating the details.
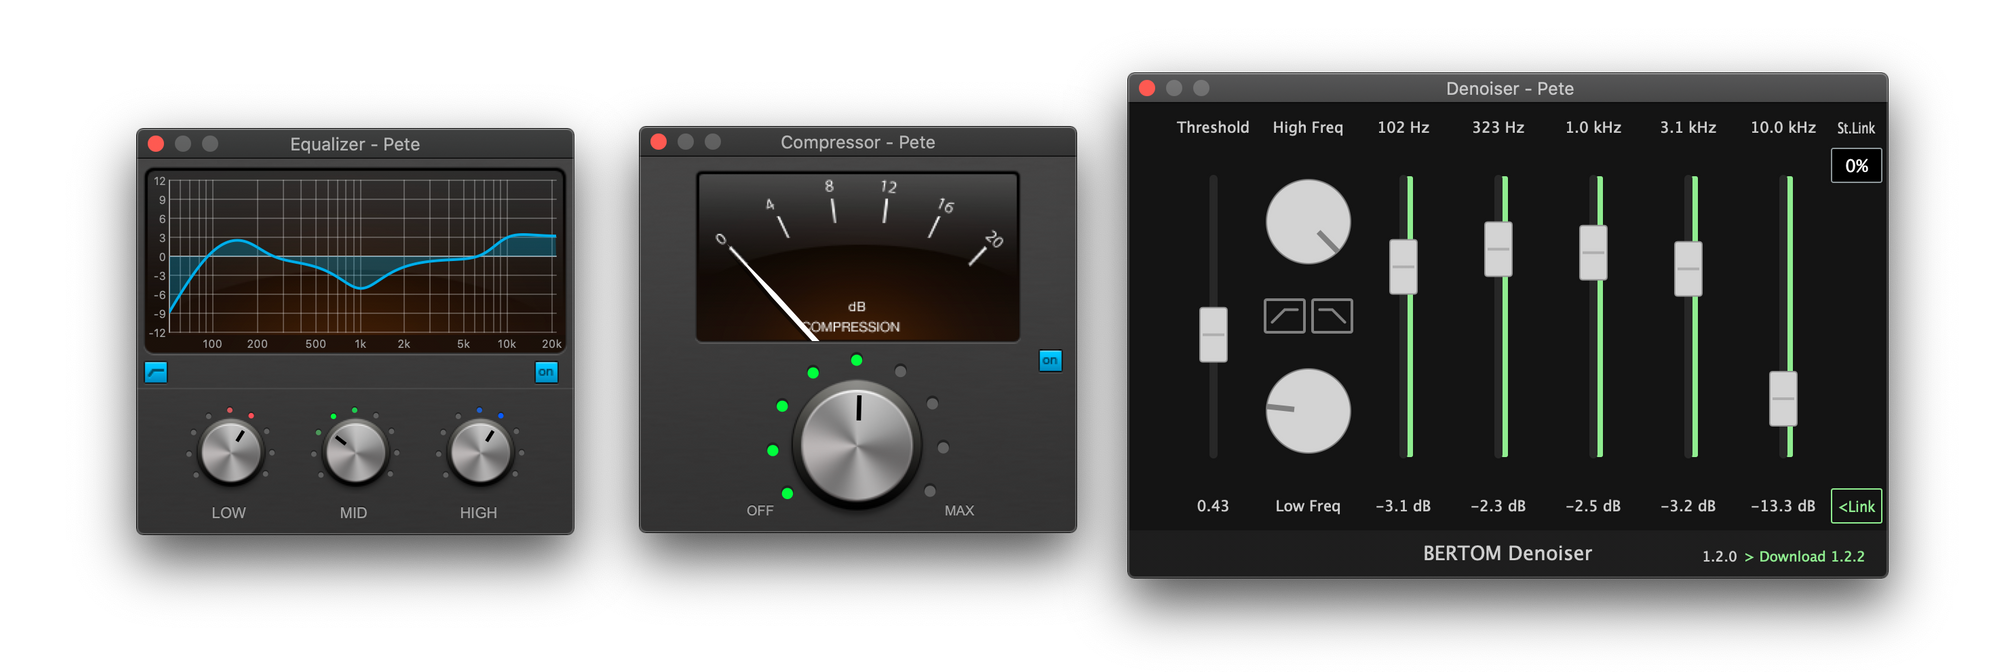
That's not to say Hindenburg Journalist doesn't give you granular control and creative freedom. There's a built in EQ and a single-knob compressor which takes the complexity out of it so you could just turn it up or down and listen to the results in real-time. Alternatively, you can use Hindenburg's Voice Profiler feature to automatically apply an EQ and compressor to get that "radio voice" effect that I personally do not enjoy.
Alongside the built in effects, Hindenburg Journalist also supports third party AU or VST3 effects. On macOS, this means you have access to all of Apple's AU effects like their highpass filter or multiband compressor if you want a little more control.
I also highly recommend the absolutely stellar free plugin Bertom Denoiser. It's worked wonders to clean up a noisy track whether that be due to audio leaking from headphones, a noisy preamp, or a some background noise and I now use it on every single podcast I edit. Even if you don't use Hindeburg Journalist, Bertom Denoiser is available as both an AU and VST3 plugin which means it will work with other DAWs such as Logic Pro or
It's also possible to add chapters and artwork right within Hindenburg Journalist and when you're ready to publish you can send it directly to a bunch of popular services like Soundcloud, Libsyn or Podbean. Alternatively, you can upload to an FTP server or just export an MP3.
Alternatives
I don't want anyone to think they have to spend money on software to get started with podcasting as there are some fantastic free (and paid) alternatives. Hindenburg Journalist just happens to be my favourite DAW of the ones I've tested but it may not fit your workflow or editing style.
- Audacity (Mac/Windows) - Free
- GarageBand (Mac) - Free
- Adobe Audition (Mac/Windows) - From £19.98/month
- Logic Pro (Mac) - £200
- Descript (Mac/Windows) - From $12/month
Audio Hijack
Mac | ~$70
I've used Audio Hijack for well over a decade and it's a tool I would consider essential* to anyone working with audio on Mac.
In fact, all of Rogue Amoeba's apps are incredibly powerful. Loopback lets you channel audio from one app to another, Farrago provides rapid-fire soundboards, Fission is a great (but perhaps a little basic) audio editor, and Piezo is Audio Hijack's little brother that records from a single source.
However, it's Audio Hijack that I use week-in-week-out. Primarily Audio Hijack allows me to capture the audio of my co-hosts so we have a backup in case a mic or recording fails but it can also do so much more.
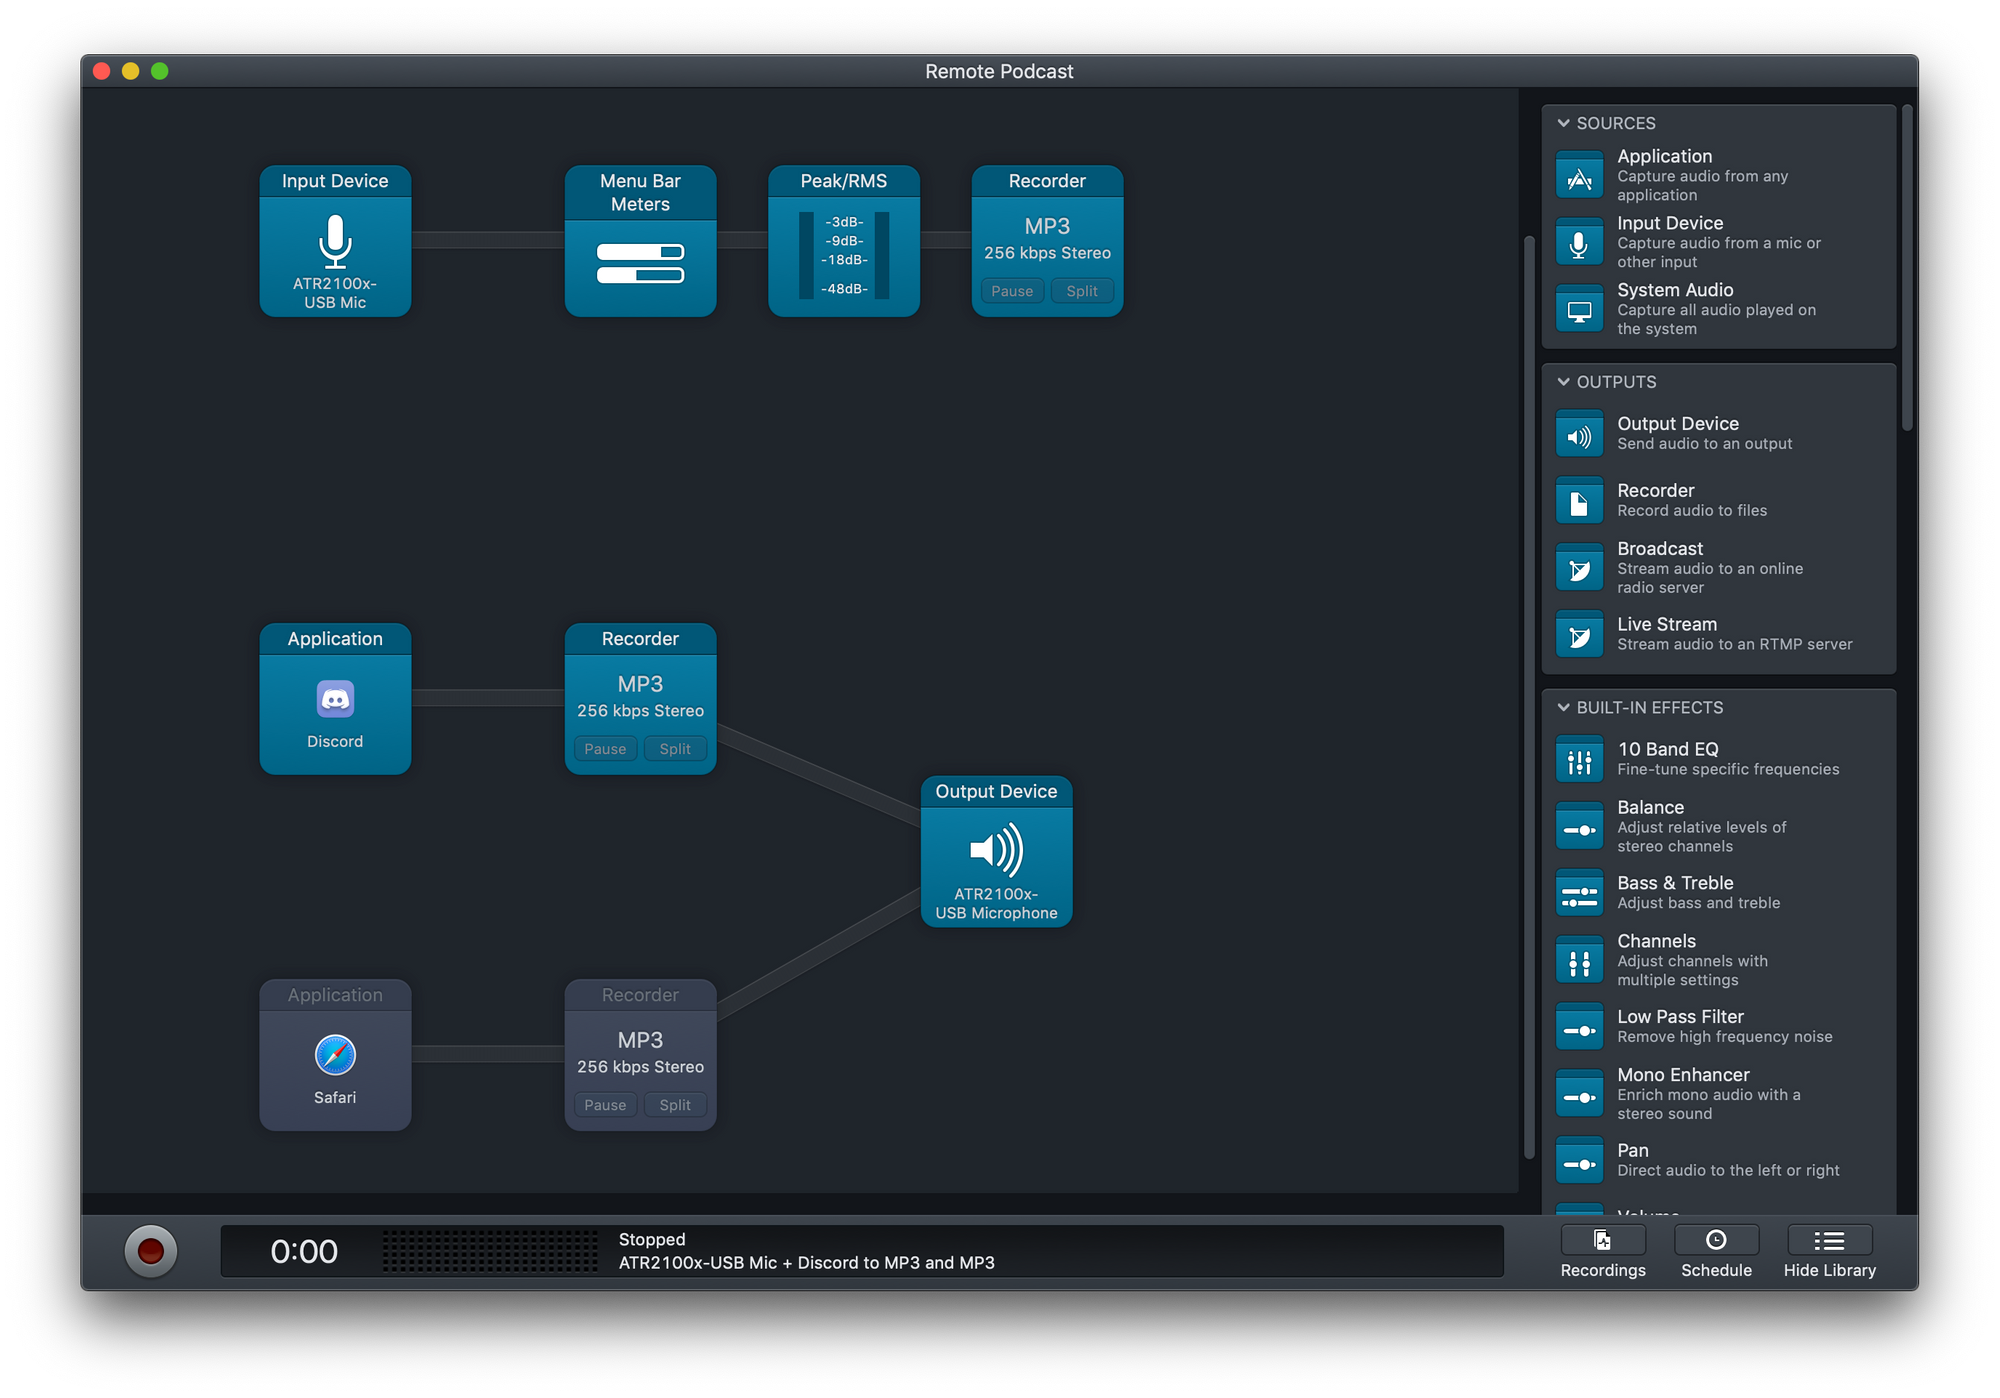
You can add real-time effects like a compressor, EQ, or even clean up background audio using an audio sample and record at any point in the chain. Or, merge together your local mic with a remote source and get a single file out the end. Audio Hijack is an extremely powerful tool and I know I only scrape the surface of what's possible.
Alternatives
*Essential doesn't necessarily mean you need Audio Hijack but it's something that will likely improve your workflow and as soon as you've lost some audio once you'll wish you had a backup.
I've looked for decent alternatives for Windows and drawn a blank. If you know of any, please let me know.
Shush
Mac | $4.99
Shush is the software equivalent of a cough button and cuts the audio from your microphone at the system level with the touch of a button.
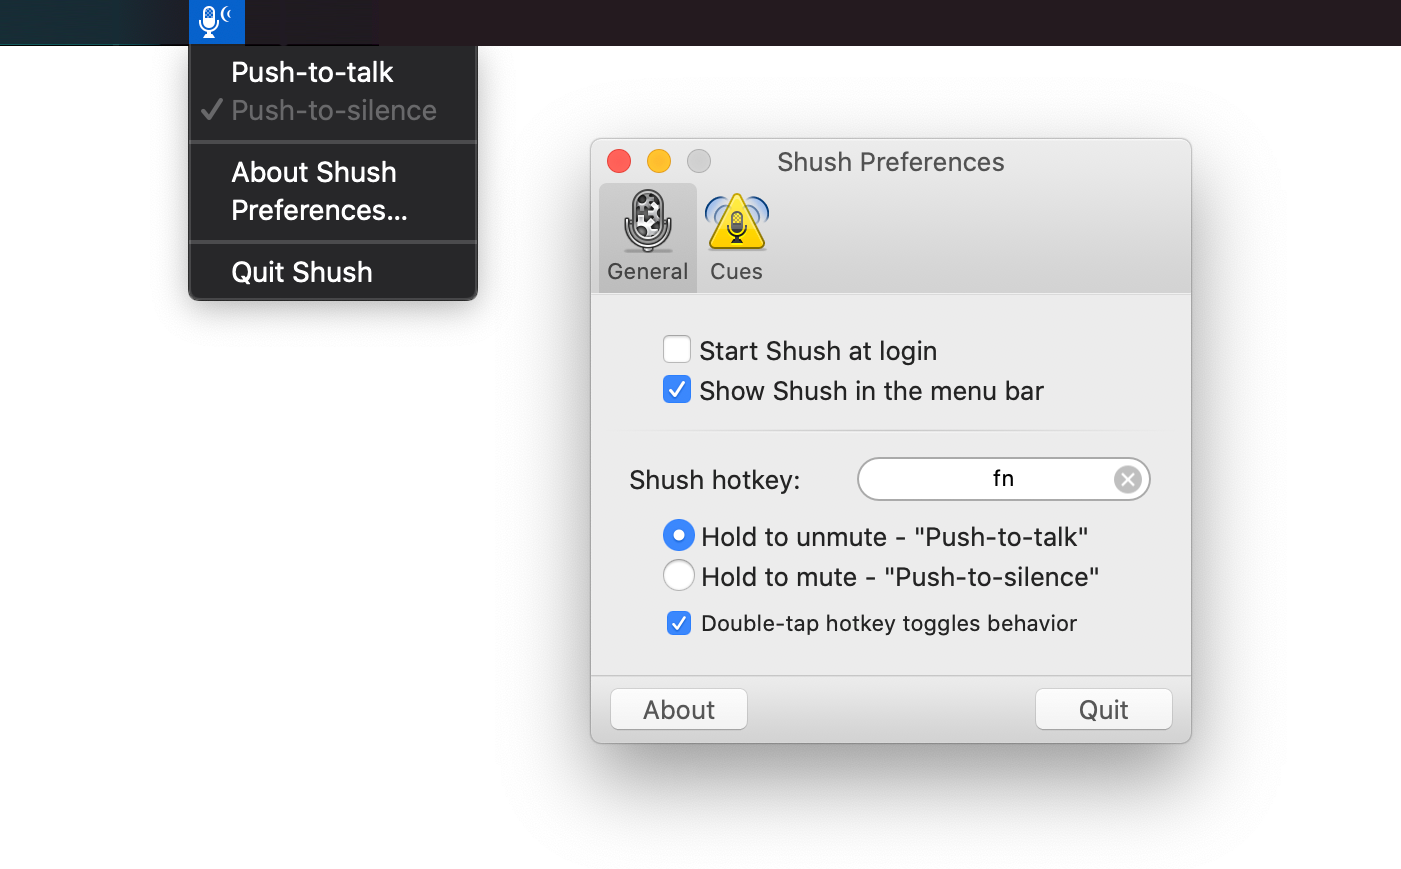
I have Shush wired up to the fn key on my Mac and can simply hold it whenever I need to cough in the middle of recording. A double tap of the button toggles mute on and off.
It's a simple tool that proves extremely useful any time you record or stream.
Alternatives
Discord
Mac/Windows | Free
This one really is down to personal preference but after trying Skype, FaceTime, Google Meet, and Zoom, Discord has come out tops as my app of choice for video calling.
I've found Discord has pretty low latency (though FaceTime may have the edge but is Mac only) along with great audio and video quality. There's also built in noise supression, echo cancellation, and noise reduction which for our video podcast really helps as we just capture the screen and audio using OBS.
Zoom does offer some advanced features like recording audio for each person or a video of the call but the £120 per year price tag is just too rich me.
Audiogrammer
Mac | $2.99 + in-app purchases
Even if you don't know what an audiogram is, I can almost guarantee you've seen one around the web. They're those little videos of a waveform that moves in time with the audio playing.
On this week's PotsCast, @steve228uk finally got to use the Diablo 3 Loot Goblin Amiibo. Was the almost 2 year wait worth it? 👀 https://t.co/SXUFg0kdR5 pic.twitter.com/VEcYVysUgC
— LootPots (@lootpots) October 26, 2020
Audiogrammer makes it incredibly easy to put one of these together in a variety of shapes and sizes for various social networks or even YouTube. Drag an audio file in and move things around on the canvas to suit your style. Then you simply drag the handles on the timeline to the clip (or entire file) you wish to export a video of.
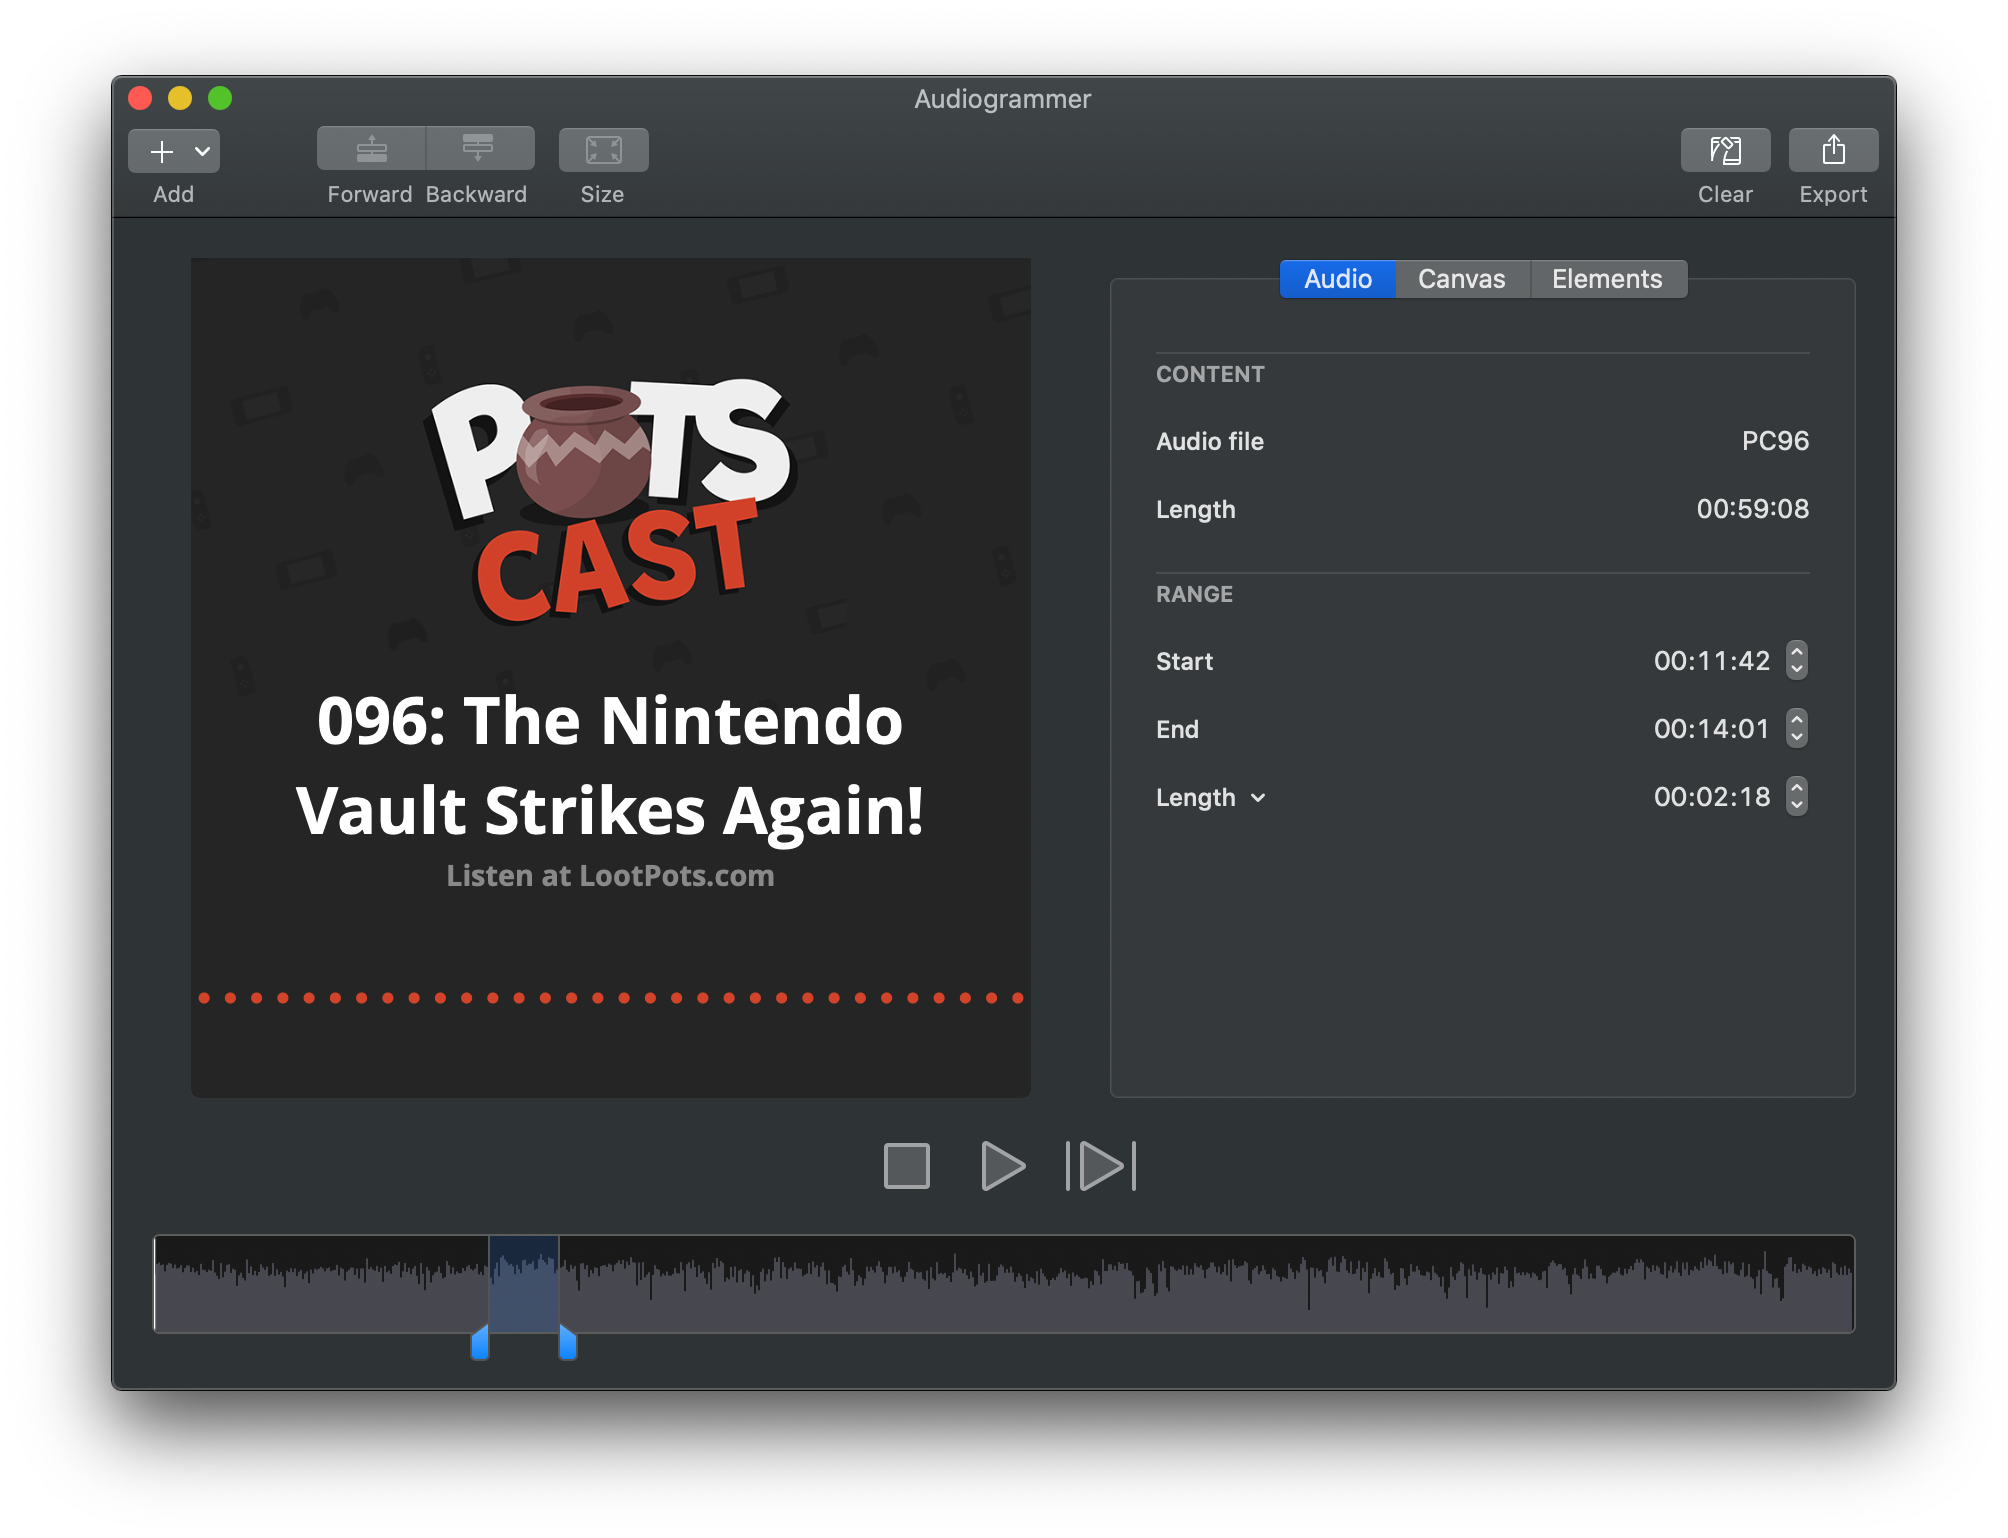
It's a great way to get some shareable videos of your podcast or even create a video version for YouTube that's a little more than a static screenshot.
Alternatives
- FusionCast (Mac) - $7.99
- Headliner (Cloud) - Free w/ watermarks | $7.99/month
- Audiogram (Cloud) - Free w/ watermarks | $19/month
Podcast Hosting
I won't pretend to know where the best place to host a podcast is in 2021 but I can say that for years I've been very happy with Fireside. Plans start at $9 a month and you'll be up and running with a website for your podcast as well as distributing on Apple Podcasts, Spotify, and other players almost instantly.
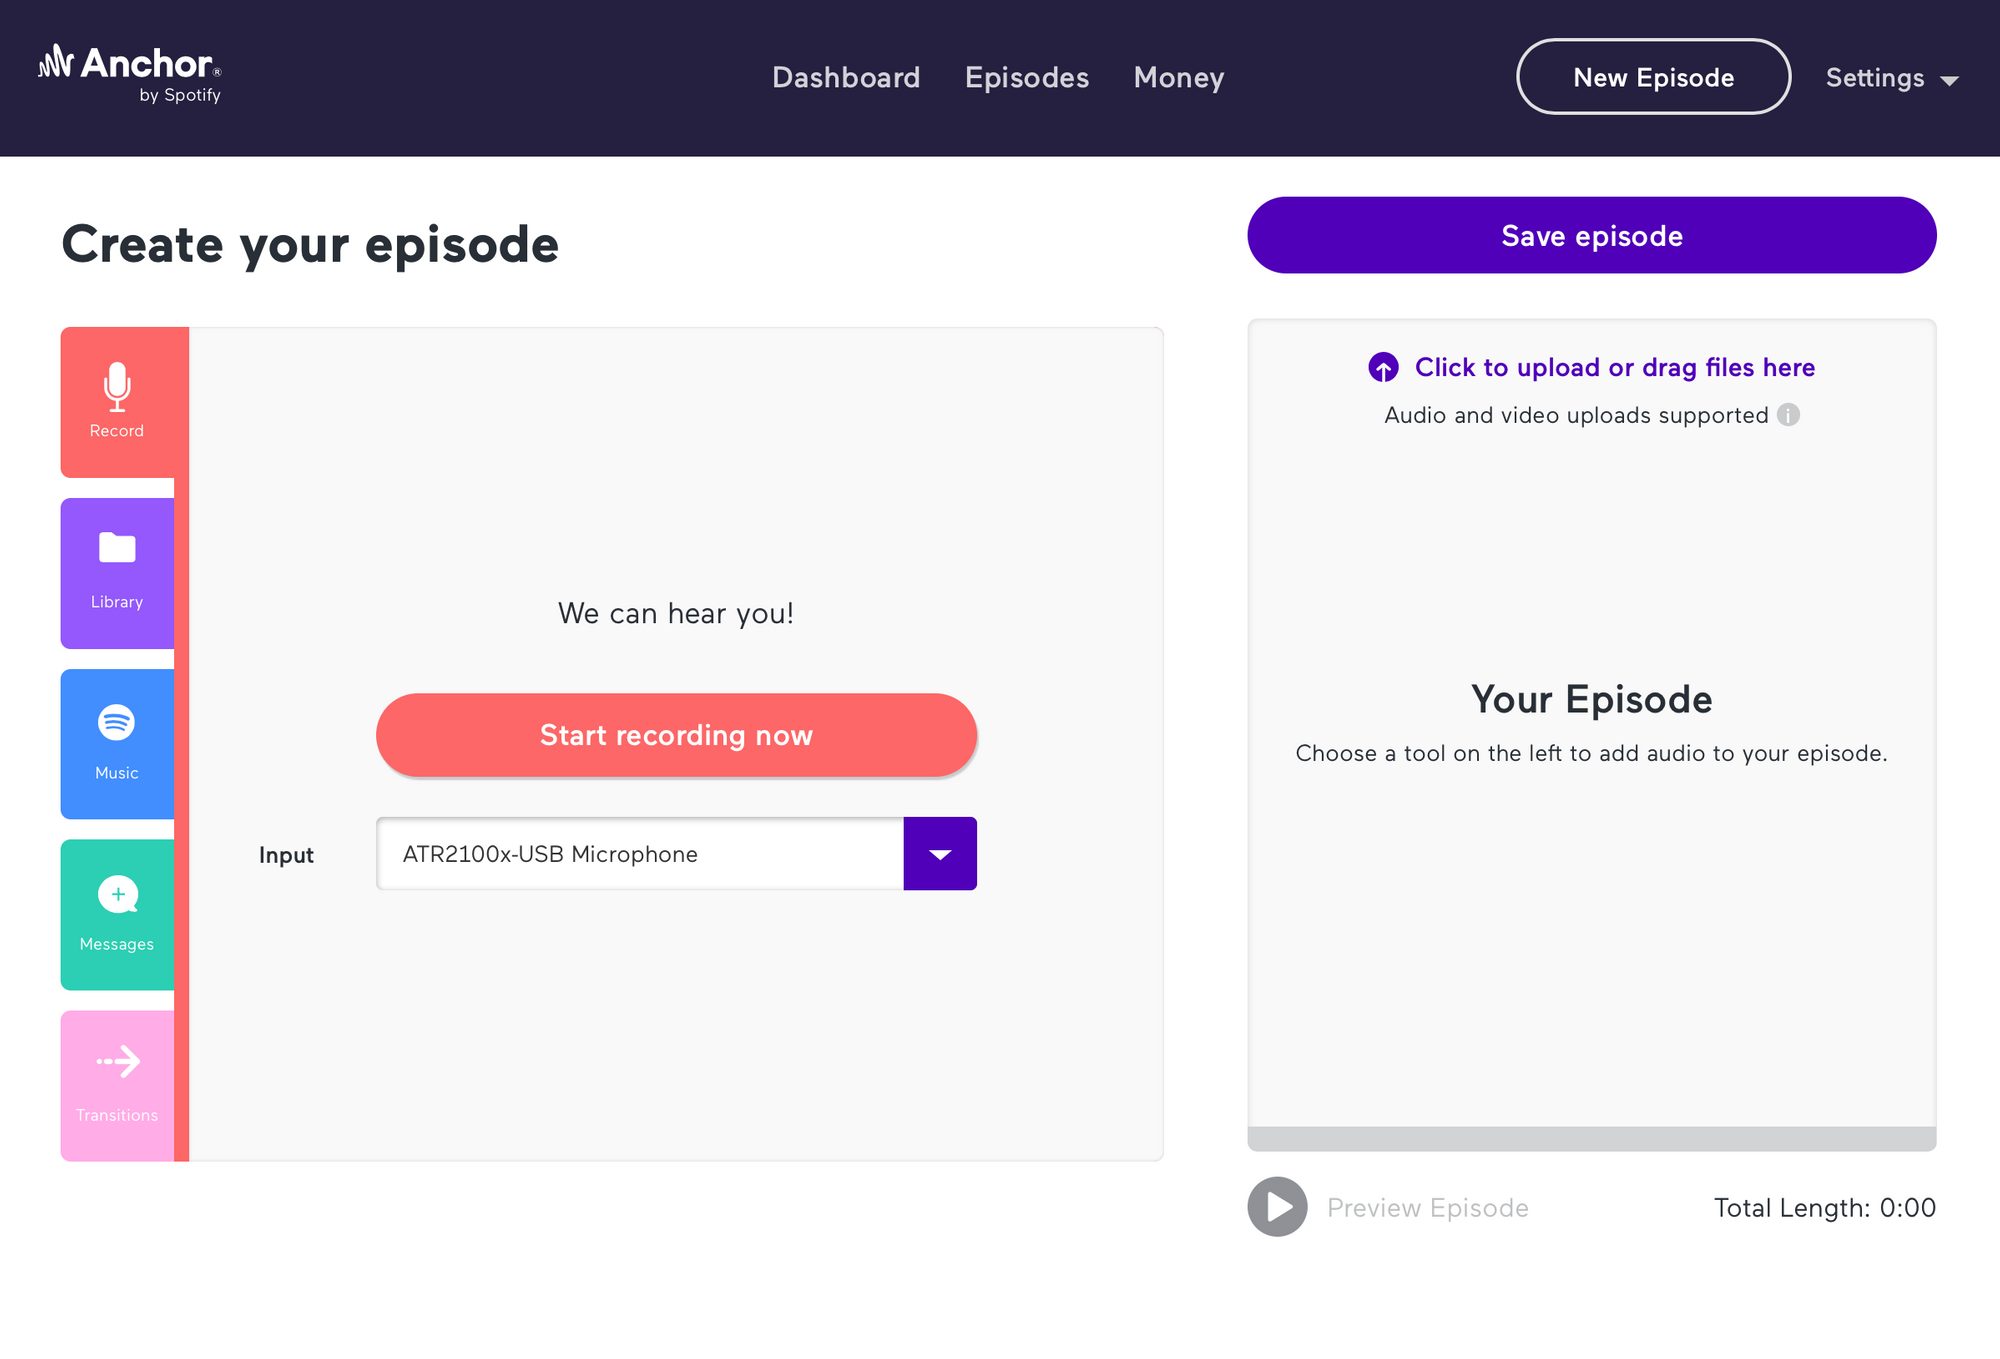
Having said that, the first place I would recommend anyone starting a podcast to look is Anchor. Owned by Spotify, Anchor is completely free and will still allow you to distribute your podcast everywhere – not just on Spotify. Aside from hosting, Anchor also has a bunch of tools to record and edit and episode right in your browser, include music from Spotify, and even monetise with ads when you're ready.
Alternatives
Process
Okay, so you've got your equipment and software and now it's time to start recording. This is the process I go through, start to finish in terms of planning, recording, editing, and publication but as you get in the swing of things you'll figure out what works best for you.
- Before we start recording, we create a shared shownotes Google Doc which is a rough outline of the show and keeps us on track. It's also the basis of what we publish along with the audio file.
- We'll start the call on Discord and record our own microphones on our local machines. We sync up our tracks either by saying "1, 2" back and forth or by clapping. This can then used during the editing process to easily ensure tracks are aligned correctly.
- I'll use an Audio Hijack session I have setup to record my raw audio as well as my podcast co-hosts via Discord. I previously used Audio Hijack's compressor and noise reduction here too but I now do this in post.
- We'll record the show with good mic technique (talk across the microphone, not into it) and upload our audio to Google Drive. I make sure to have ample amounts of water or orange soda around!
- While recording I'll take a note of any timestamps that might require edits. Coughs that slipped through (despite using Shush), talking over one another, or other interruptions along with points that will need chapters. This speeds up the editing process significantly.
- I'll then download the files and duplicate a Hindenburg Journalist project I already have setup with tracks for me and my co-host, along with the intro music. These tracks already have the correct EQ, compressor and de-noiser settings applied and Hindenburg auto-levels when I import. With some very small tweaks I can get the show sounding the same very week.
- Now it's just a case of aligning the tracks, editing the points at the timestamps I took note of when recording, and adding chapters within Hindenburg Journalist.
- Once edited, I'll export the MP3 from Hindenburg Journalist which handles the levelling before writing the file.
- After that it's time to upload the exported MP3 to our host, Fireside.
- I'll copy any relavant links or notes from the Google Doc and schedule the podcast for release!
I've got the post-recording process to the point where it now takes me no more than 30-45 minutes. I feel like having clean audio in the first place is the key to keeping editing to a minimum and with a good mic, good technique, and discipline of not talking over each other and muting where necessary, it's pretty easy to obtain.
Starting a podcast might seem like a daunting idea but thanks to free software and free hosting, the cost of entry is lower than its ever been. If you've been thinking of getting behind the mic for a while, there's never been a better time to get your voice heard.
I also hope you'll take the time to check out my weekly Nintendo and video games podcast, the PotsCast. We've also recently started putting out a video version on YouTube.