Restoring an Apple Extended Keyboard II
I've been looking to foray into the realm of mechanical keyboards for well over a year but never took the plunge. I'd been looking at either a modern keyboard such as a Pok3r or something vintage like an IBM Model M.
Something I didn't realise was Apple also used to make mechanical keyboards — right up until 1996 when they discontinued the Apple Extended Keyboard II. I had a look around for an ISO version for a while but for some reason the only ones I could find on eBay were in the US and postage was often as much as — if not more than — the value of the keyboard.
That was until this listing came up on eBay:
They keyboards were in a sorry state but for ~£20 including postage via courier I thought I'd give it a shot. Considering the weight of these things, postage is usually £8-£12.
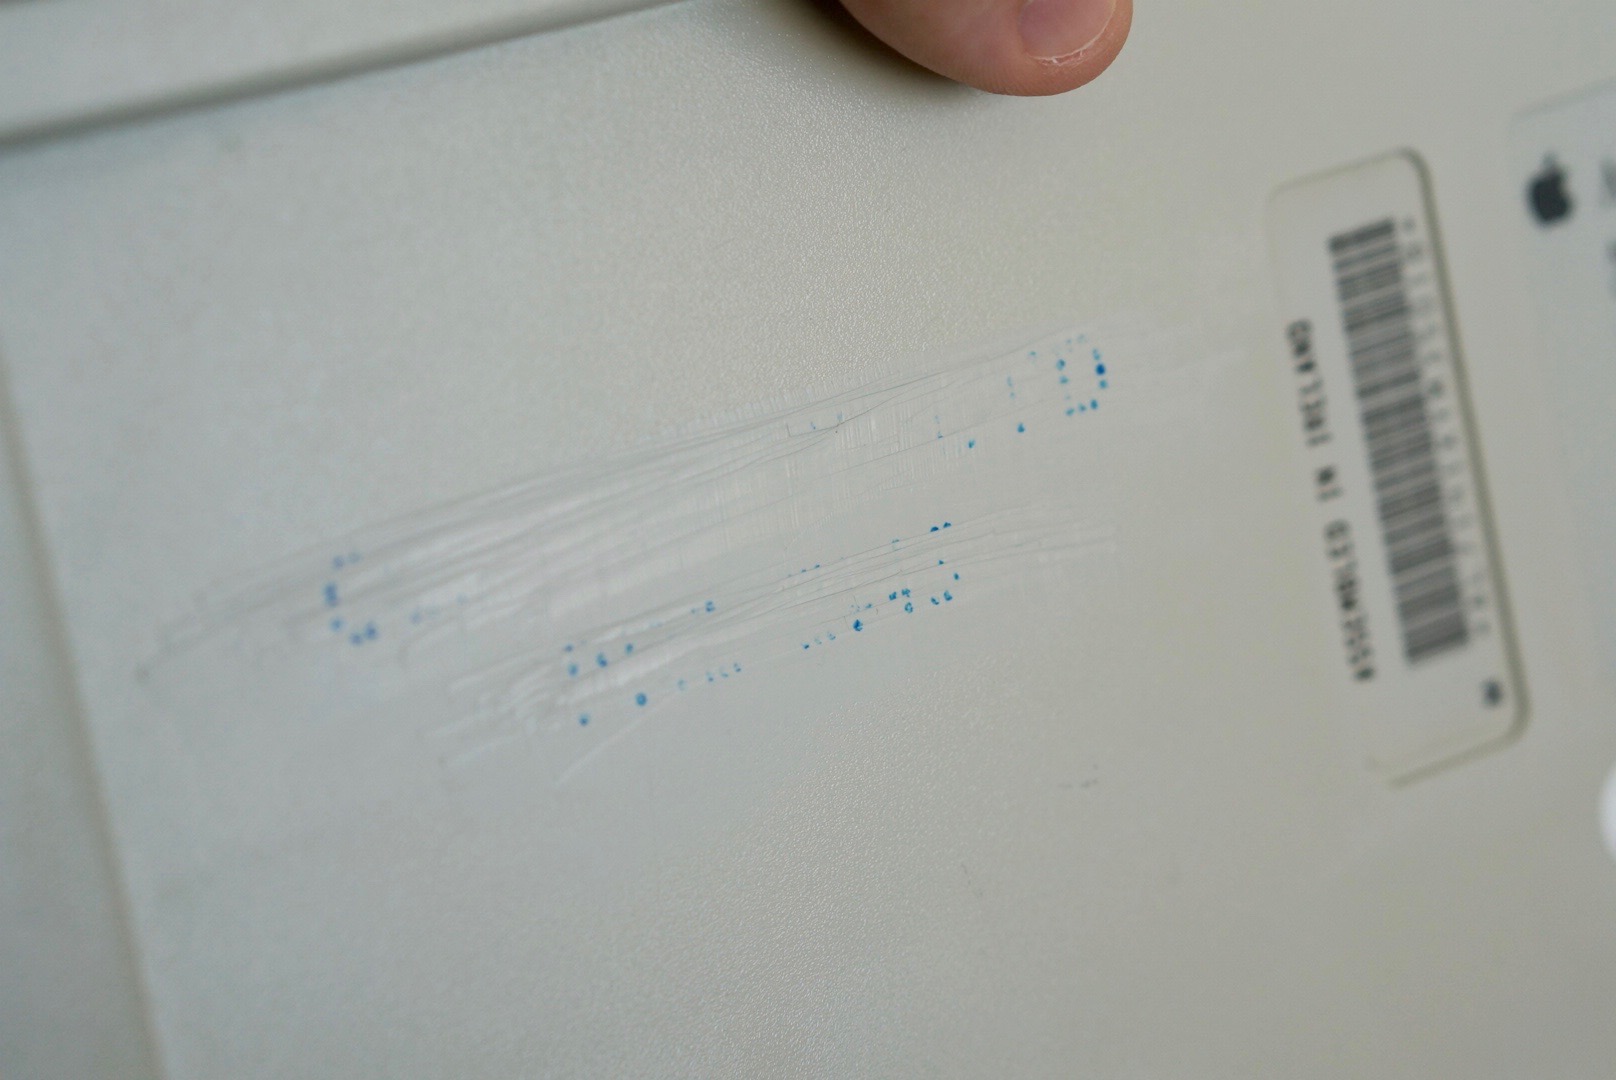
Some of the keyboards in the photo were in a worse state than others with those nasty blue security messages embossed in them and then scratched off with some wire wool. I crossed my fingers that I would get one of the two that didn't have that and thankfully lucked out.
Cleaning
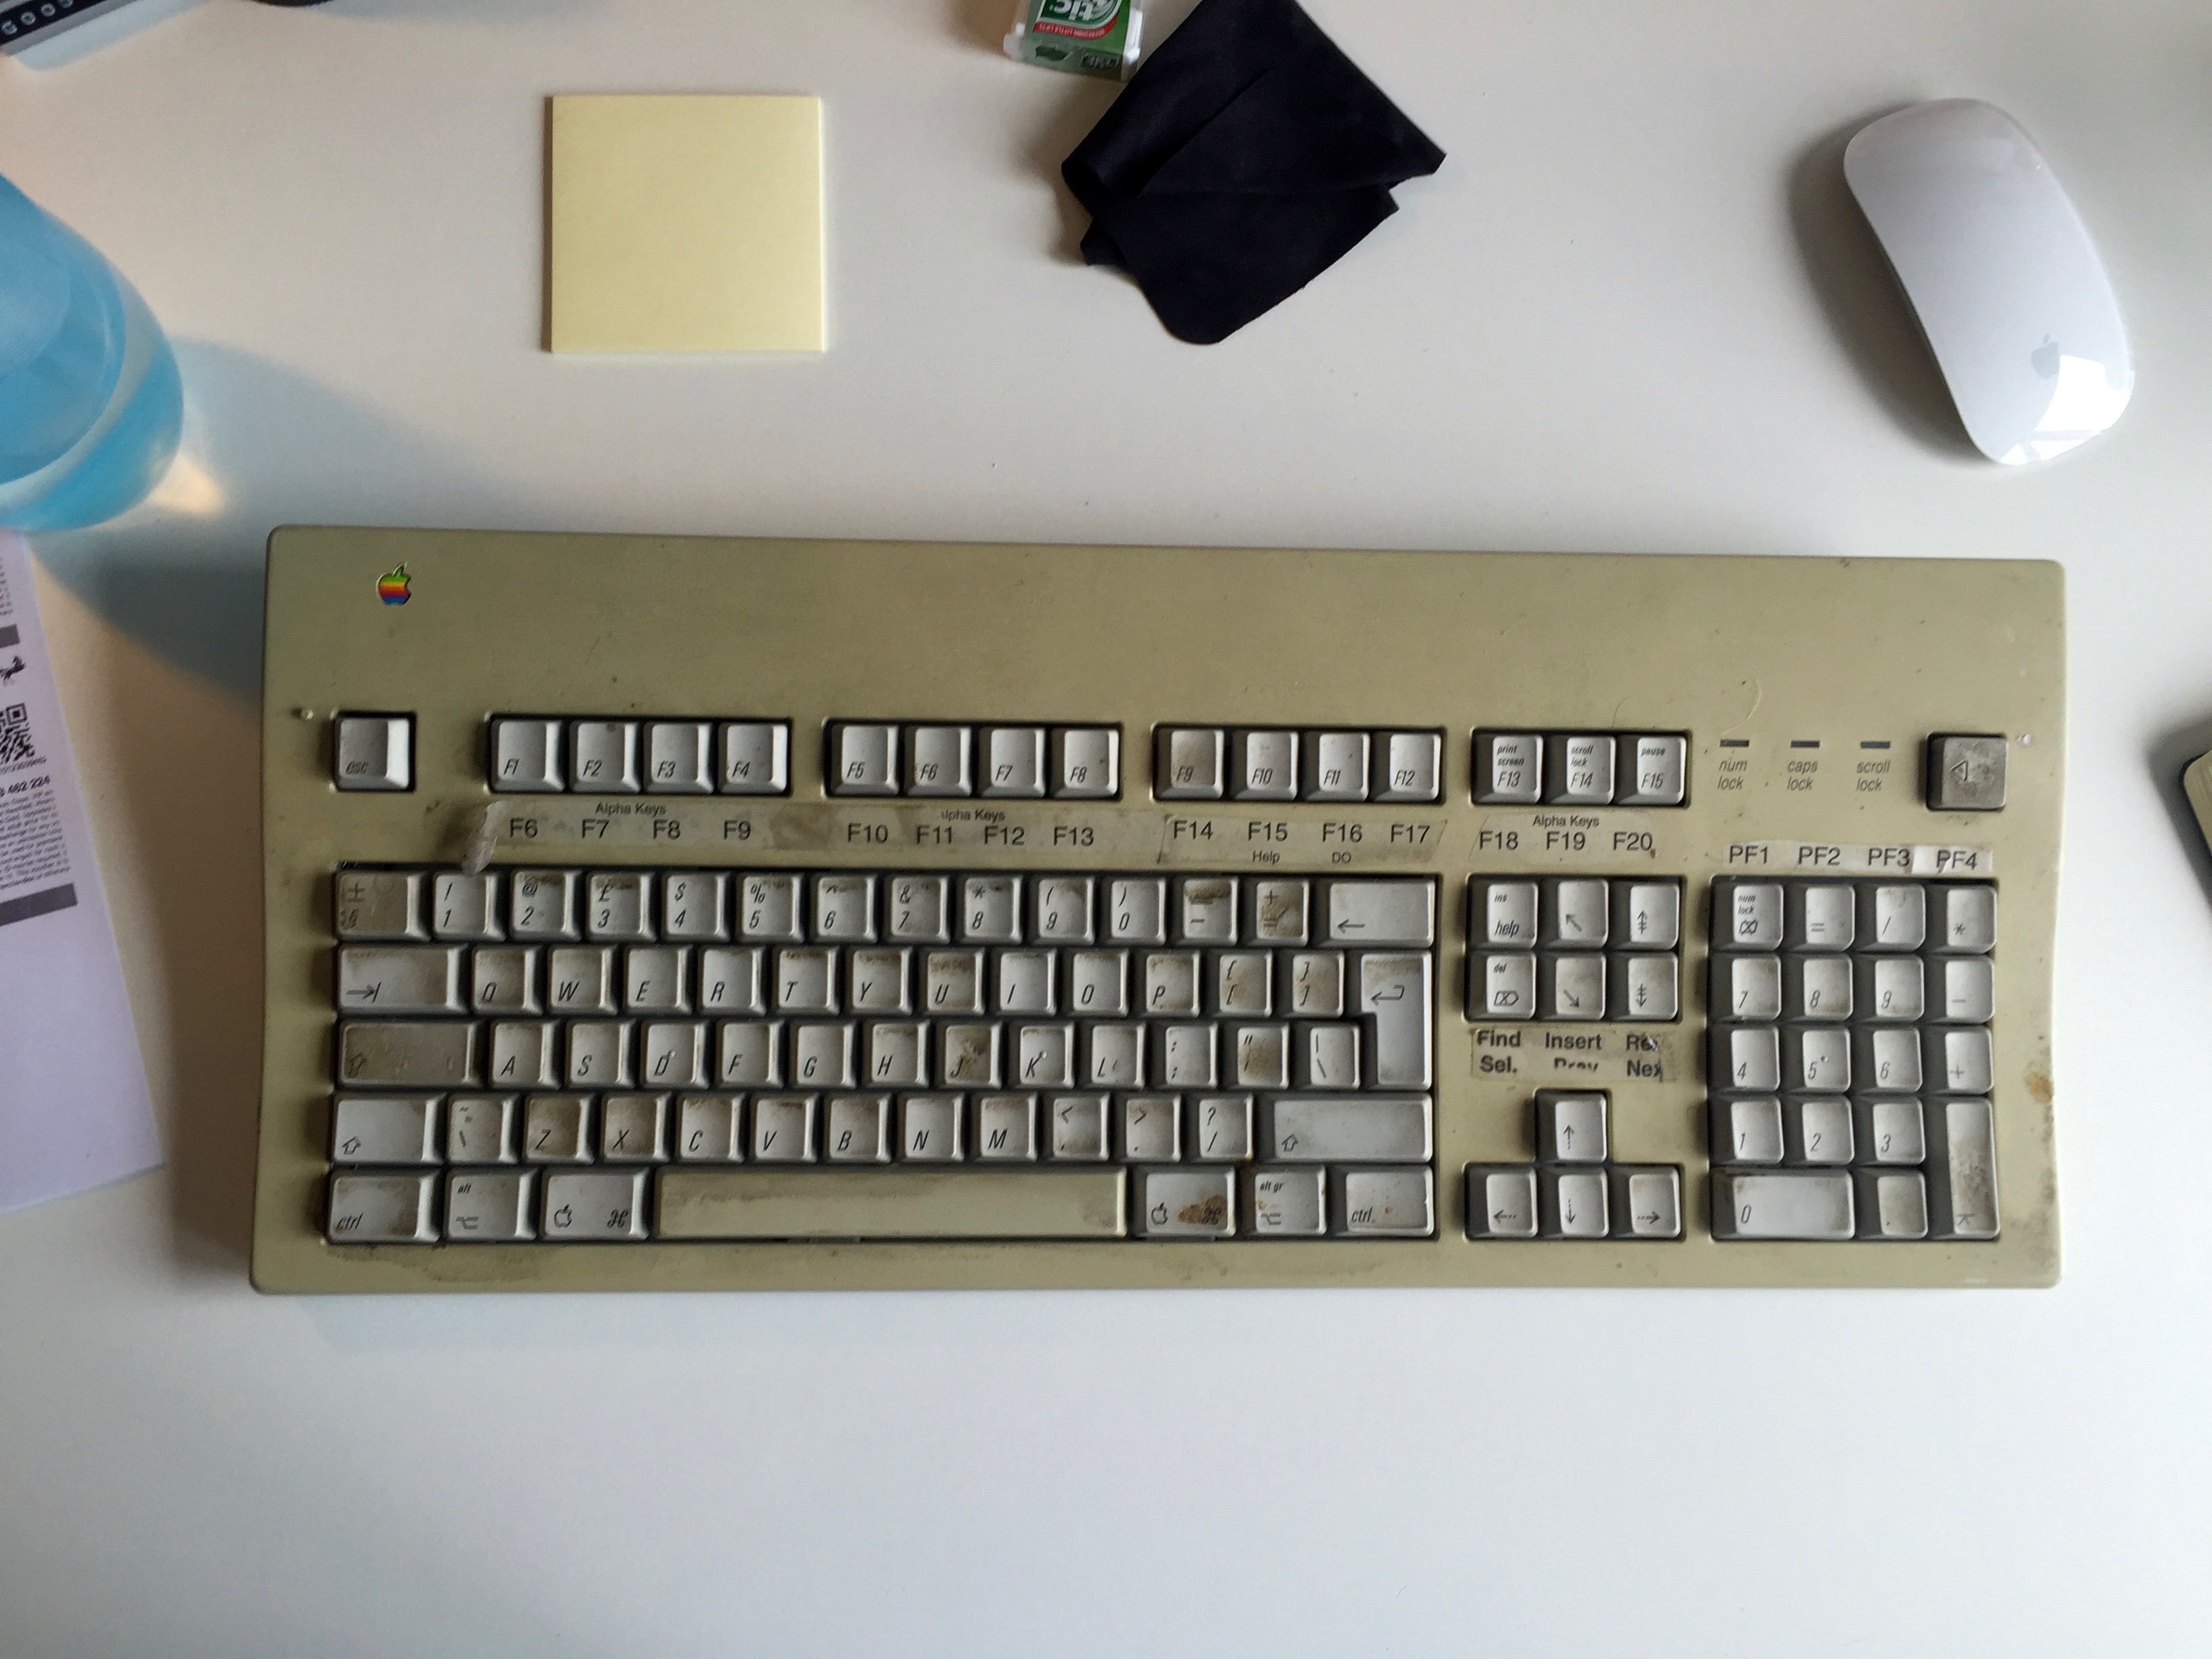
When it arrived it was apparent just how dirty this thing was. I don't think it's been cleaned at all in its 20 year life span and from what I can tell this thing is from a school. That's 20 years and hundreds of children's grubby fingers.
It did have one of those blue security messages embossed in it but thankfully this was on the back. Someone also did a pretty good job of scratching it off.
The first thing I did was rip off those stickers around the function keys. I have no idea what the purpose of them was, perhaps specific labels for some app? Removal of the labels only accentuated the yellowing of the rest of the bezel and left behind a nasty sticky residue.
Next, I took the bezel off. For an Apple product it was surprisingly easy. Just a single Philips head screw on the back of the keyboard and then a little bit of prising to undo 4 clips surrounding the bezel.
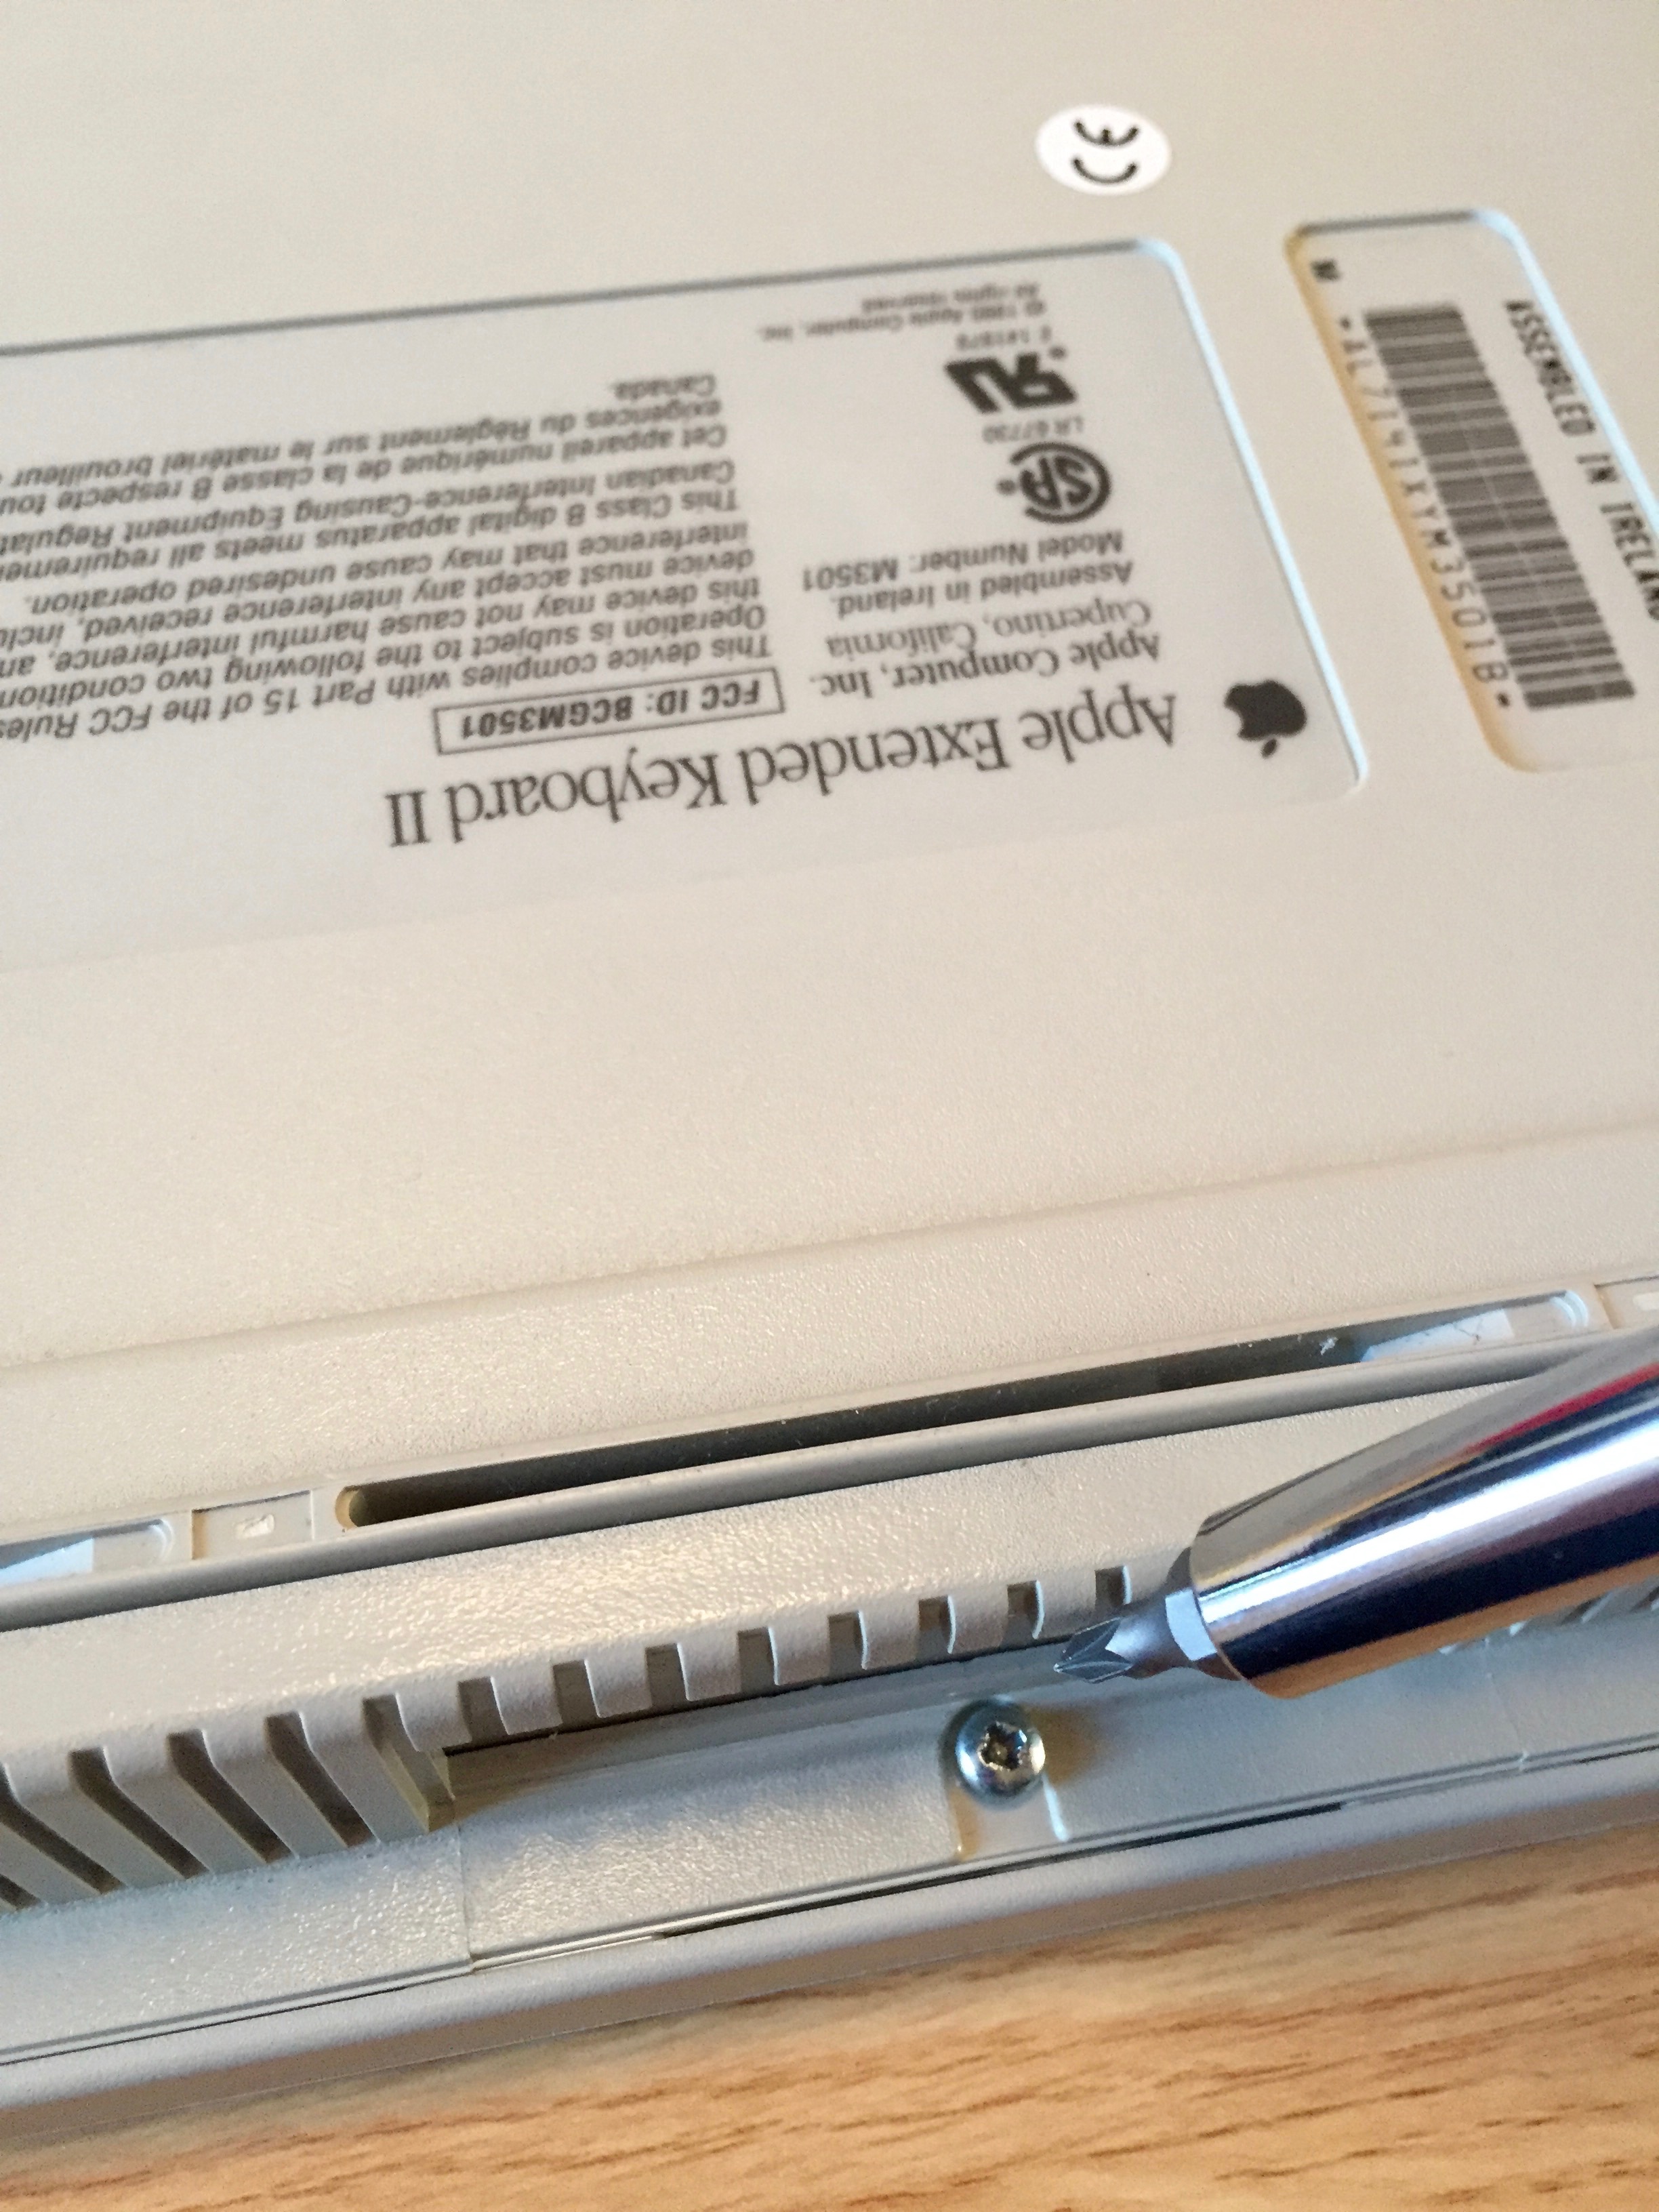
I used a card from my wallet to avoid damaging the plastic when unclipping it from the base.
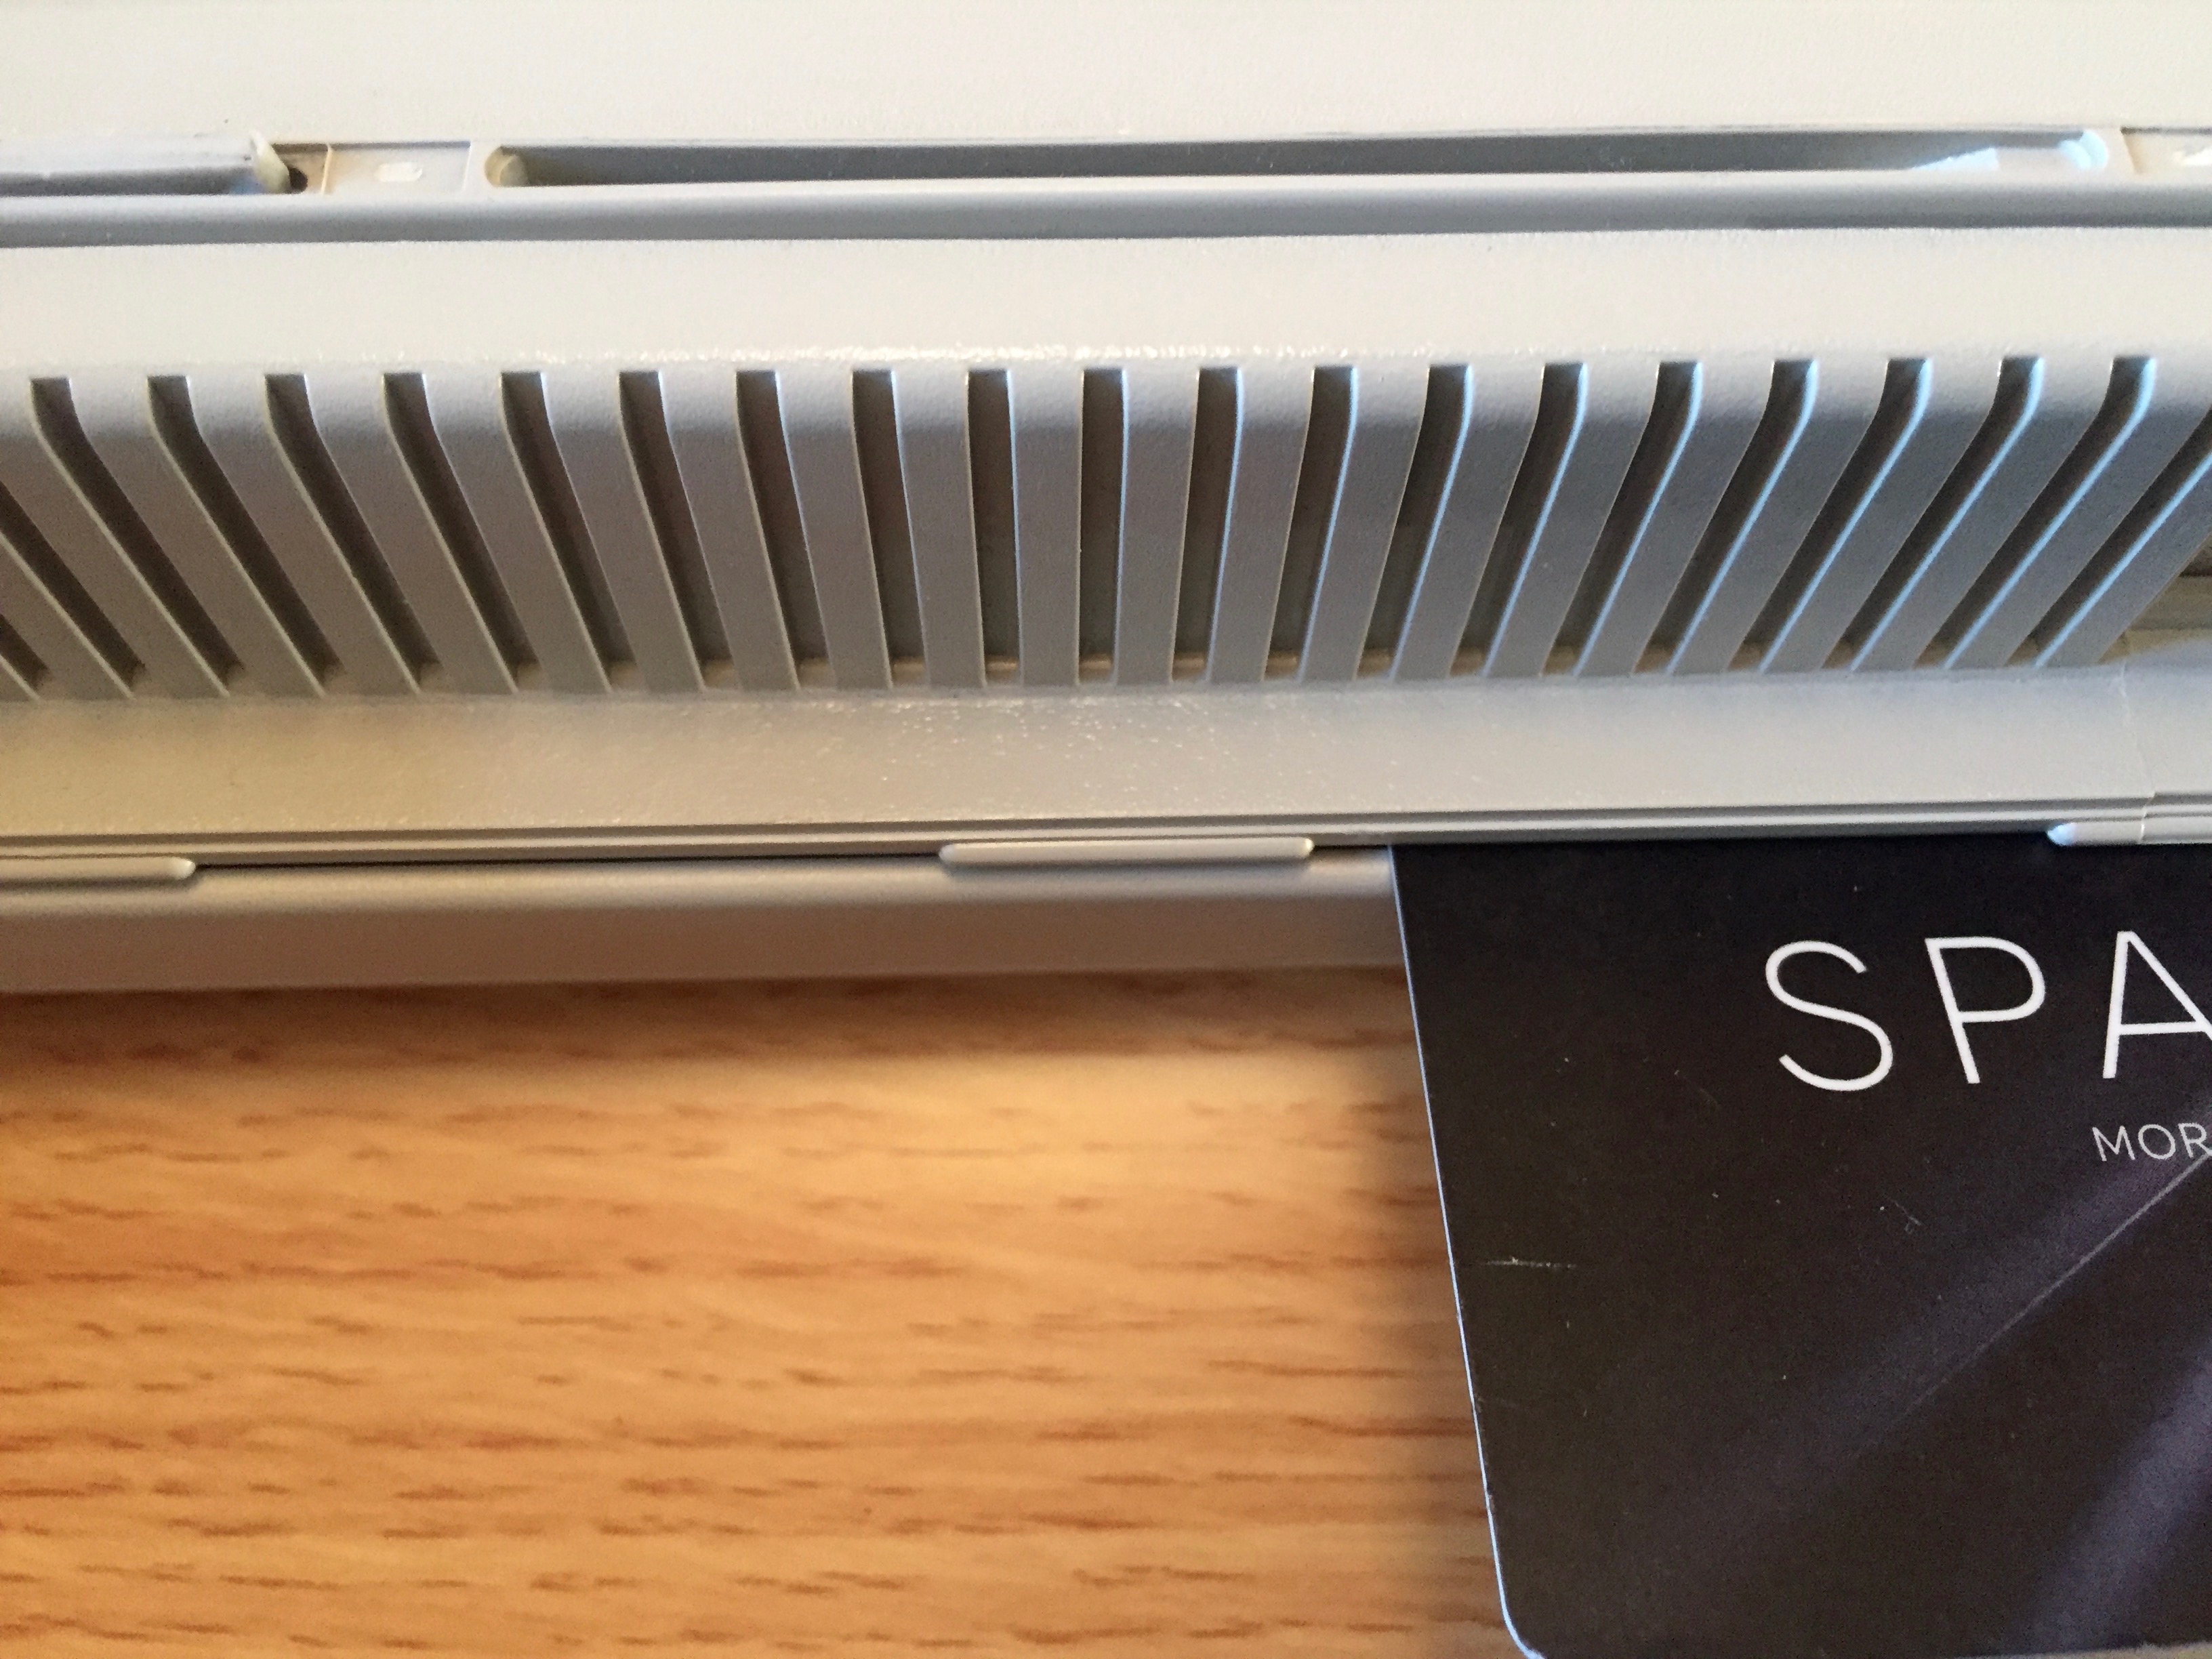
Once unclipped, the bezel just came straight off. I gave it a first pass with some kitchen cleaner wipes which got rid of some of the dirt. Next I used surgical spirits I bought at the pharmacy to remove that sticky residue left over from the old stickers and some marks that I originally assumed were scratches.
Once the bezel was clean it was time to tackle the keys. I started pulling them off one by one with a butter knife being careful to prise only the cap and not the switch. The longer keys such as enter, space and the caps lock key have springs to help them bounce back more easily so were slightly more difficult to get off.
After that I soaked all the keys in warm soapy water for 15 minutes before rinsing and draining them. The next bit was probably the most time consuming of the clean. I went over each key with a cloth and surgical spirits to get the remaining grime off (and there was a lot of it).
While the keys were off I used some compressed air to get rid of the dust and grime that had collected under there. Then I popped all the keys back on their switches one by one and double checked everything was in the right place.

The keyboard uses Alps cream switches. Oddly, the home keys are D & K as opposed to F & J
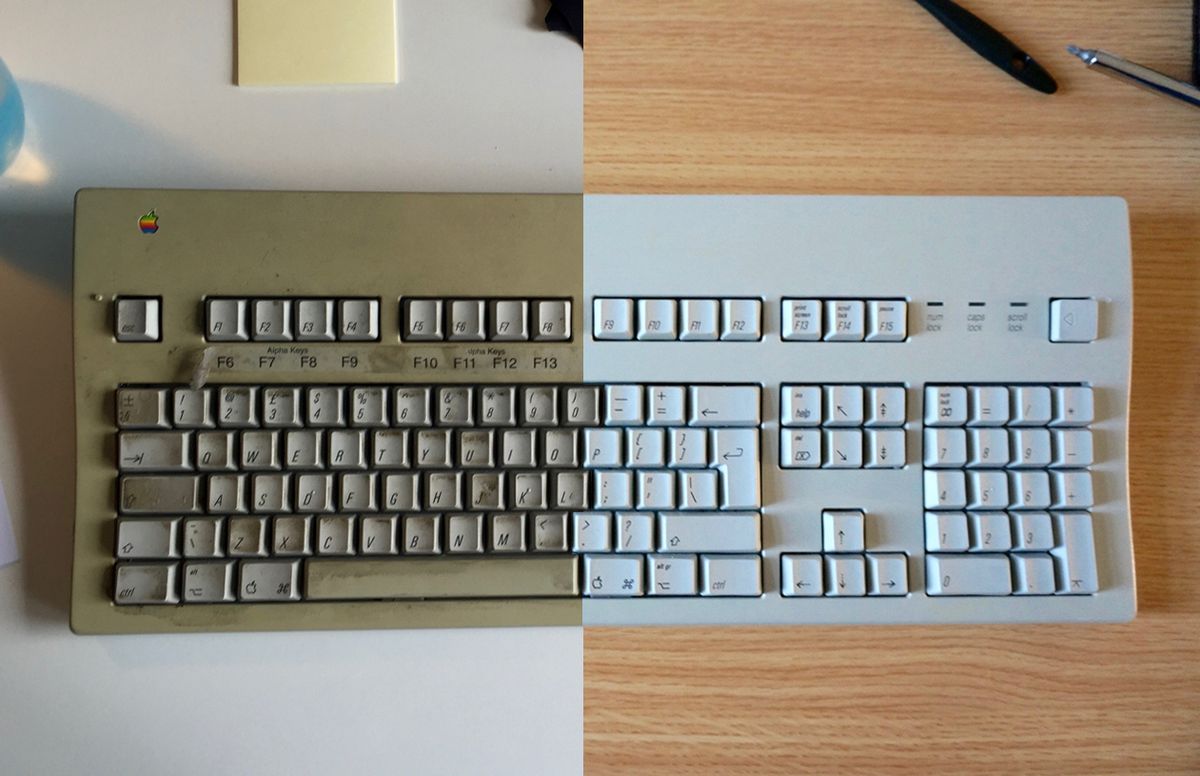
De-yellowing
The keys are made of PBT plastic (with the exception of the space bar) and so remained the grey colour they were made over 20 years ago. Unfortunately due to exposure to UV light, all of the other plastic on the keyboard such as the bezel and the spacebar (made of ABS) went yellow.
You can clearly see here the difference between the space bar and the rest of the keys.
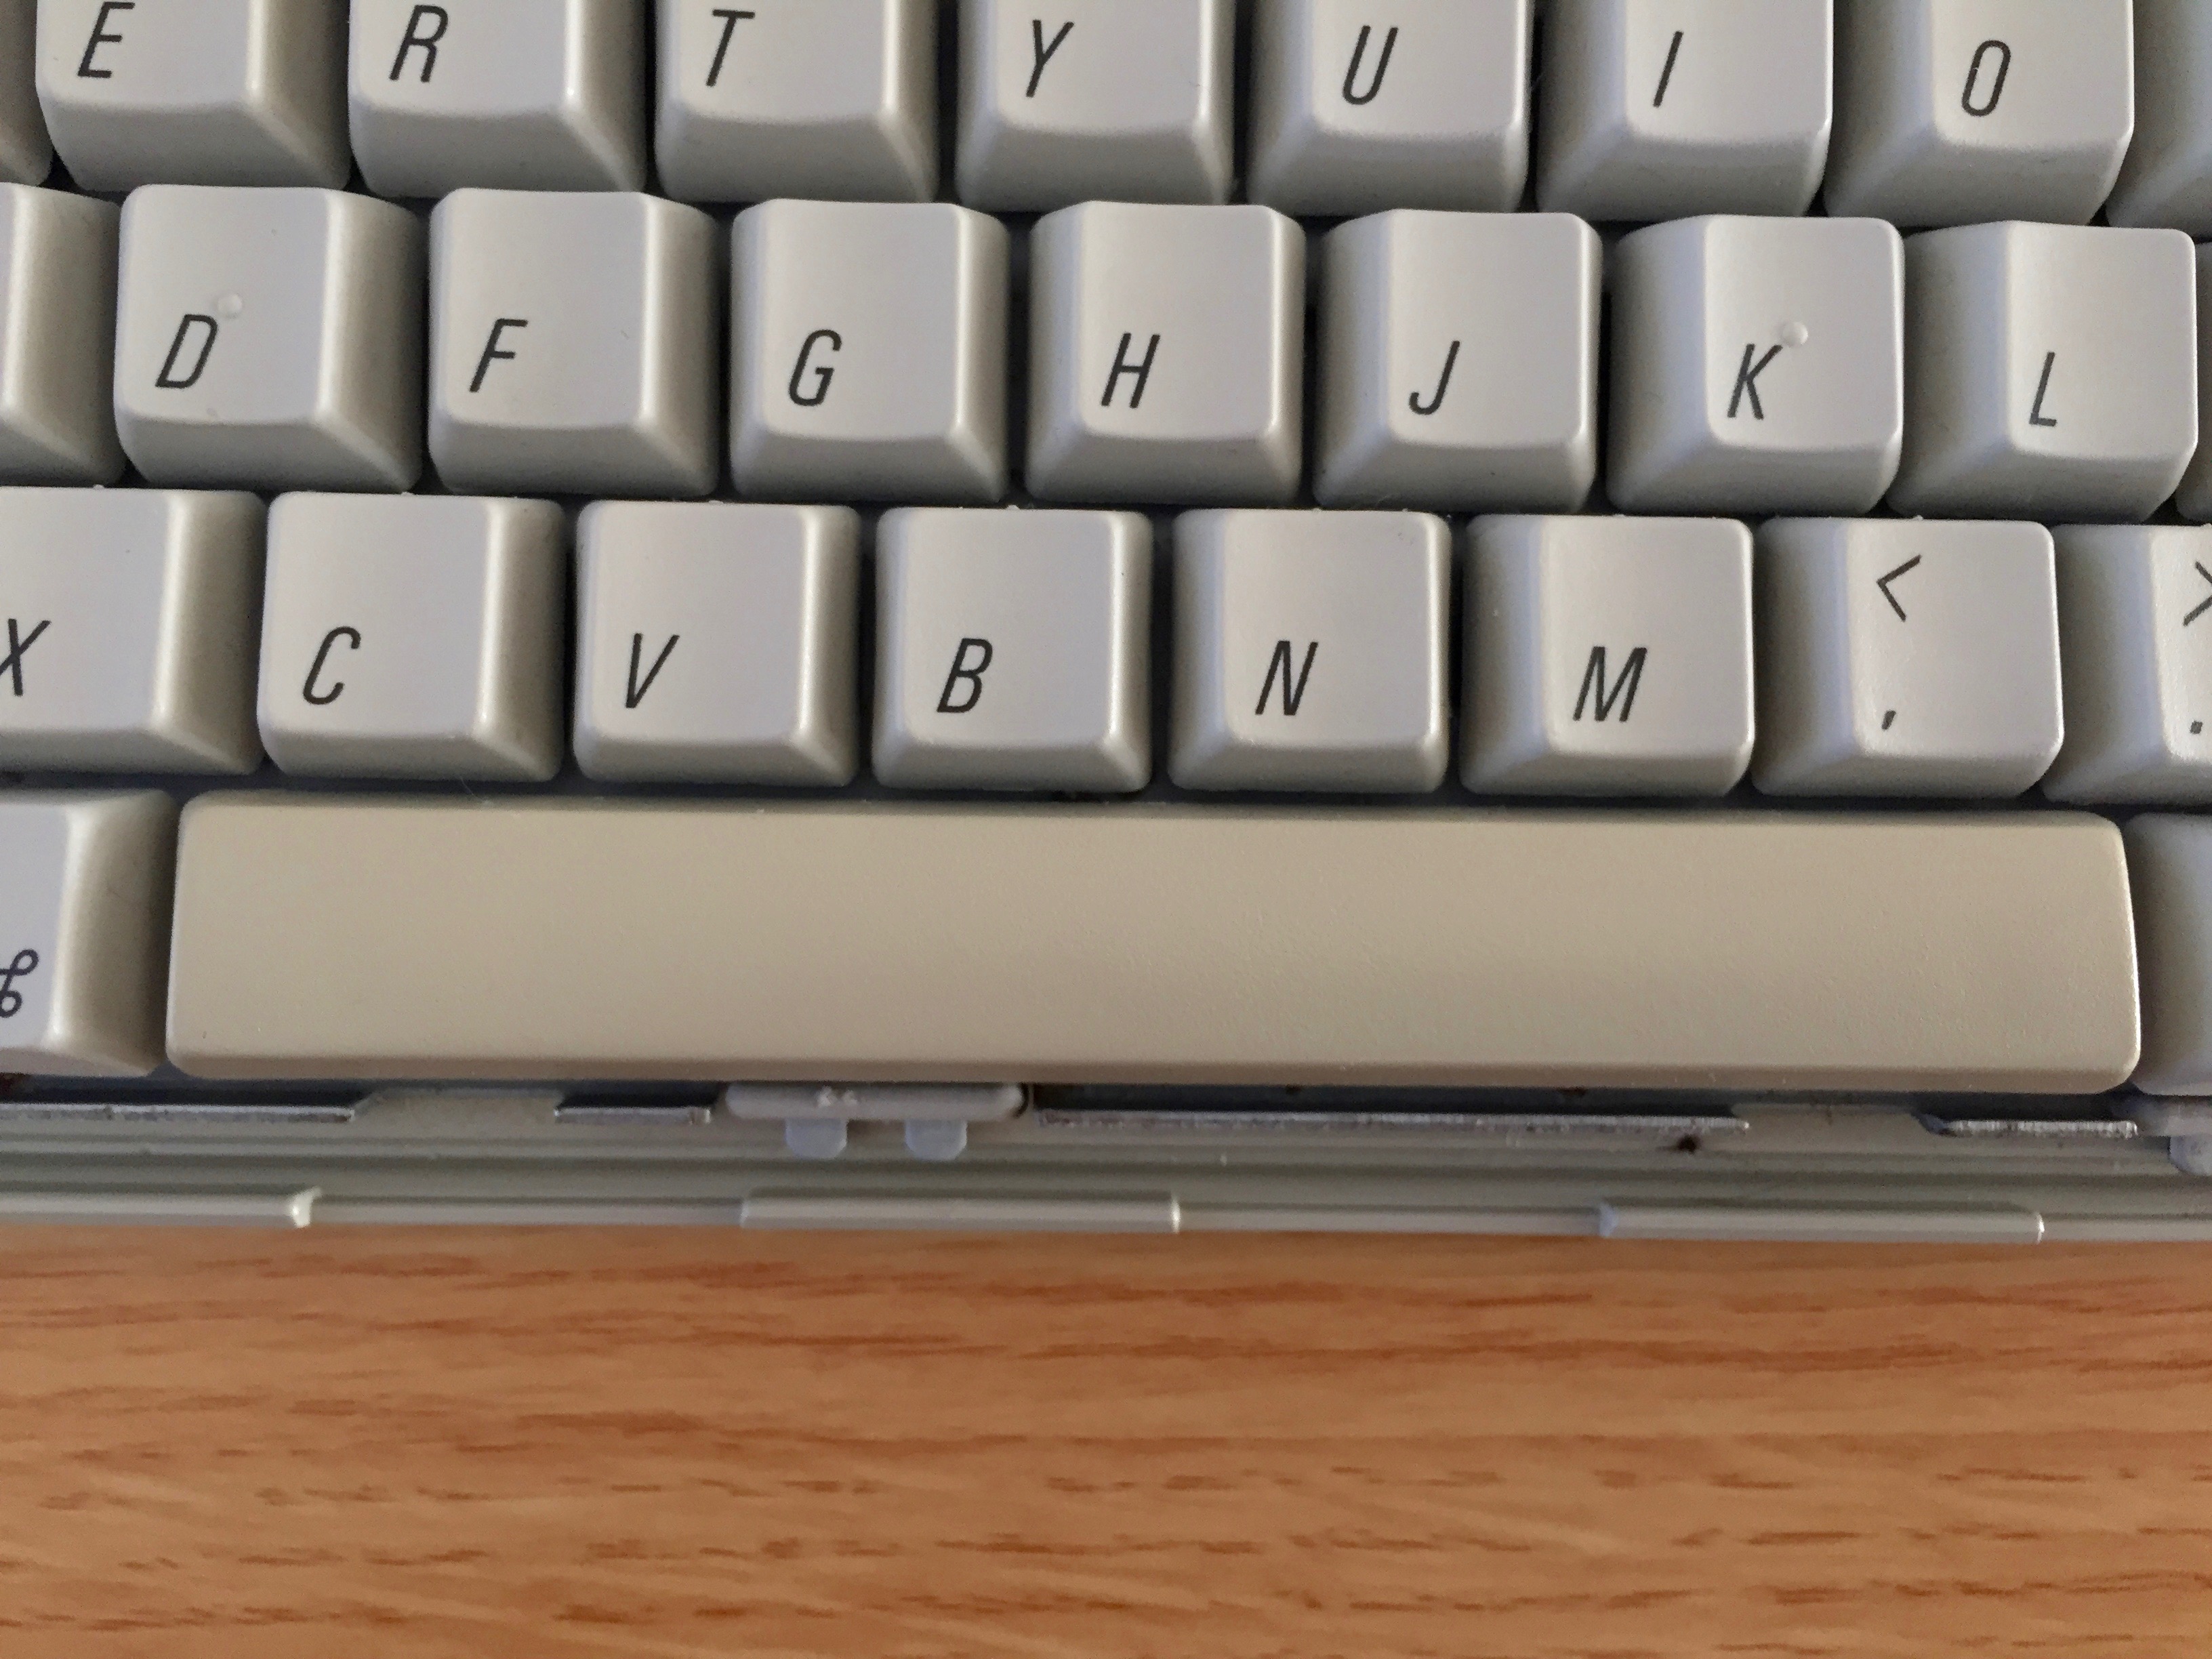
A lot of people confuse this yellowing with being dirty but it is in fact bromine — a fire retardant used in older plastics – that leaks out of the plastic when exposed to heat or UV light.
Retr0bright
I always assumed it was impossible to fix but it turns out the Internet has a solution to everything. In this case some clever people found out that if you mix hydrogen peroxide, Oxy Clean, and xanthan gum together you'll end up with something called Retr0bright. Together these ingredients make a creamy-like substance that can be pasted onto old plastics and then (oddly) activated with UV light to remove the yellowing.
I had a go at making some Retr0bright but ended up with something that was way too watery to be effective. Even when I did attempt to wrap it up in clingfilm the mixture just poured off the plastic and onto the slabs in my garden.
Hair dye cream
After my failed homemade attempts I thought about buying pre-made Retr0bright from eBay but it was fairly expensive and there was no guarantee it would be any good. I started looking around for some alternatives to see if anything else would work.
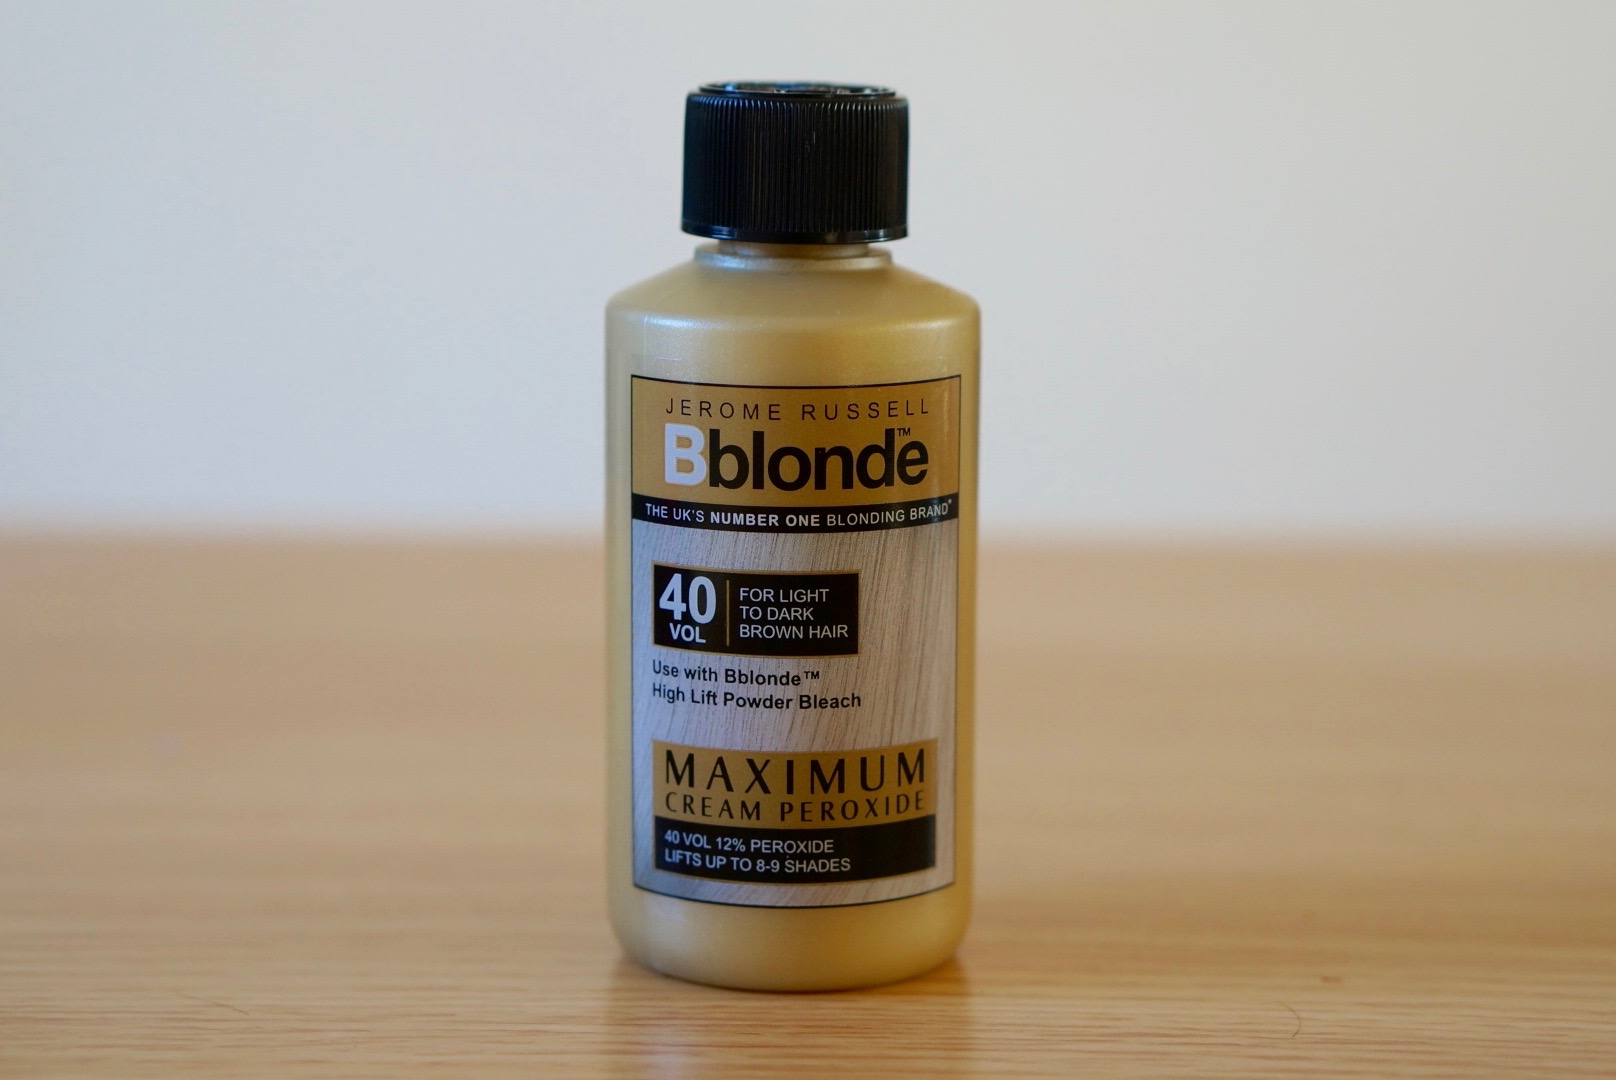
The hydrogen peroxide I used when making my Retr0bright was from the pharmacy and intended to be used as an antiseptic or a mouthwash(?!?!). It seems however that there are a number of uses for the stuff and it's actually an active ingredient in blonde hair dye kits. The kits usually come with multiple parts. There's a cream for the stage 1 bleaching and then a powder that does the actual dying.
Some thoughtful sellers on eBay have bought loads of kits in bulk and are selling the parts off separately. As I only wanted the cream this was perfect because kits usually cost about £10 in the shops. The cream I got was Jerome Russell Bblonde 12% Hydrogen Peroxide Cream for the grand total of £2.25.
Take 2
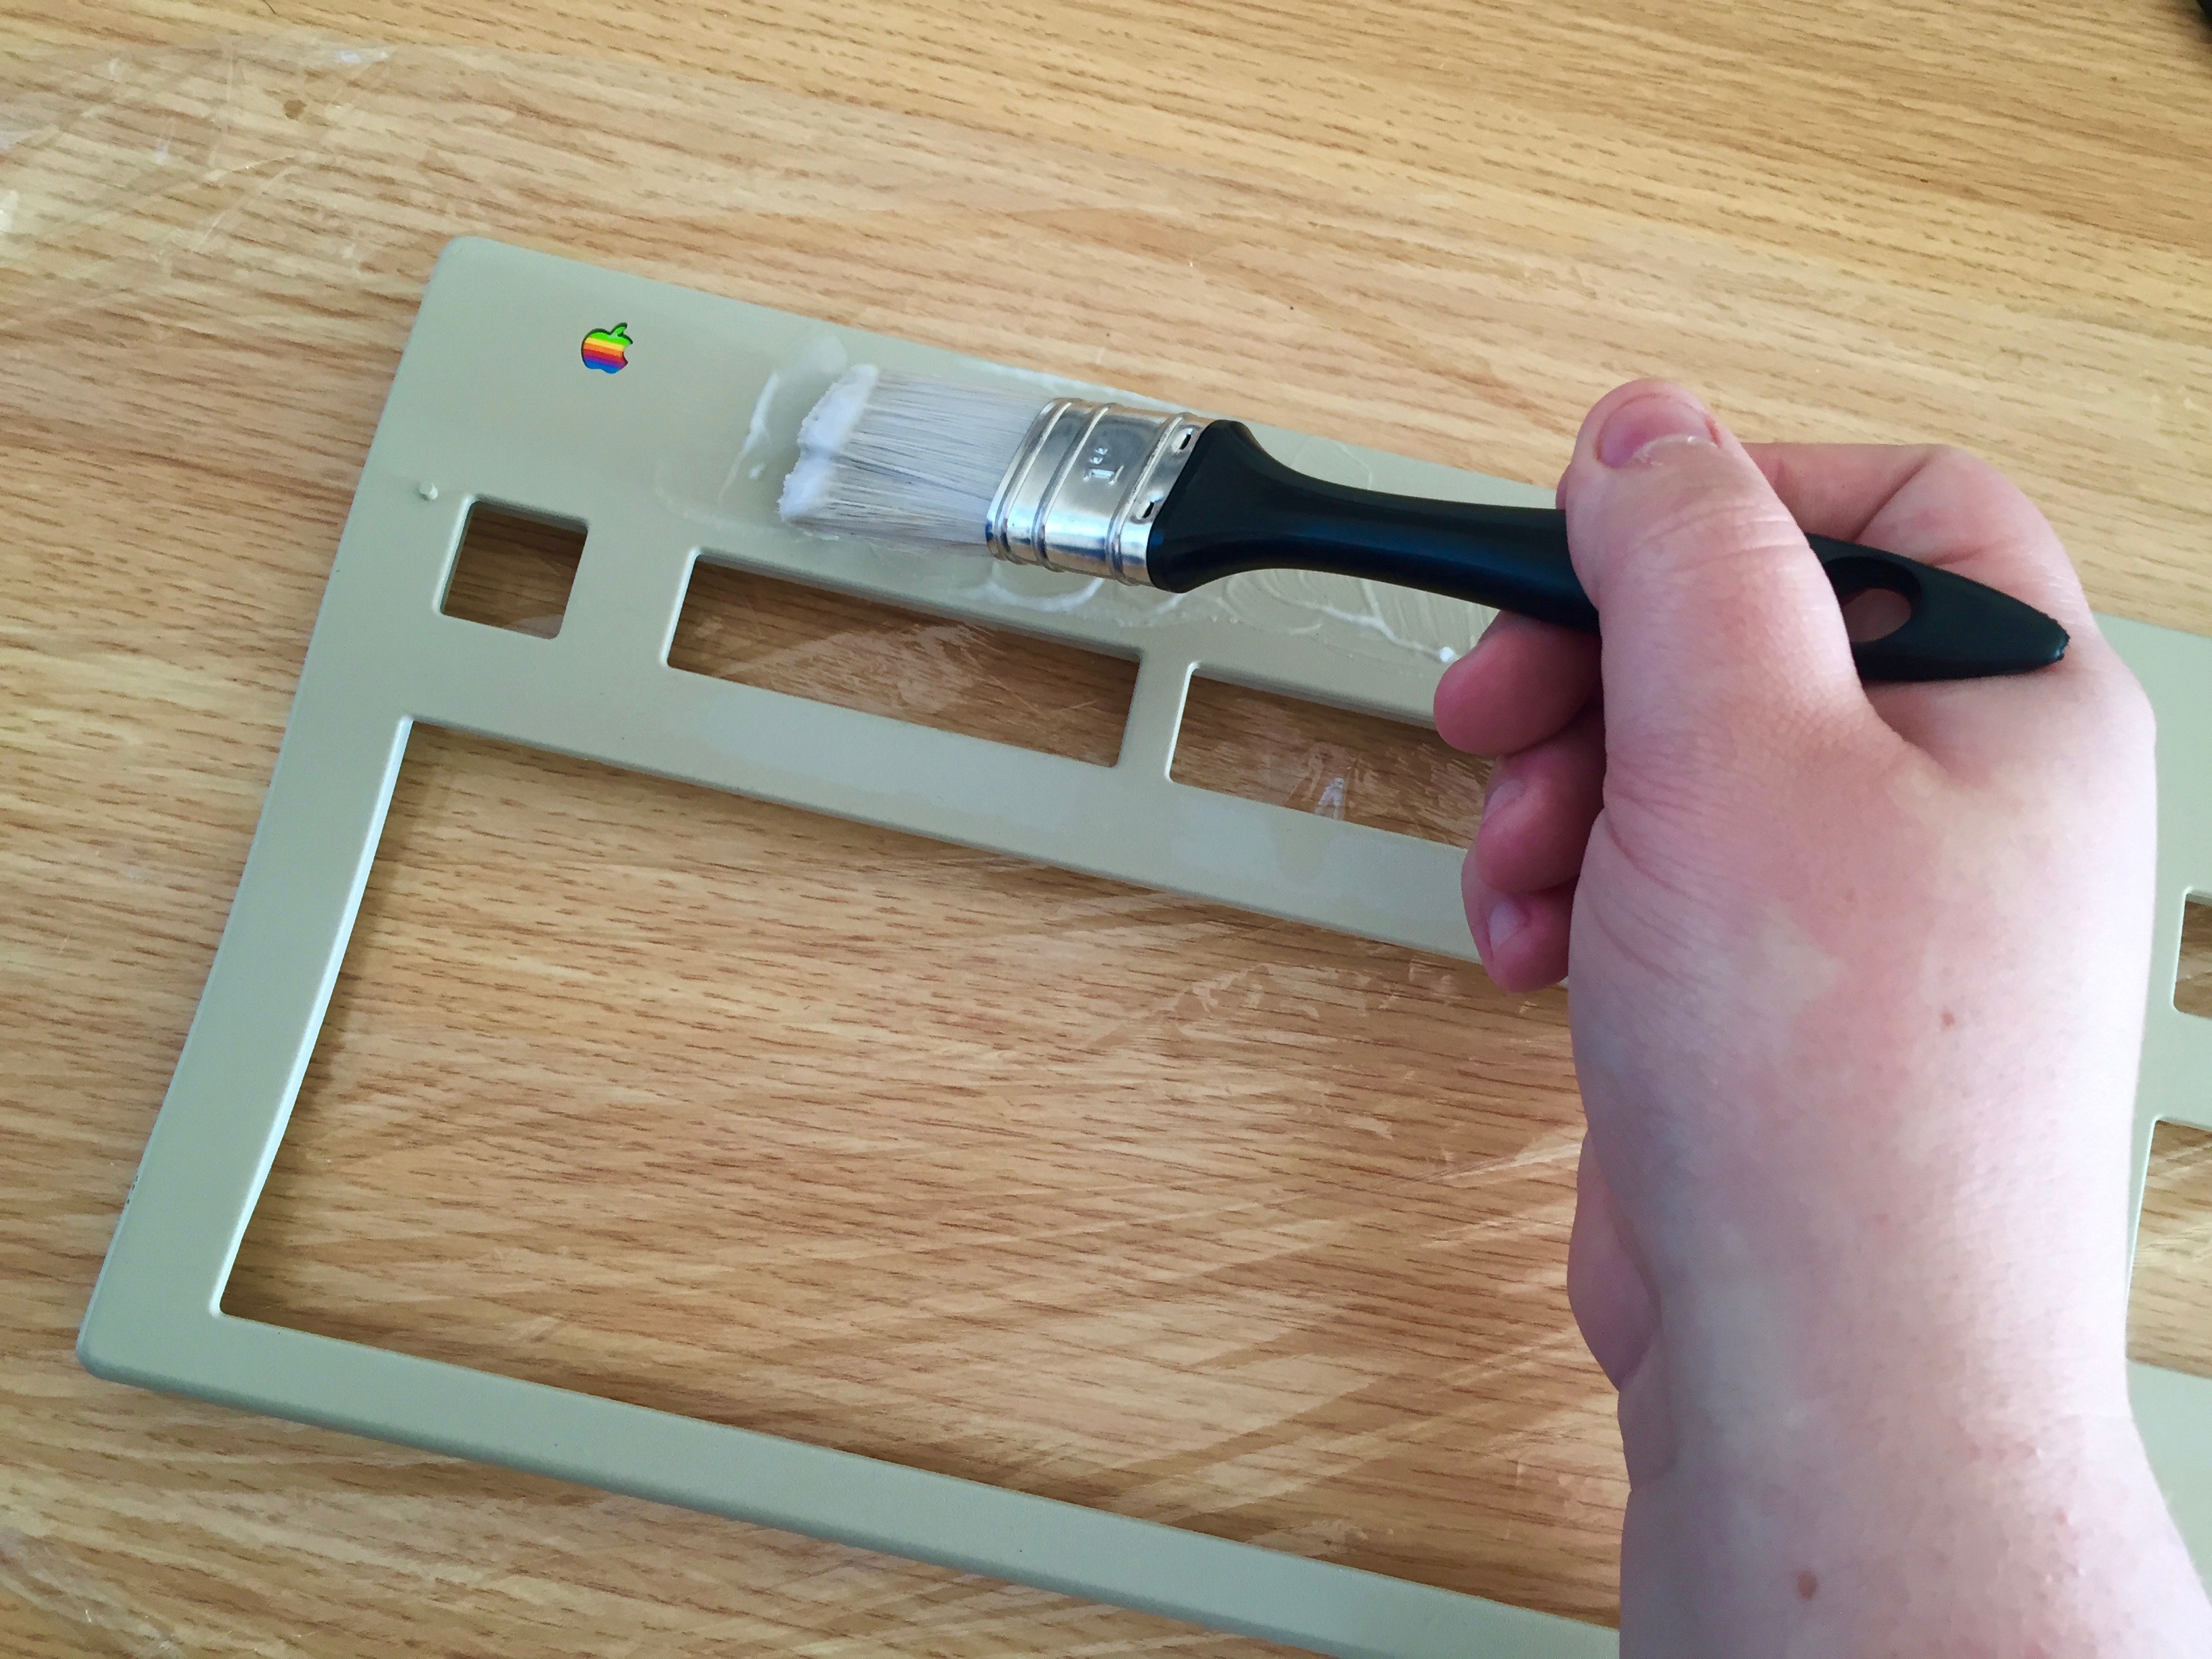
After my previous failed attempt I'd put the keyboard back together and started using it. I waited for a lovely sunny day to take full advantage of the sun's rays before giving it another go.
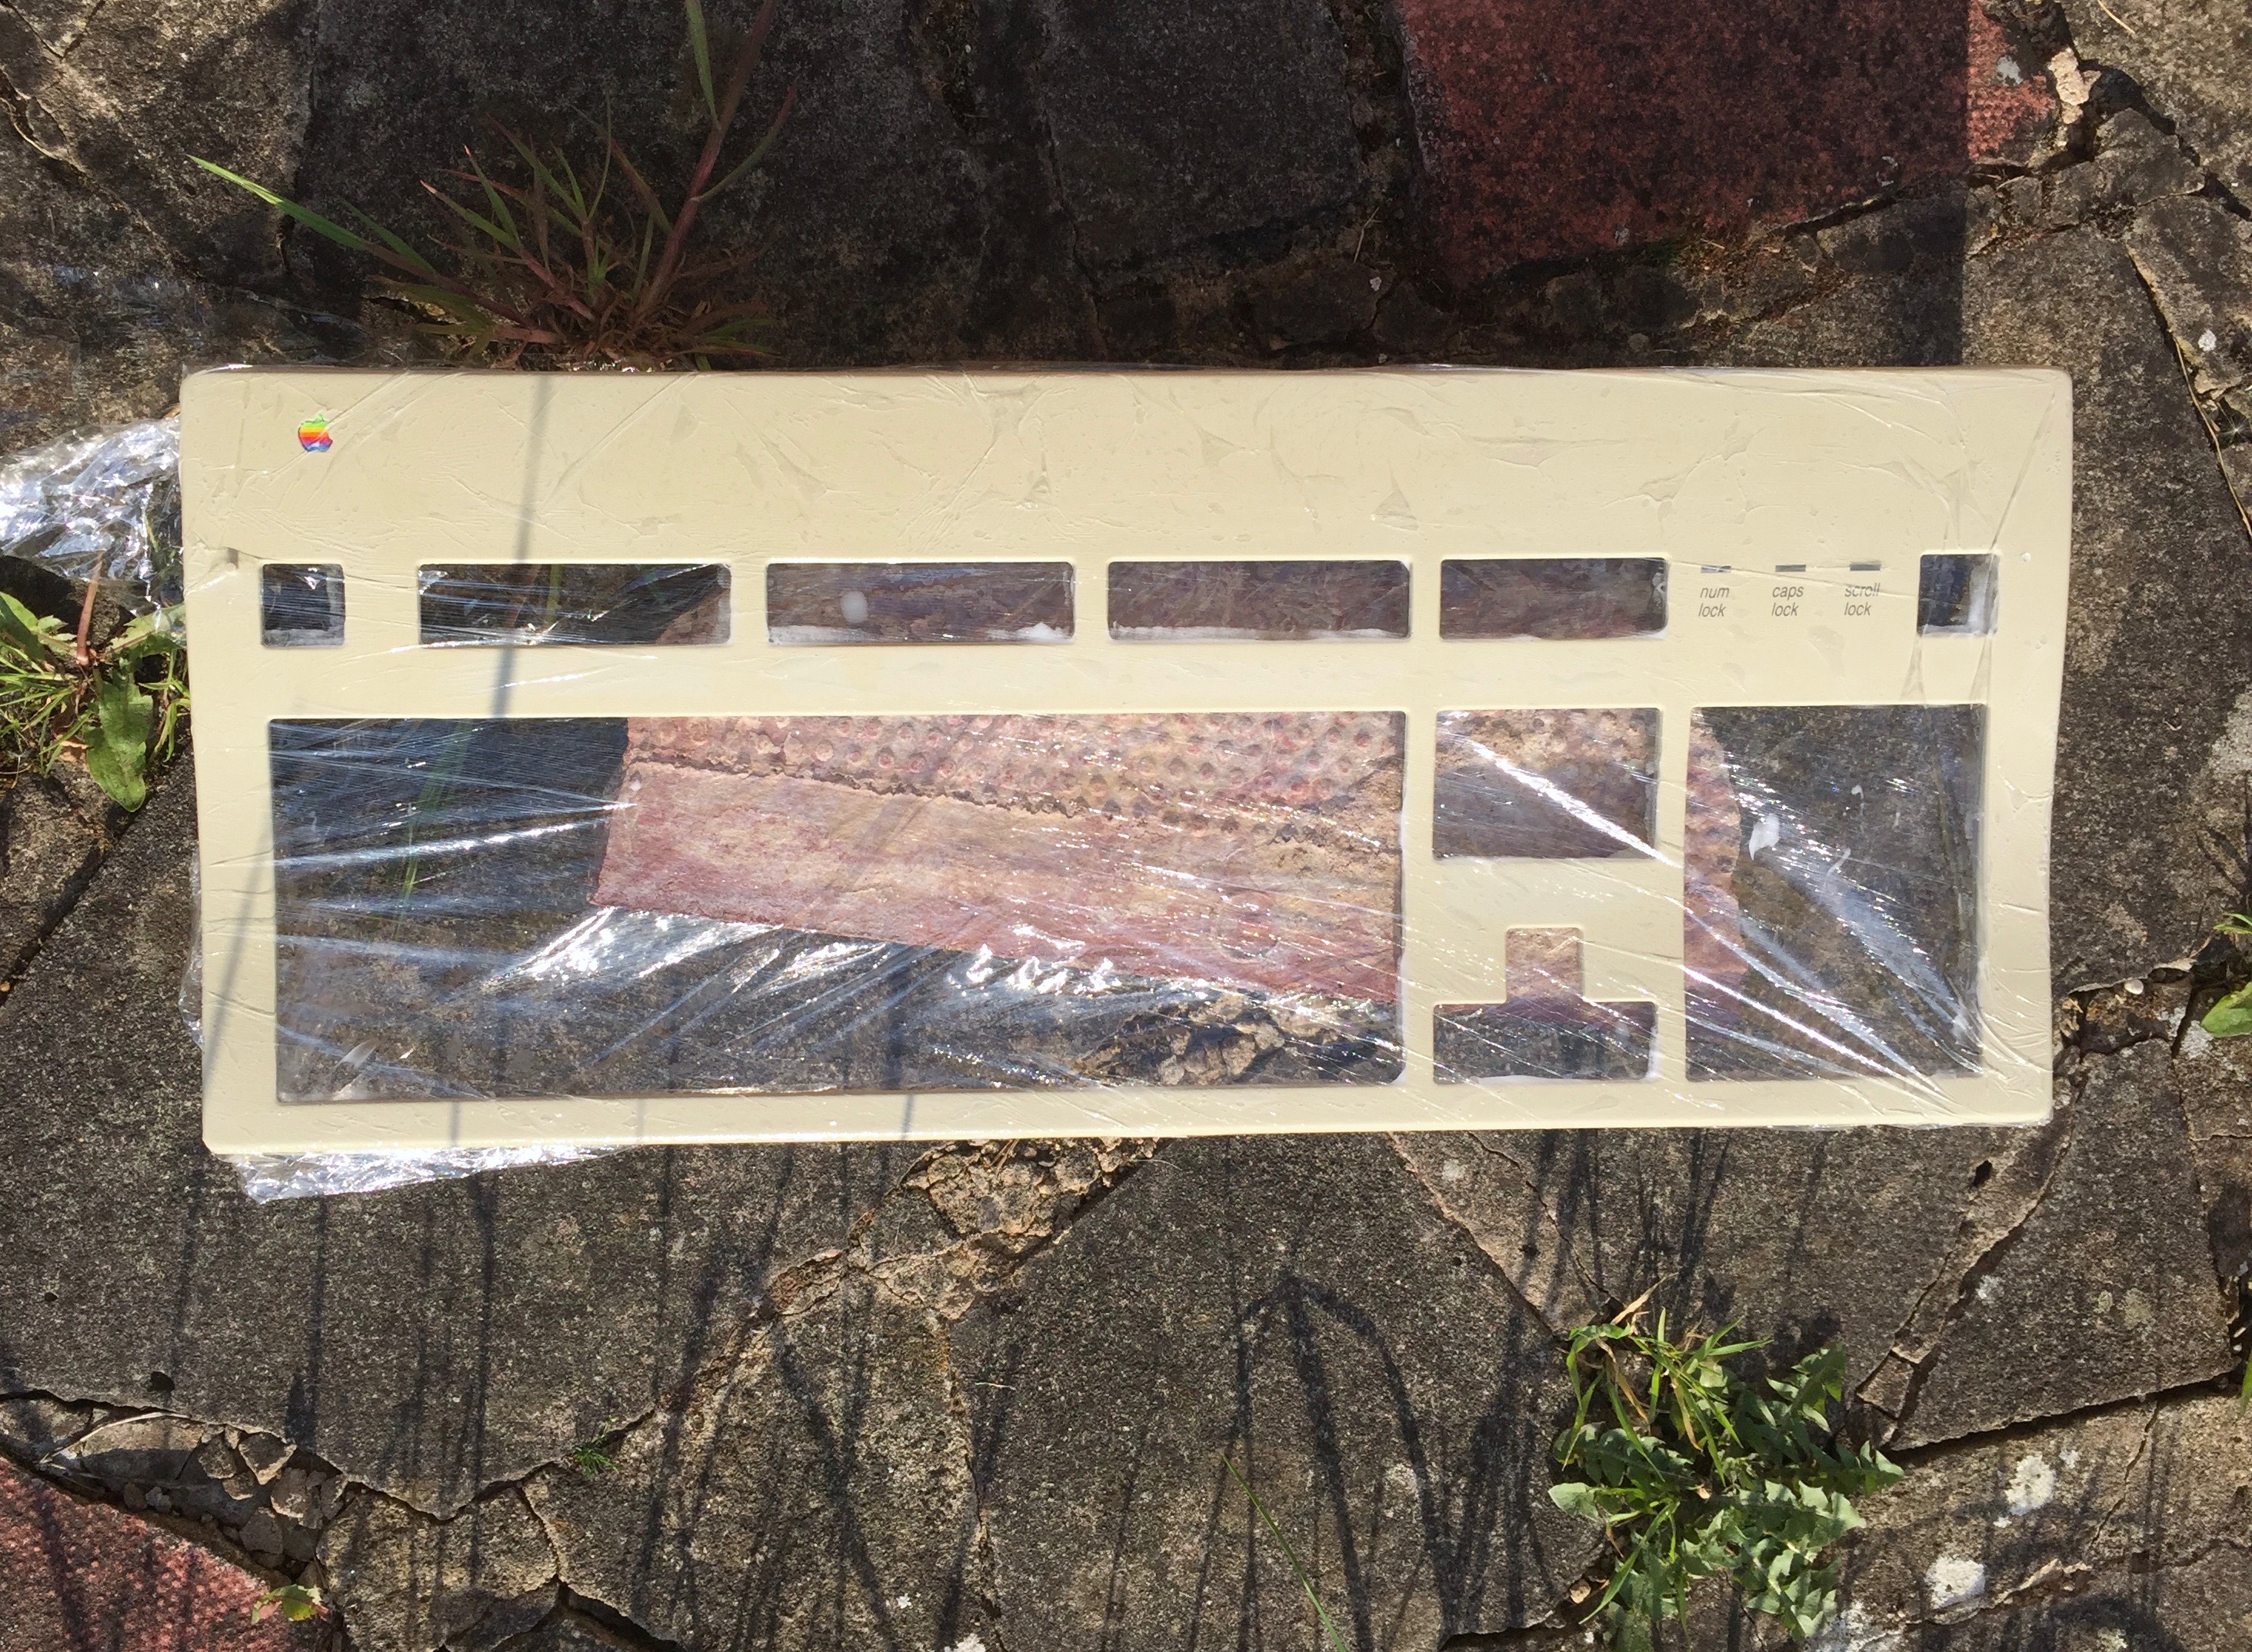
Once the bezel was off the front of the keyboard, I placed it on some clingfilm and started painting the cream on. I tried to coat it as evenly, and as thinly as possible as a little cream goes a long way. Then I rolled the sheet of clingfilm over the top and and pushed out as many air bubbles and creases as I could to avoid streaking. I used the clingfilm so the cream wouldn't evaporate being out in the sun for a couple of ours.
Just look at how beautiful that Apple logo is 😄
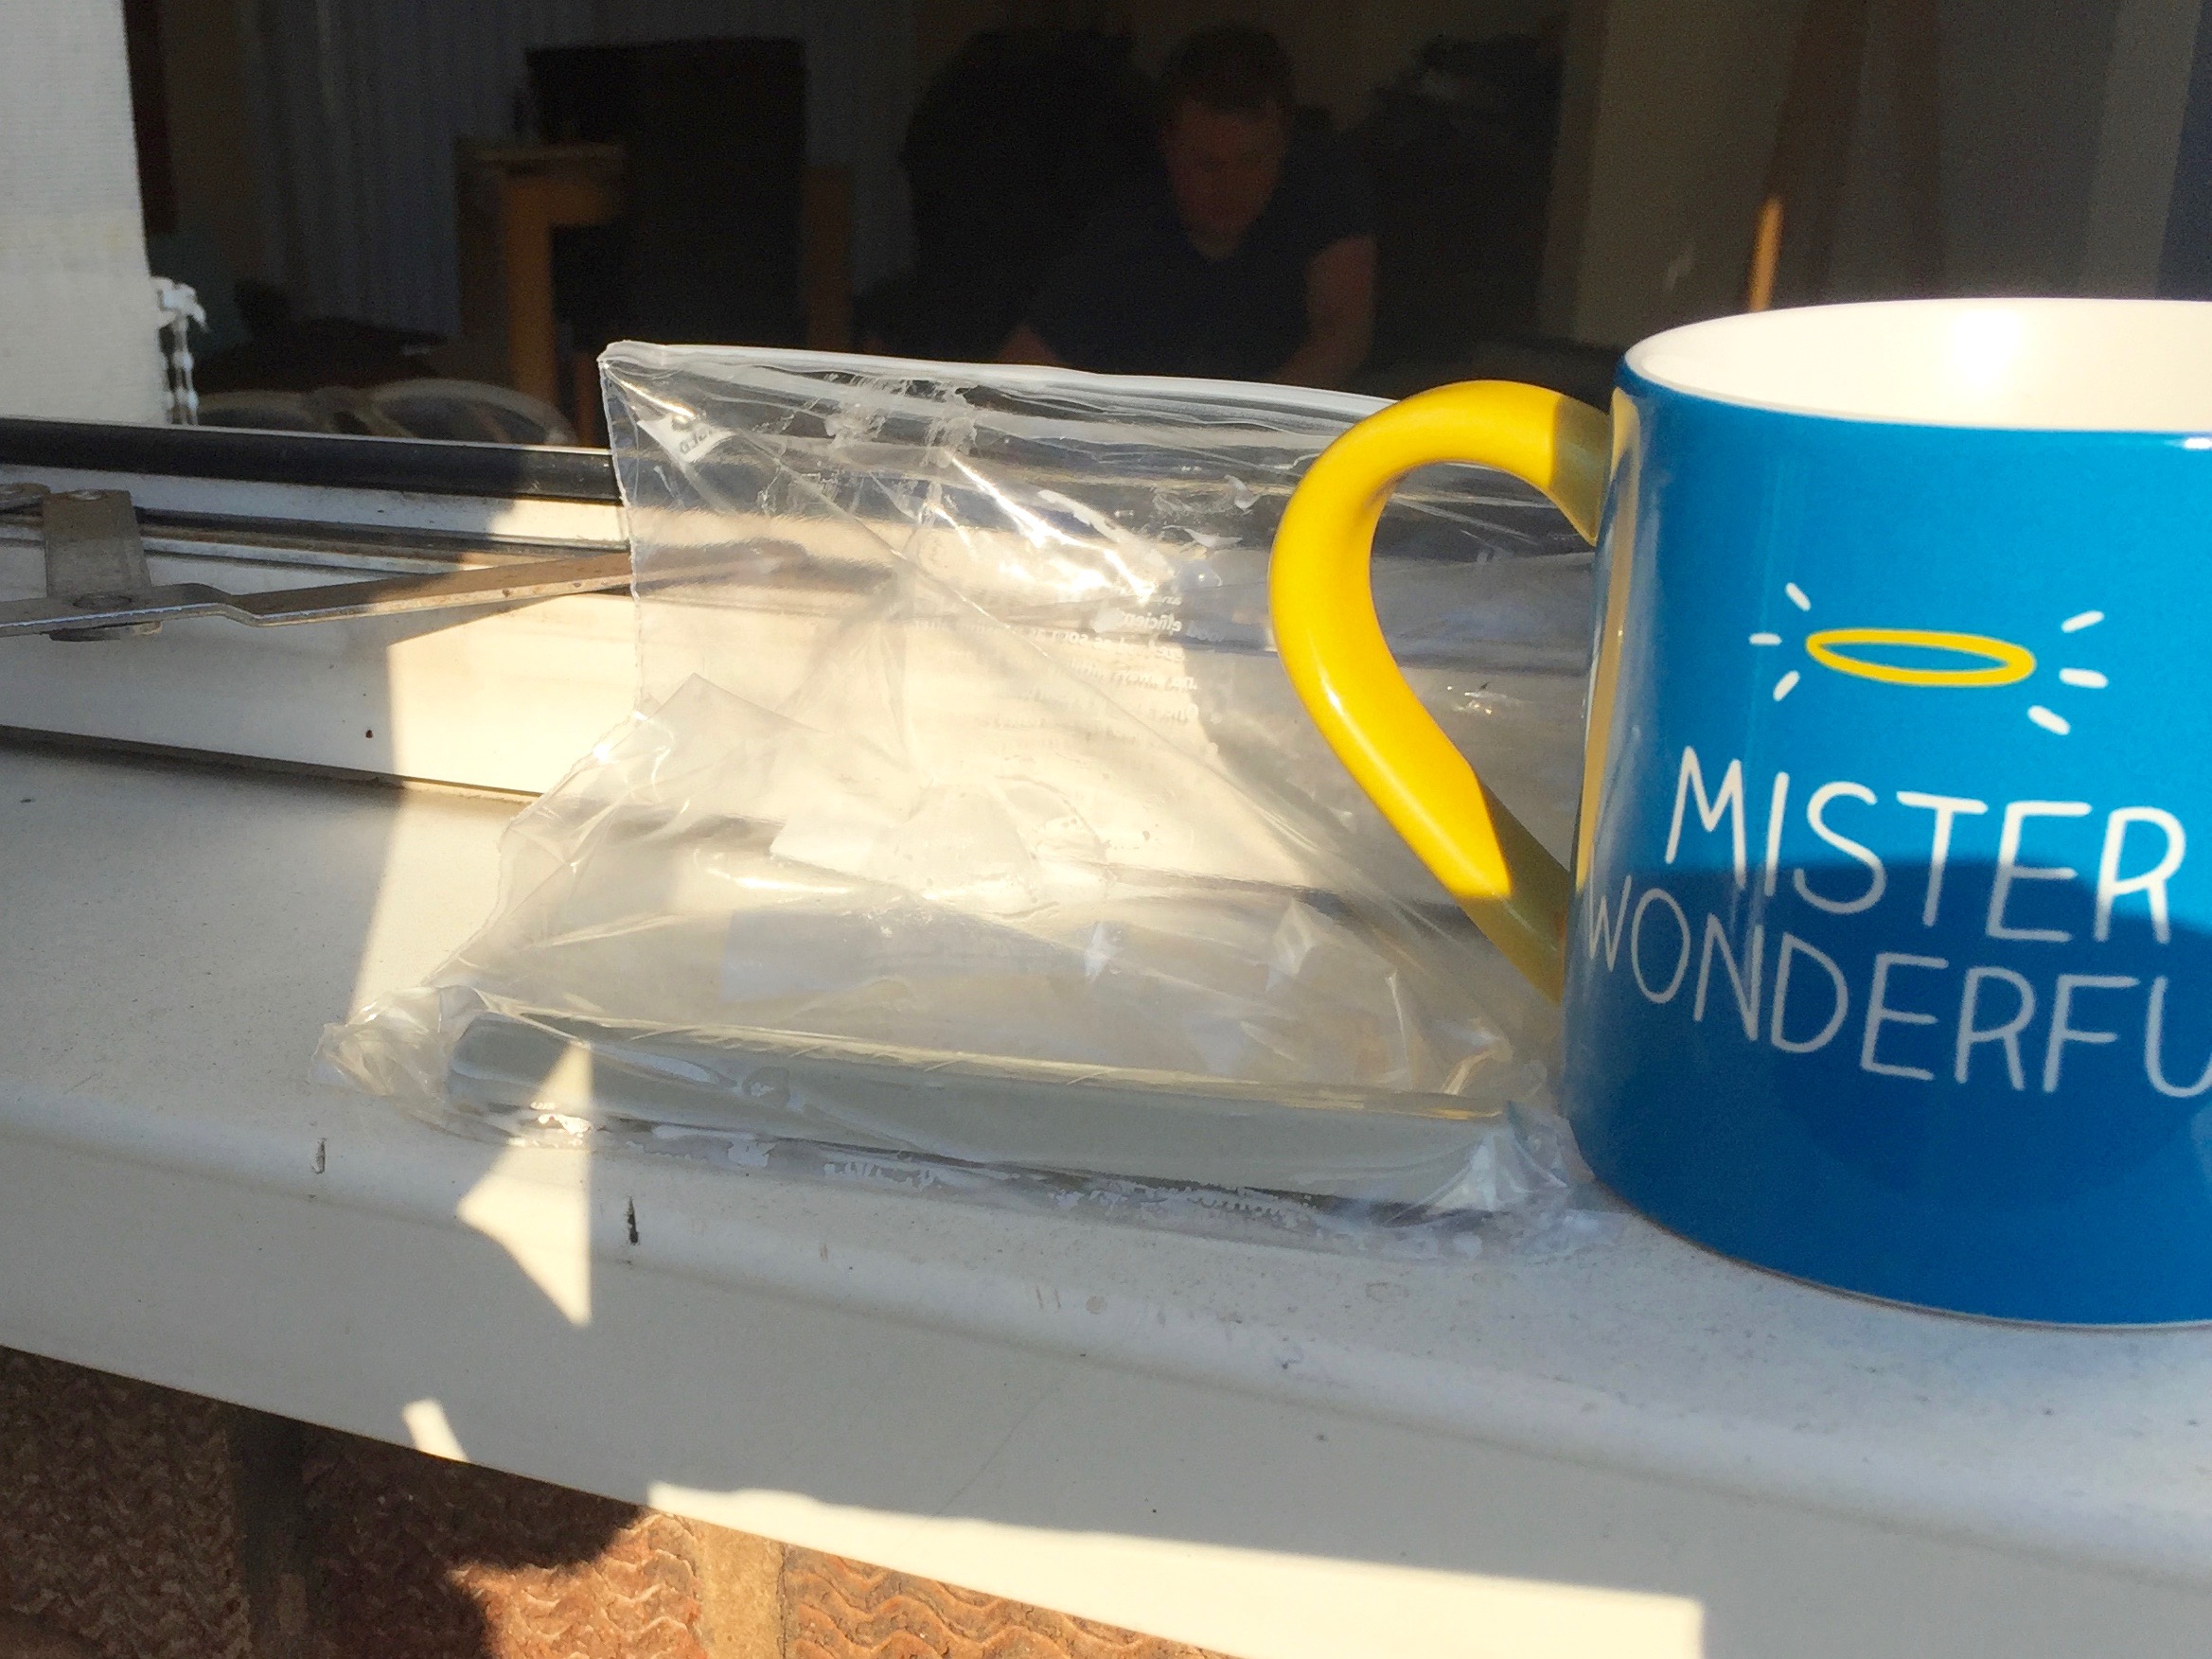
I also pulled the space bar off as that too had yellowed and gave it a coat of the hair dye cream. I placed it in a zip lock bag and popped it and the keyboard bezel out in the sun.
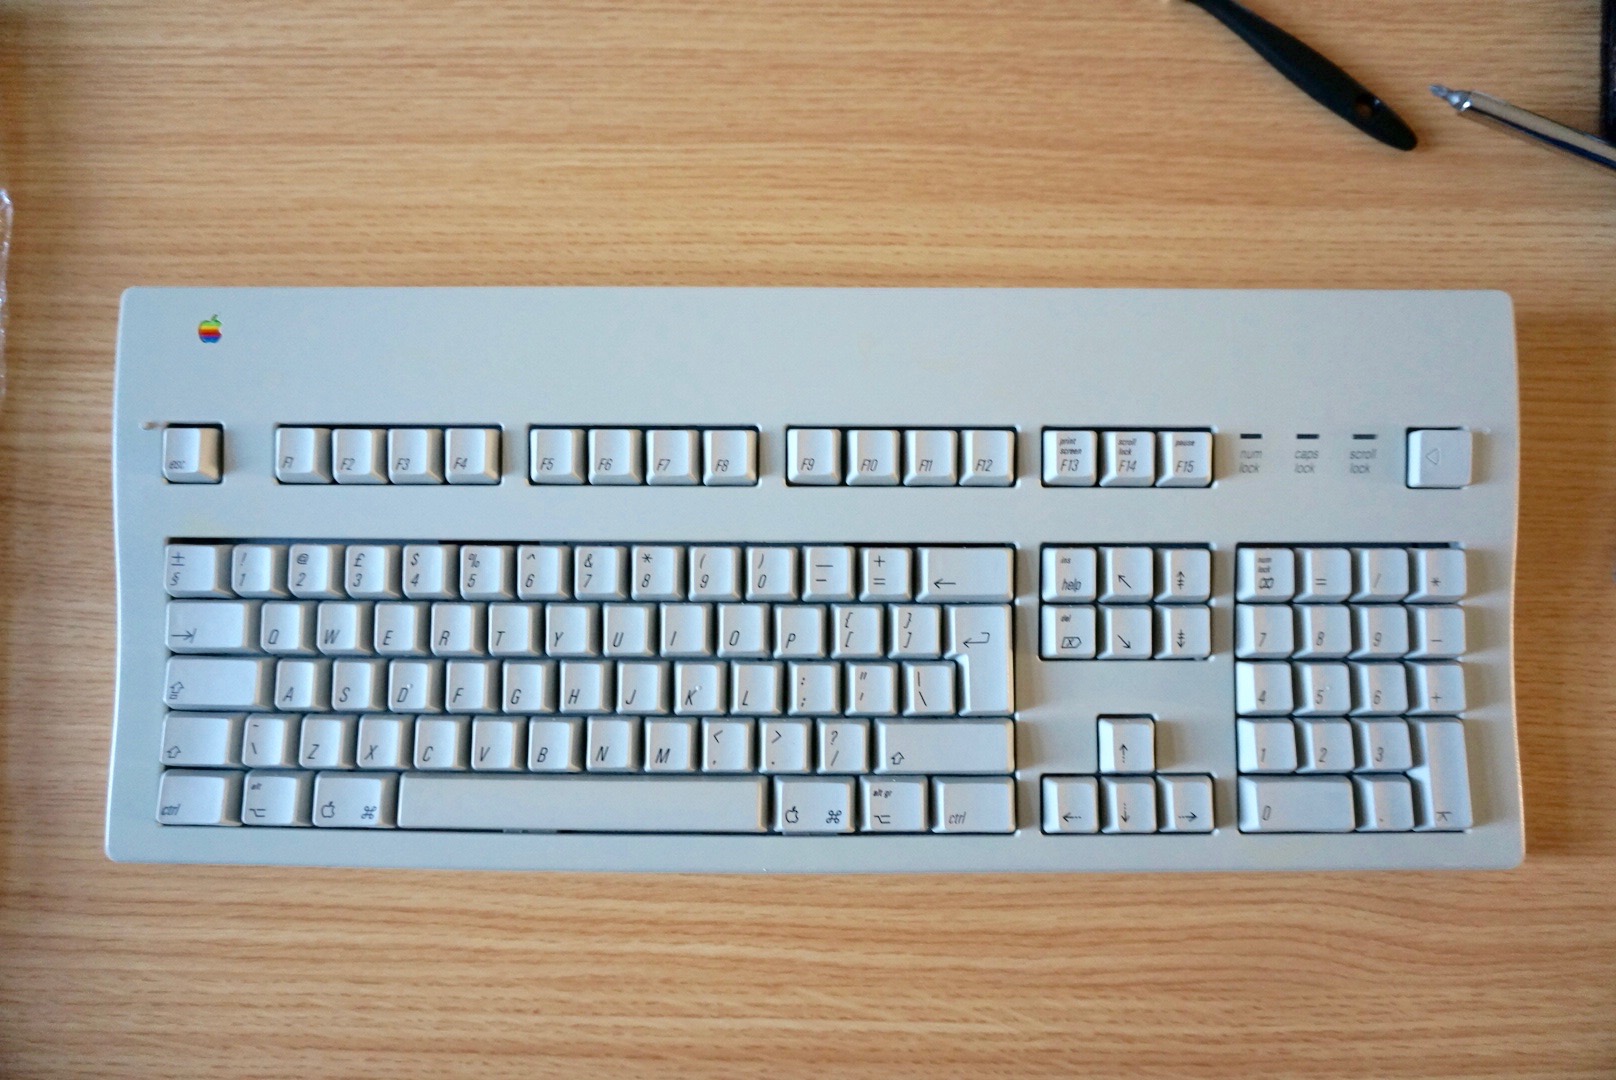
After two hours out in the sun I brought them back in and rinsed the cream off in the sink. It was immediately apparent that it had worked miracles. Apart from a couple of small patches that may have been a little more yellow (or I may have missed with my paint brush) both the bezel and the space bar were nice and evenly coloured and matched the colour of the rest of the keys for probably the first time in years.
Using it in 2016
In order to get it to work I needed 2 things: An ADB cable and an ADB to USB adaptor. The cable was easy to get ahold of as an ADB cable is actually identical to an S-Video cable. I ended up getting vintage, sealed ADB cable but I think I'm gonna end up looking for a coiled cable if I continue using the keyboard as the one I have is a little long.
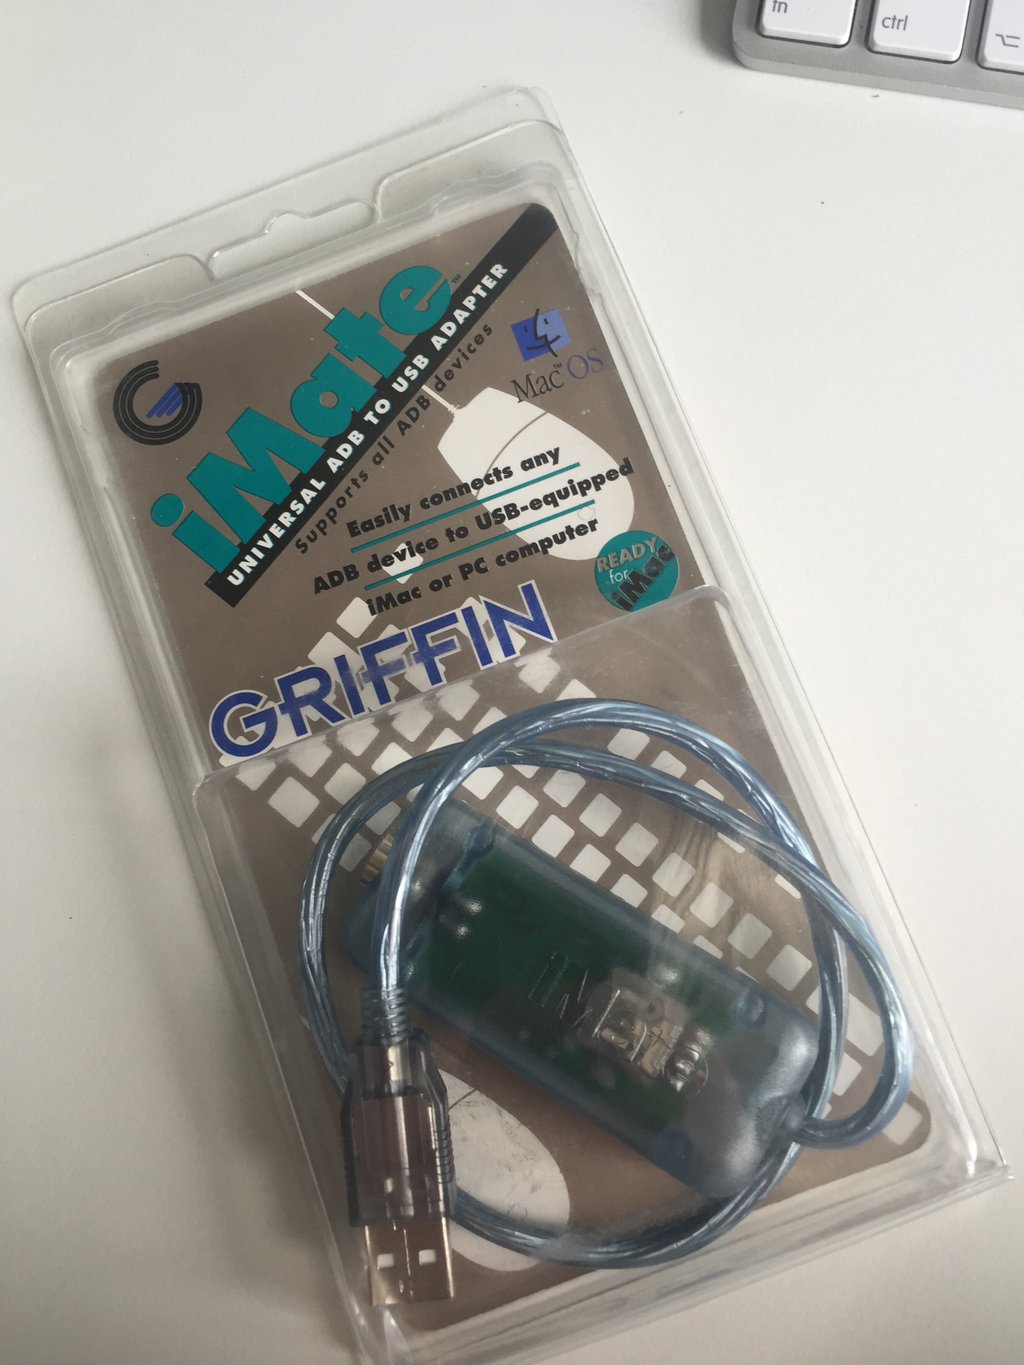
The adaptor was slightly more tricky acquire. From what I can tell there's only ever really been one commercially available adaptor — the Griffin iMate. It was released to allow people to connect their peripherals to the upcoming (original) iMac but because it's long discontinued it is a bit pricey if you want a new one.
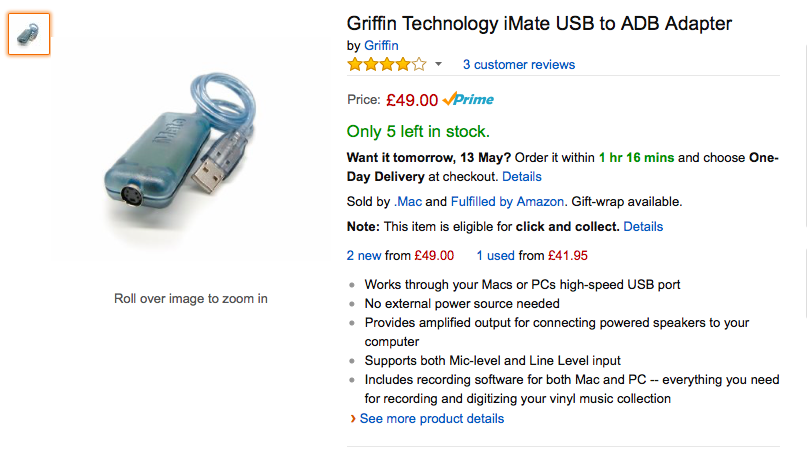
I managed to get one from Amazon but they go in and out of stock fairly frequently so if you're looking for one keep checking back there. There is an alternative using a Teensy 2.0 and some open-source firmware but that would require soldiering and wasn't a route I wanted to go down.
Ready for iMac
Unlike the bluetooth keyboard that came with my iMac the AEK II doesn't have things like brightness control or media keys. Thanks to a handy bit of software called Karabiner it was super easy to map these keys to the function keys and it didn't take me long to remember the new locations of my volume and media keys.
I also have no idea if the num lock or scroll lock keys did anything on System 7 or OS 8/9 but they certainly don't now. Oh, and peculiarly this keyboard has a (non-functioning) print screen button. Perhaps to try and pull some IBMites over to the Mac in 1995?
Thoughts
As I said at the beginning of the post, this keyboard is my first foray into the mechanical kingdom and I wasn't sure what to expect. Prior to this the only other mechanical keyboard I'd typed on was an old IBM Model M back in school.
I couldn't be happier with the AEK II even if I do have little to compare it to. It's absolutely wonderful to type on and the cream alps switches are give a really nice tactile feedback without being clicky (I still want a clicky Model M). The ratcheted caps lock key that stays down when it's on is so quaint and almost makes me want to turn it on and off instead of using shift.
It's by no means perfect though. It's very loud so probably not ideal if you work in a busy office. I also can't tell if my model has a broken enter switch on the number pad or if that's a quirk of using an ISO layout keyboard via the iMate. Oh, and one of the pegs that originally held this weird overlay thing over the function keys has snapped off.
All of those little things make it unique. It's not perfect like a brand new product and that's part of its charm. It's lasted 20 years of being typed on and will probably last 20 more. Something that I don't think one of those chiclet keyboards will achieve.
Now if I could only find a cheap Apple IIGS keyboard…